
Most identification photos share similar requirements, such as background color, postures, facial expressions, dress code, etc, but the photo size standards vary from certificate to certificate. With the launch of online application and electronic passports, you can resize a pre-arranged photo to passport photo size and it would be acceptable in some cases. The problem is how to achieve it. Drive all the way to find a photo studio? Hire a photographer? Purchase and install a complicated editing application? However, not all alteration is permitted. In this passage, we are going to introduce some proven ways to crop passport size photo. No matter what photo editing level you are at, there must be a perfect passport photo resizer for you.
Passport Photo Dimensions
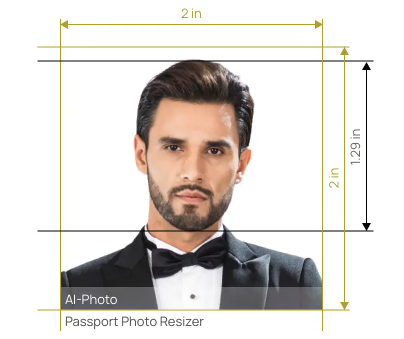
First of all, you have to find out the exact photo size. Taking the U.S. passport as an example, here are detailed dimension requirements.
| Digital version | Printed version | |
| size | 2 x 2 inches (51×51 mm) | 2 x 2 inches (51×51 mm) |
| Pixels | 600-1200 | / |
| aspect ratio | 1:1 | 1:1 |
| Head size | 1.29 inches | 1.29 inches |
| Resolution | ≥600 PPI | / |
| Format | JPEG | / |
| File size | 10KB–240KB | / |
The above table shows requirements or dimensions on US passport photo. You also can check popular passport size photos in different countries:
- 2×2 inches: Indonesia, India, Kenyan, etc.
- 35×45 mm: UK, Netherlands, Mexico, Japan, etc.
- 50×70 mm: Canada, Brazil
Resize a Picture with Dedicated App
There are dedicated apps that are equipped with built-in photo resizers, which works fast.
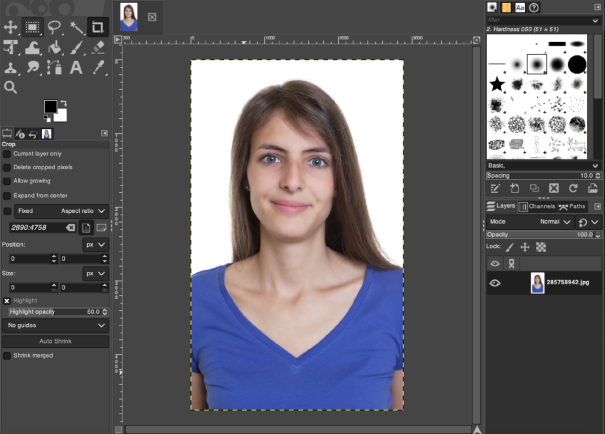
Photoshop
Photoshop is a powerful image-processing tool, not to mention a passport photo resizer. Here’s how it works.
Step 1: Insert photos.
Firstly, click the “File” button on the top menu and “open”. Choose the photo that you want to crop.
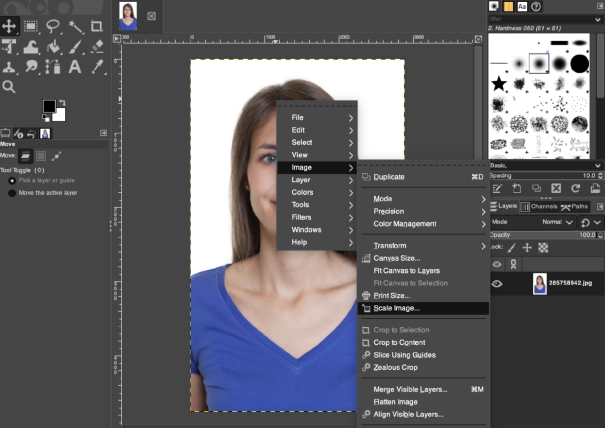
Step 2: Crop photos.
Select the “Crop” icon at the left side toolbar. Resize passport photo by entering a value for the “Width” and “Height” at the top or use the “Image > Image Size” to input the values.
You can also crop it by dragging the mouse to zoom and crop over the area of the image. Hit the Enter key on the keyboard to finish after selection.
Step 3: Save photos.
Click the “File” button and choose “Save As”. Select the required file type (usually JPEG or PNG) and click “Save” to finish.
Source: Multi Tech
GIMP
If you don’t plan to pay the Photoshop subscription fee, GIMP is a good alternative. It is free software that suits Linux, macOS, Windows and other operating systems. This is an open-source tool and you have to download it first. With a variety of customization options and plugins, you can resize passport photo by the following steps.
Step 1: Insert photos.
Click “File” button at the top and then choose the original identification photo from your computer.
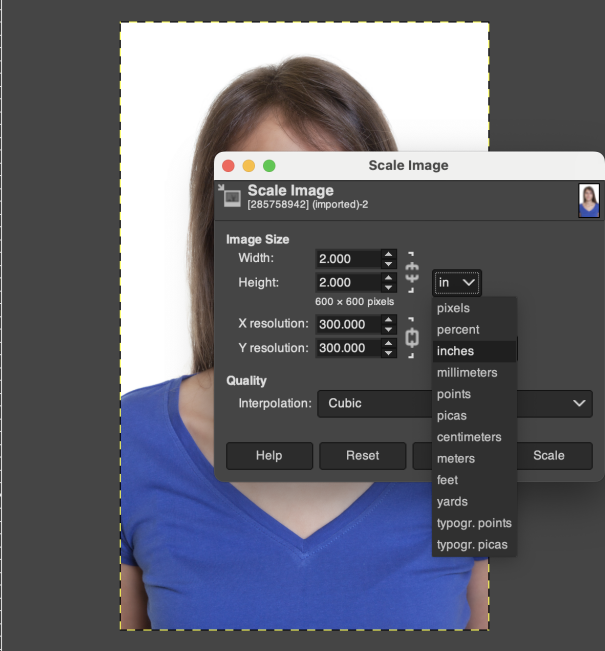
Step 2: Scale the photos.
To make it more comfortable to crop the picture, it is recommended to change the width to desired values, like 600 pixels. This can be done by clicking the “Scale Image” under the Image panel. Input “600” in the box beside “width” and click “Scale” to apply the change.
Step 3: Crop photos.
To resize the passport photo, you have to select the areas you want. Click the simple slash (/) Key to arouse the search box. Type “rectangle select” in the box and double-click on it. Drag the mouse on the picture until there is a small rectangle. Modify the “Size” in the left-side toolbar. Check the “Fixed Aspect Ratio” above and hit Enter. If you are not making a 1:1 photo, don’t check the box. All these steps aim to customize the size of your selection tool. Move the prepared rectangle over the image and circle the main part according to the passport photo size requirements. Once selected, follow “Image > Crop” on the top menu to finish.
Step 4: Save photos.
Click the “File” button and choose “Save As”. Select the required file type and click “Save” to finish.
Resize a Picture with Microsoft Tool
Photoshop might be costly and strange to novices. Good news is that there are also some common tools that can resize passport photo. If you have installed Word or Paint on your computer, the following introduction might help you.
Microsoft Word
Microsoft Word is known as the best tool to process words and create document creation. Moreover, it can also resize photo to passport size and the process is quite simple.
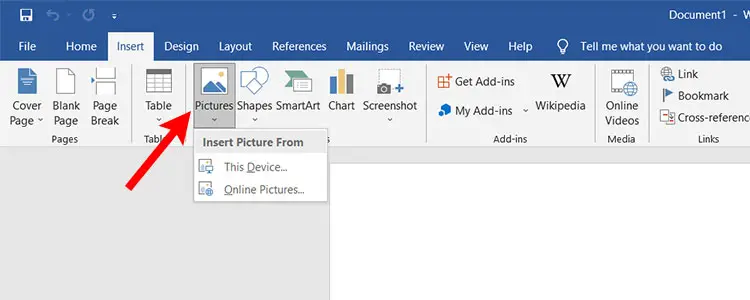
Step 1: Insert photos.
Firstly, import the photo to a Word document by following the path: Insert > Pictures > Insert Pictures From This Device. Choose the photo that you want to use and click the “Insert” button.
Step 2: Resize photos.
After importing the photo, you are ready to edit the photo. Make sure the picture is selected and the “Picture Format” menu is active at the top toolbar. If there is no “Picture Format”, double-click the image and it will show up.
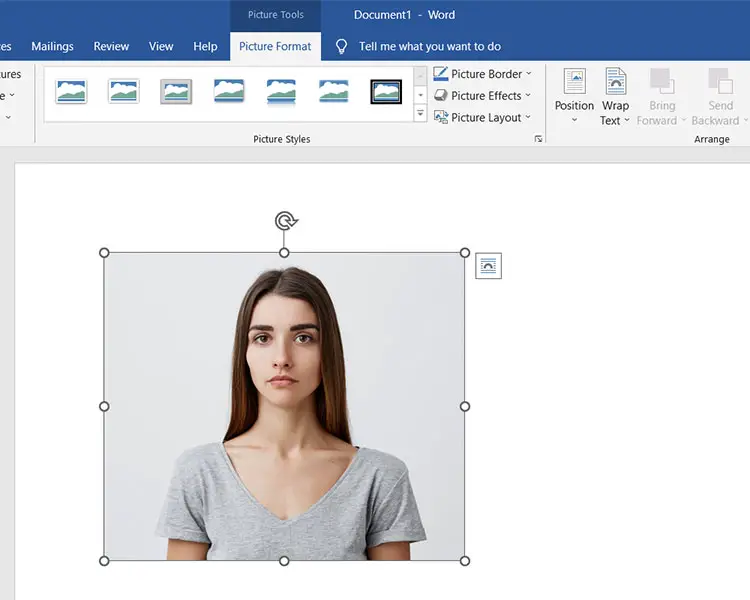
Click the “Crop > Crop Ratio > Square: 1:1” and then input 2 inches (or 5.1 cm) for height and width. If you are resizing photo for non-American passports, choose the right ratio and input the required size.
Please note that if you change either height or width, the other one will change accordingly due to the selected aspect ratio. That is to say, you can’t change both proportions at the same time. Luckily, it allows users to manually resize the photo if there is no desired picture ratio. Click anywhere outside the picture to unselect it and right-click on it. Choose “Size and Position” in the pop-out menu. Then you can uncheck the “Lock aspect ratio” and customize the photo height and width.
Step 3: Save photos.
Now you get the proper passport size photo. Click “File > Print” to print it out and cut the paper. If you would like to save it as image file, Microsoft Word can also achieve it. Double-click on the picture and choose “Compress Pictures” on the top menu. Ckeck the box in front of “Delete cropped areas of pictures” and click “OK”. Right-click on the image and choose “Save as Picture”. Choose where you want to save it, file name, file type and click “Save”. Everything is done.
Microsoft Paint
Paint is a simple Windows image editor that is equipped with basic and essential tools, including photo resizer. You can crop a passport size photo by the following steps.
Step 1: Insert photos.
Firstly, click the “File” button on the top menu and “open”. Choose the photo that you want to crop.
Step 2: Crop photos.
To resize photo to passport size, click “Select >Rectangle” feature (marked as No.1) and select the area you want. And then click the “Crop” button (marked as No.2). However, you are not sure whether your selection meets the required passport photo size. Next, click the “Resize and skew” button (marked as No.3). Choose “Pixels” to see the values of the cropped photo. For example, the digital US passport photo must be 600 – 1200 pixels and 1:1 aspect ratio. If it does not meet the requirement, please continue resizing. In this case, you might have to adjust it through several attempts.
Step 3: Save photos.
Click the “File” button and choose “Save As”. Select the required file type (usually JPEG or PNG) and click “Save” to finish.
Notes:
Unlike the tools above, Microsoft Paint is unable to input exact values to adjust height and width and it’s hard to make a fully compliant dimensions, which adds to the possibility of being rejected. Therefore, although it is approved to use, it is not an ideal way to resize passport photo.
Resize Photo Online
What we mention above are all manual editing tools. However, the most efficient method should be turning to a secure automatic tool. Many passport photo makers can adjust the height and width of the photo without sacrificing clarity. What is the best choice? It should crop to standard size automatically and ensure compliance and acceptability.
If you want to skip troublesome download and installation, you can resize passport photo online. That is what AiPassportPhotos does.
With dozens of photo templates in the database (such as photos for passports, ID cards, driving licenses, visas), it provides standard size like 2×2 in, 35x45mm, 40x60mm, etc.
Moreover, the one-button operation is quite user-friendly for those who know little about photo editing. Here is the instruction of how to resize photo to passport size.
- First of all, visit the passport photo resizer by AiPassportPhotos.
- Choose the country and document type (See The red mark No.1).
- Click the “Upload” button and choose the photo you have prepared (See The red mark No.2). Then the system will do the remaining job. There is no need to double check whether you can entering the exact size values.
- Preview and click the “Get photos now” button to download the images without watermarks.
Related Post: How to Resize Photo for Instagram Facebook Linkedin Twitter?
Summary
What if you have ever taken a perfect identification photo and it could be used for passports by just changing the size? There are many proven ways to resize a picture, such as offline applications like Photoshop, Microsoft Word, Paint and online resizers such as AiPassportPhotos. If you are familiar with the requirements and have confidence in manual selection, Photoshop would provide more possibilities but don’t use it to retouch your passport photos. If you have a limited budget, Word and Paint would help. However, when it comes to professional passport photo resizer, AiPassportPhotos deserves a try.