
It’s time for a new passport photo, but you don’t want to deal with the hassle of making a biometric appointment, or leaving your house and wait in line? Well, getting your passport photos done at home is definitely possible! We’re going to walk you through each step of how to edit your passport photos right on your computer.
What to know when editing your passport photos
Keep in mind that if you’re taking and editing your passport photos, they still need to meet government standards. Meaning you have to alter the size of the photo, adjust the resolution, and possibly change the background color of your photo to fit the guidelines provided by your country.
With that in mind, your first go-to option will probably be Photoshop, a largely used and popular image editing software all around. As you proceed to edit your passport photos, please note that you are not allowed to alter any facial features, edit out red eyes, or remove any blemishes. Your photos will likely be rejected if you’ve made any of these adjustments mentioned above. Furthermore, any changes to the size and background color of the photo will also be rejected if the edits you’ve made aren’t perfectly seamless.
Get started editing on Photoshop
To get started, we first need to take a portrait of yourself for your passport photo. Some tips to remember when taking your picture: look for a spot in your home that can be used as a clean and simple background for your photo (preferably a plain color wall), tidy up your hair, and remember to keep a neutral facial feature.
Launch Photoshop
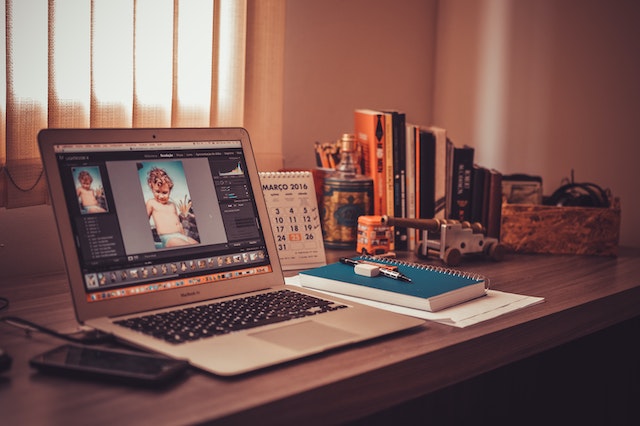
If you don’t already have Photoshop on your computer, head over to Adobe and download and install the program. Once it’s ready to go, you can start by adding a picture to the editing software.
Open the Picture File
Select the picture you want to use, and open a “New File”, or drag the image and drop it into the “drag and drop an image”area of the workspace. If you successfully opened the picture in Photoshop, you should be able to see your image in the workspace. If you don’t see your photo, try again by dragging the picture to the workspace.
Crop and Resize
In the tool bar look for the “crop tool”, it should be the 5th icon counting from the top. Once the crop tool bar is opened you should be able to see it as a new row opened on the top of the page. When you see the new crop tool bar row, you now can set the size you need for your passport photo. For example, the United States requires its citizens’ passport photos to be 2 inches in size and 301 DPI in resolution. Photoshop can allow users to set the height and width of each photo by entering the size number in the crop tool bar. It also uses the same method for image resolution (you should be able to see the resolution right next to the height and width of the photo).
Changing the Background
If you were able to take your passport photo with the correct background color, then you’re done after editing the size and resolution of the photo. However, if you were not able to take your passport photo with the required backdrop color, then Photoshop can help you change that as well. We will be using the “selection tool” to change the background color.
After you have correctly re-sized and changed the resolution of your passport photo, on the top menu bar, click on “select” and choose “select and mask”. Now select “view” on the right-hand side of the workspace under a pop up menu named “Properties”, then select “overlay (V)”. Now you should be able to see a red film layer over your passport photo.
Next, we are going to crop out the subject of this photo by using the “subject select” tool in Photoshop. At the top of the menu bar, look for the “quick selection tool” to use. For all of us that are new, the “quick selection tool” will be very user friendly because the AI detection will automatically distinguish the selected subject from the background. In the case that the “quick selection tool” detects and cuts out the wrong areas, we will need to do minor adjustments by hand with the brush tools.
If you’re more familiar with using Photoshop, you can also try using the brush tools to select the subject. Despite being a bit time consuming, the upside to using the brush tools is that the cut-out points will be much more precise because you’ve hand selected each point.
Double Check
Even though the auto select tool should have selected everything, it’s always best to check closely. Areas around your hair and shoulder are places that might not have been selected and cut out correctly. If the selected subject didn’t get cut out properly, it will create rough edges, and rough edges increase the chance of rejection. Now, you can redo the subject selection with the methods we’ve discussed in the last section, or we can try to smooth out the selected subject. To smooth out the image, select “layers” on the top menu, then select “matting”, and lastly select “defringe”, and you’re all set.
New Layer
After you have selected the subject in the picture, you’ll need to set the selected subject as a new layer. This way you can add layers to your photo without ever interfering with the subject layer. To do so, you will need to click on “output to” and select “new layer with layer mask”. Now that you’ve successfully created a new layer, you can choose and add any background color you need for your passport photo.
Select Background
Time to add the backdrop color for your passport photo. With the new subject layer you’ve created, we are going to teach you how to add a neutral color layer as a background for passport photo. First, you need to use the “fill” tool to fill a new layer with the required backdrop color. Next, layer the new background color under the subject layer. Finally, your passport photo is complete with the proper size, resolution, and background color!
Save and Submit
Now, your passport photo is all edited and ready for submission. Save your passport photo in the JPEG format, and in a folder of your choice (a good tip to keep in mind is to rename the photo so it’s easy to find, for example, “2023 passport photo”, and save it in a folder that you can easily remember and access). If you’re submitting by mail, please have your picture printed in the correct size and ready to go!
Now that we’ve gone through details on how you can edit your passport photo’s size, resolution, and background color on Photoshop, it’s time to weigh out the pros and cons of the software.
Pros:
- You can get it all done at home.
- No time limits on how fast you need to take and edit your passport photos.
- Photos can be taken multiple times until you have you’re happy with you perfect passport photo to edit.
- Having the ability to set the required resolution instead of just cropping the size of the photo.
- Adding any background color layer you need.
- Professional editing tools that can be used to edit other photos and designs.
- Digital copy that is convenient to save, copy, and print.
Cons:
- Need at least some photo editing skills.
- Need to know how to use the basic functions of Photoshop.
- Costly monthly payment depending on the package you pick.
- More editing tools than you actually need.
- Doesn’t come with parameter checks on whether your edited passport picture meets the government required standards.
- Higher chances of photo rejection.
Cost Effective Software for Passport Photos
If you enjoy the convenience of getting your passport photos done at home, and Photoshop happens to be way too complex for you to navigate, then you need a simpler solution. Allow AiPassportPhotos to show you how convenient is it to have your passport photos done professionally without having to take a step outside of your home. AiPassportPhotos offers passport photo compatibility for up to 23 different countries, including but not limited to the US, UK, Singapore, India, South Africa, Korea, and many more. A one-stop for all package for anyone that needs their passport photos taken professionally and fast. Aside from adult passport photos, AiPassportPhotos also offers passport photos for babies, making it easy for anyone that has a large family.
AiPassportPhotos’ most advanced artificial intelligence technology offers instant passport photo processing within seconds after you upload your picture. Compared to Photoshop, AiPassportPhotos is a lot simpler and much more user friendly for users of any age. You don’t need to learn step-by-step how to navigate through Photoshop, all you have to do is upload one photo, and everything else is taken care of. Furthermore, AiPassportPhotos guarantees qualified results that 100% ensure passport photo compliance. Therefore, you wouldn’t need to worry about your passport photo getting rejected ever again.
Let’s Get Started with AiPassportPhotos
To start, make sure that you have an internet connection, and head on over to AiPassportPhotos’s web page. Simply start the process by selecting the country you need for your passport photo. The site will give you details on the photo requirement for size specification, photo resolution, and the background color you need for your country’s passport photos. Next, upload the photo that you have already taken, and the system will automatically crop and adjust the photo to the size and resolution requirement of your country. In the case that your background doesn’t meet the requirement, AiPassportPhotos’ AI system will automatically detect and change the background color that meets your photo’s needs. All these steps would have taken you hours to do on Photoshop, but now it’s done in minutes. While saving you time, the software also saves your passport photo as a printable template so that you can print, cut, and be ready to use.
This cost effective solution for digital biometric photos is much cheaper than using Photoshop. AiPassportPhotos now offers your first passport photo for free, and only pocket change if you ever need more photos for yourself or your family in the future. The spend-by-credit option is so much better for anyone that isn’t looking forward to investing money in an image editing software they will rarely use. Getting your passport photos done professionally for less than $3 US Dollars is a deal you wouldn’t want to pass up.
All in all, AiPassportPhotos is a great time saver for anyone that has a hectic life and a busy work schedule they need to attend to. Not to mention how budget friendly is it to use AiPassportPhotos compared to Photoshop. It’s understandable that sometimes we just don’t have the time or energy to learn a new set of skills on how to edit your passport photo, and that is okay because now there is a much simpler solution than Photoshop!
Conclusion
We strongly recommend that you give AiPassportPhotos a try because it’s hassle free compared to the traditional method of using Photoshop. Using Photoshop can take up so much of your time if you’re new to the complicated software that was meant for professional photographers and graphic designers. As a newbie in Photoshop, you would need to learn everything from scratch, and you might even run into issues that require you to start over and over again. Better yet, you might even get stuck and not be able to move on with Photoshop. So why go through all that trouble just to risk having your hard work get rejected if your edits aren’t correct or seamless. AiPassportPhotos can do everything you have to learn for Photoshop in a much easier fashion, not to mention cost effectiveness!