
People want to remove color from an image for some particular reasons, such as business purposes, e-commerce requirements, or even personal use. Mastering the ability to remove color from images is crucial for us right now. Fortunately, this article will explore several methods for removing color from images, along with practical tips to help you achieve the desired results with ease. Let’s get started.
How to Remove Color from Portrait Image
In this section, we will provide 3 available methods on how to remove the color from a portrait image, meanwhile, the removed effects will be illustrated below, you can choose one of them to achieve the best result.
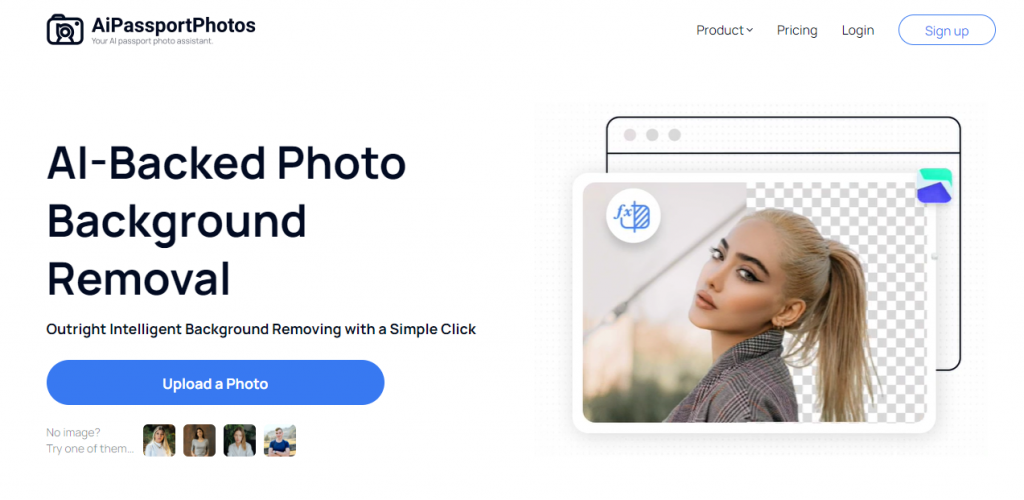
AiPassportPhotos
AiPassportPhotos is one of the best online tools that provides a range of features to get rid of the background from your images. Powered by artificial intelligence (AI) technology, it can instantly detect the portrait of the image and easily change solid background colors, as well as handle complex backgrounds in just simple steps. Besides, it offers versatile preset background templates for you to select, helping you bring them back to life.
👉 Here is how to use it:
Step 1: Go to AiPassportPhotos background removal.
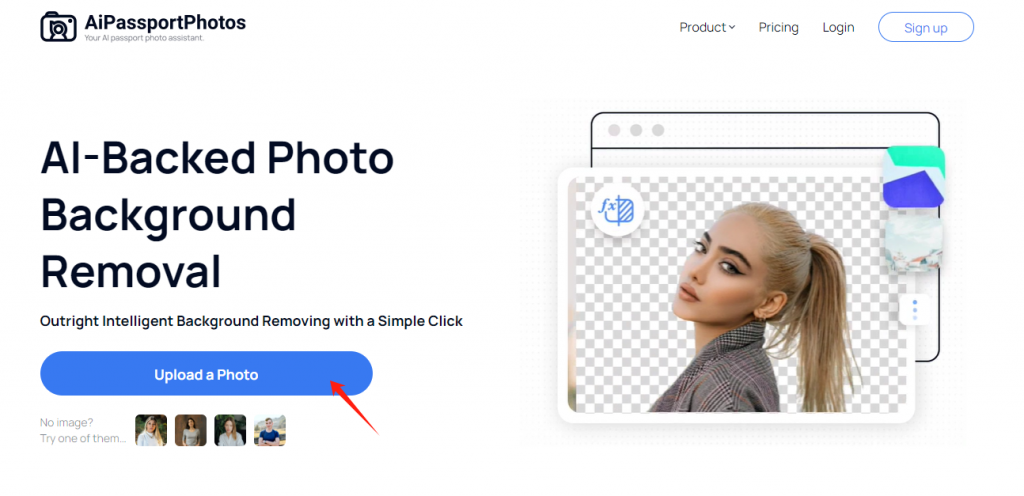
Step 2: Click the “Upload a Photo” button and upload the photo that you want to remove color.
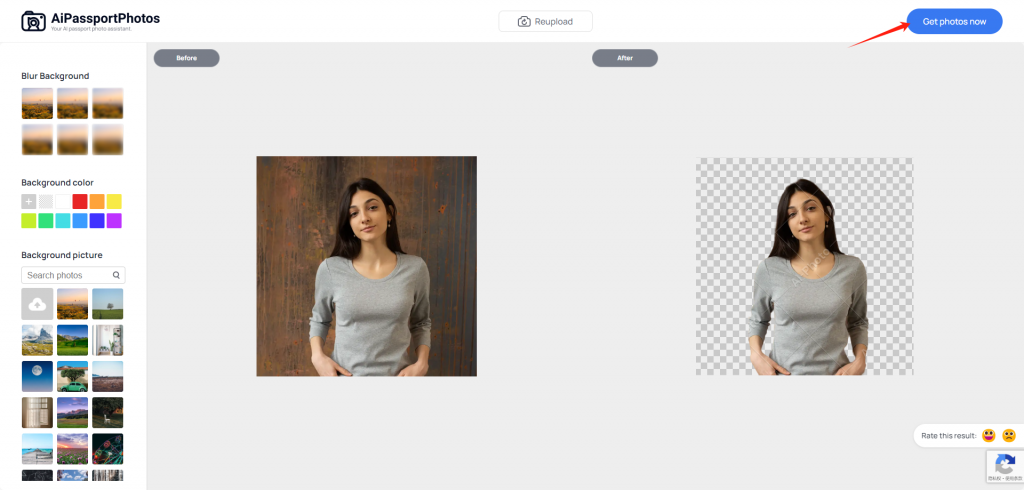
Step 3: Preview the results then download and save the generated photo.
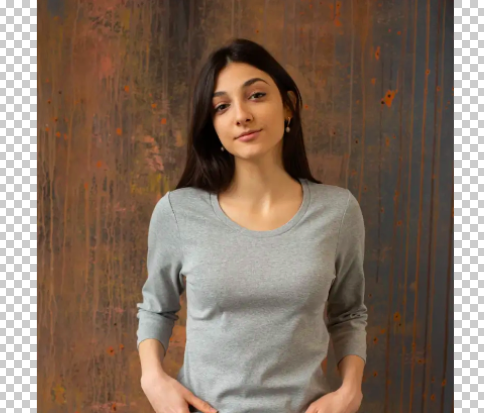
👀 Picture Example:

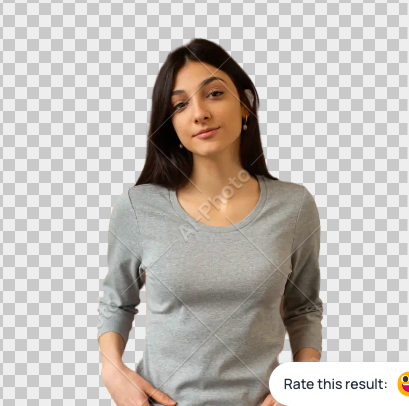
| Items | Effect |
| Is the color removing natural? | ⭐⭐⭐⭐⭐ |
| Are the details well handled? | ⭐⭐⭐⭐⭐ |
| Are the photos of good quality? | ⭐⭐⭐⭐ |
imgonline
imgonline is also a professional online tool to remove color from images. Along with its AI technology, it can automatically create a clean portrait. This tool is capable of handling solid background colors rather than complex background colors. Additionally, you can directly share your edited image on various social media sites.

👉 Follow the simple steps to remove the background from a photo:
Step 1: Open the imgonline website on your devices.
Step 2: Click on “Drop Image Here” and you can upload an image that you want to remove color.
Step 3: One-click remove color.
Step 4: Preview the edited photo and download it.
👀 Picture Example:

| Items | Effect |
| Is the color removing natural? | ⭐⭐ |
| Are the details well handled? | ⭐⭐⭐⭐ |
| Are the photos of good quality? | ⭐⭐⭐⭐ |
Fotor
Fotor is another easy-to-use photo background editor that you can use to remove background color from the image. With AI power, you can easily cut out the background and remove the unwanted area from the image. It also has a wide range of preset templates for you to select and ensures a satisfied result. But this tool needs to choose a subscription plan if you want to download the HD version.

To access the Fotor editor to remove the background color from an image, follow the steps.
Step 1: Open the Fotor website on your devices.
Step 2: Click on “Upload Here” and you can upload an image that you want to remove color.
Step 3: One-click remove color.
Step 4: Preview the results then download and save the edited photo.
👀 Picture Example:


| Items | Effect |
| Is the color removing natural? | ⭐⭐⭐⭐⭐ |
| Are the details well handled? | ⭐⭐⭐⭐ |
| Are the photos of good quality? | ⭐⭐⭐⭐ |
How to Remove Color from Object Image
In this section, we will provide 2 helpful methods on how to remove color from object image. Removing and changing the colors in object images is also a popular photo editing technique today. Keep on reading to find out how to do it.
removebg
removebg is a convenient browser-based photo background editor, focusing on professional technology, this online tool gives the desired result in getting rid of the background. Only in 3 steps, you can instantly have your transparent object. Also, this tool requires registering before downloading the photo in HD quality.

The following steps are below to remove the background color from your photo successfully.
Step 1: Open the removebg website on your devices.
Step 2: Click on “Drop Image Here” and you can upload an image that you want to remove color.
Step 3: One-click remove color.
Step 4: Preview the edited photo and download it.
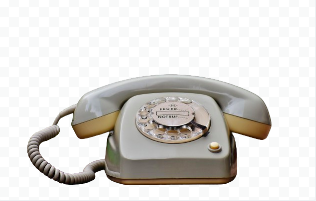
👀 Picture Example:

| Items | Effect |
| Is the color removing natural? | ⭐⭐⭐⭐⭐ |
| Are the details well handled? | ⭐⭐⭐⭐ |
| Are the photos of good quality? | ⭐⭐⭐⭐ |
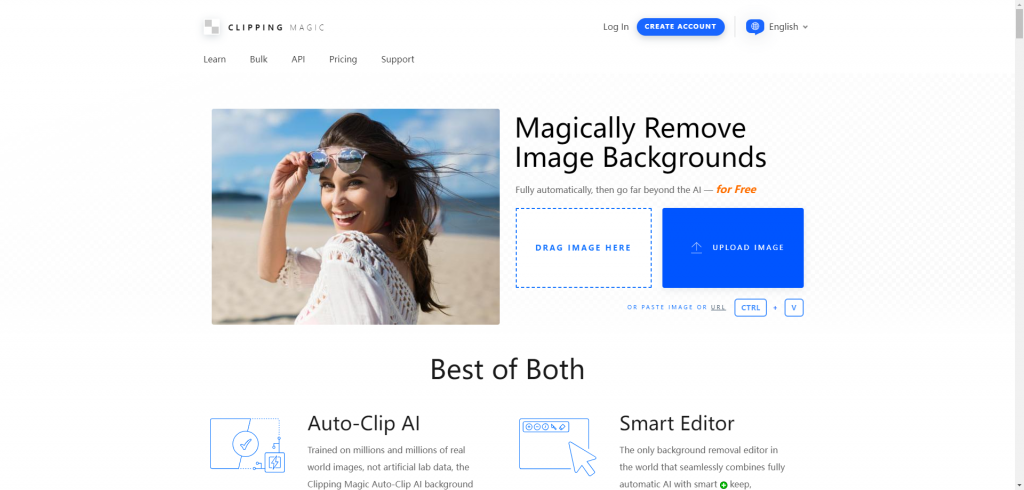
Clippingmagic
If you are looking for another popular tool to remove color from an object image, Clippingmagic will be your best option. Seamlessly combines fully automatic AI technology, you can use it to easily meet your preferences while ensuring the optimal result.
Let’s take a look at how to use it.
Step 1: Open the Clippingmagicwebsite on your devices.
Step 2: Click on “Drop Image Here” or “Upload Image” and you can upload an image that you want to remove color.
Step 3: One-click remove color.
Step 4: Preview the edited photo and download it.
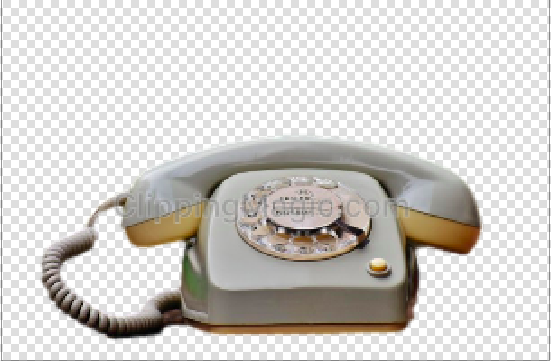
👀 Picture Example:

| Items | Effect |
| Is the color removing natural? | ⭐⭐⭐⭐ |
| Are the details well handled? | ⭐⭐⭐ |
| Are the photos of good quality? | ⭐⭐⭐ |
How to Remove a Specific Color from Image
Adobe Photoshop is a professional image editor, which provides comprehensive features and tools for image editing, including advanced design and specific color removement, etc. Furthermore, this software is compatible with both Windows and Mac OS, it greatly offers convenience for users. But it is pretty challenging for a beginner if you do not have plenty of in-demand skills. Don’t worry, in this part, we will give you a detailed guide on how to remove a specific color from the image.
Removing Specific Color With The Magic Wand Tool
The Magic Wand tool can automatically select an object or area of your image, using advanced machine learning to discern what you might be trying to select. Here are several provided steps to remove specific colors with the Magic Wand tool. This method allows you to adjust edges if anything goes wrong with the selection. Let’s go into how to use it.
Step 1: Launch Photoshop and open the photo that you want to remove in Photoshop.
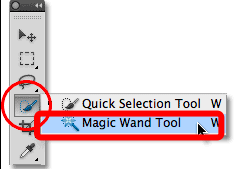
Step 2: Select Magic Wand Tool in the Photoshop.
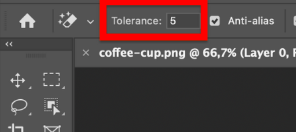
Step 3: Modifying tool settings, such as tolerance level. Since a higher tolerance value can select a broader range of colors while a lower value selects a narrower scope.
Step 4: Now you can make and adjust your selection. Hold Option on Mac or Alt on PC and then click on the color you want to remove and eliminate.
Step 5: Then pressing the Delete key while your selection is active to remove the selected color permanently.
Step 6: After that, you can select the image layer and apply a layer mask. But before that, you should invert your selection by pressing Shift + Command + I (Mac) or Shift + Control + I (PC).
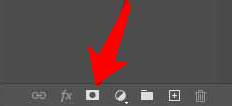
Step 7: Then click the “Add Layer Mask” button at the bottom of the Layers panel to apply the layer mask.
Step 8: After that, a white layer mask thumbnail will appear. And you have successfully removed color from the image.
Removing Specific Color With The Select Color Range Tool
Unlike the previous Magic Wand Tool, the Color Range Tool allows for accurate color selection, enabling you to target a specific range of colors in some complex backgrounds. Follow the below steps to learn how to use it.
Step 1: Launch Photoshop and open the photo that you want to remove in Photoshop.
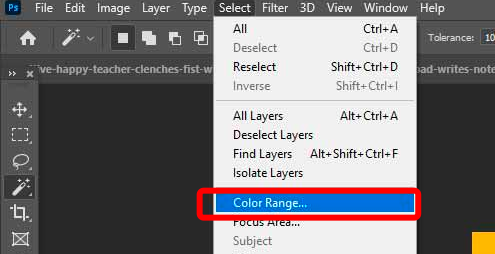
Step 2: Choose the “Select” and then select “Color Range” in the Photoshop. Along with this feature, you can use the eyedropper tool to sample colors from your shot.
Step 3: Then use the “Fuzziness” slider to control the range of colors that will be selected. Usually, a higher value can select a broader range of colors while a lower value selects a narrower scope.
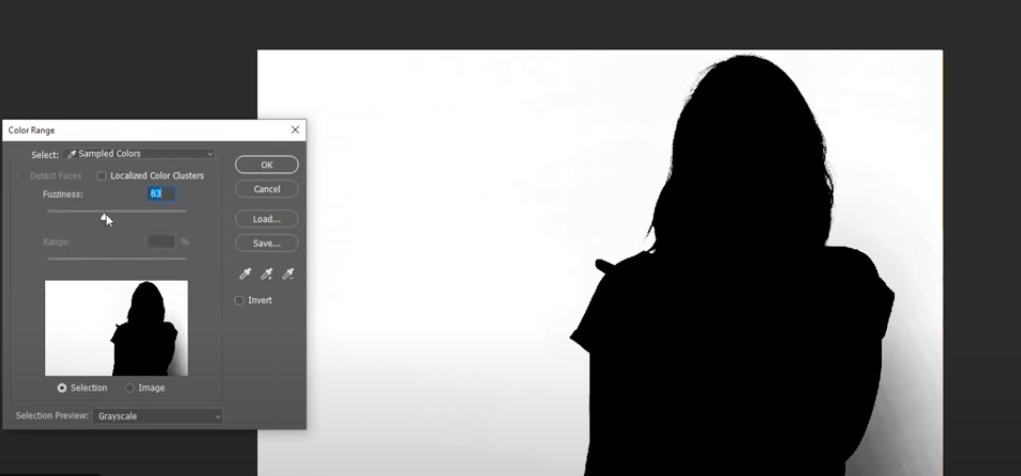
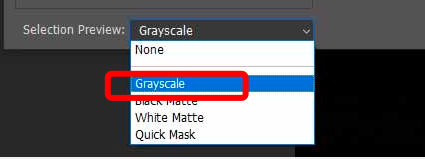
Step 4: Then set your selection preview to “grayscale” to achieve optimal results. Once you’re done, click OK to convert it to a selection.
Step 5: After that, remember to click the “Select” menu and choose “Deselect” or press Ctrl+D to deselect your selection to work on the entire image again.
Step 6: Then pressing the Delete key while your selection is active to remove the selected color permanently.
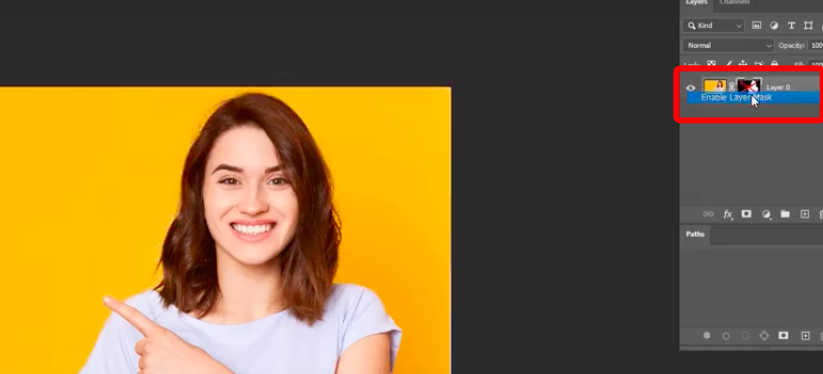
Step 7: Now, you can click the “Select” menu and choose “Inverse” to invert the selection, and then enable the layer mask. After that, a white layer mask thumbnail will appear. And you have successfully removed color from the image.
💡 Bonus tip: You can press Command + I (Mac) or Shift + Control + I (PC) to switch the selected region in your file.
Conclusion
We’ve reviewed 6 available tools and alternatives for you. These options provide powerful editing features to help you remove the full colors from a photograph. Moreover, each tool offers its features, pros, and cons, you can use any of the tools based on your actual requirements, skills, and budget. But if you re looking for a straightforward approach to removing color from an image, AI photo editors are specifically tailored to you.
📚 Explore Further