
Once you’ve taken the photo you plan on using for your passport document, your next step is to get it fitted to size. AiPassportPhotos need to meet very specific requirements about their dimensions, including how much space your face takes up.
This is one of the most tedious parts of obtaining a new passport, so if you are wondering how you can accomplish this task as quickly as possible, here’s what to do.
Understanding Passport Photo Requirements for Your Region
Different countries will have different specifications on how large the passport photo must be. Many countries, including the United States, request a 2-inch by 2-inch photo, so there’s a good chance these dimensions also apply to you. When it comes to picture quality and resolution, your passport photo should be around 300 pixels per inch. Anything less than that risks being considered too low quality and invalid as a result.
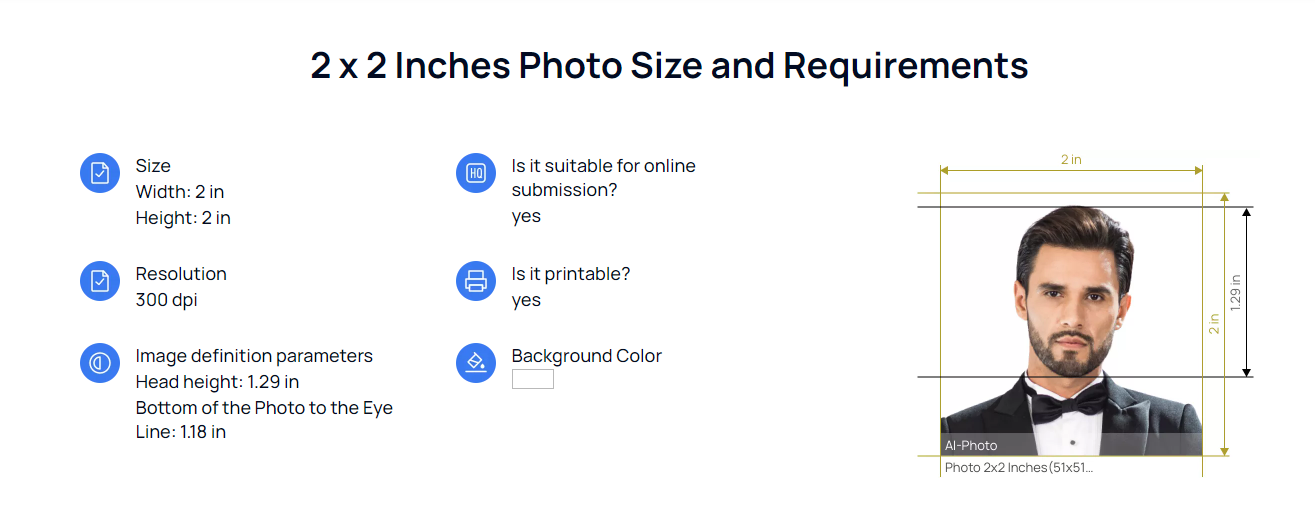
While that takes care of the photo size, there are other requirements to take into consideration as well. The picture needs to be no older than 6 months, and there needs to be a bit of space between the top of the picture’s border and the top of your head. This space should be no more than half an inch long, ideally closer to a quarter of an inch.
The photo itself also needs to be taken on a blank background with no objects or other people behind you. Additionally, the camera should be taken at your eye level so that it is as level as possible with your face.
You should make no facial expressions and have no headwear covering your facial features. Simply make a neutral expression and have your eyes, nose, mouth, and ears perfectly visible.
While clothing such as scarves and headwear are not normally allowed, you may wear headwear in your passport photo if it is for religious reasons such as a hijab. Despite this exception, religious headwear must still be worn in a way that does not obscure your facial features at all.
Traditional Method of Taking Passport Photos
Nowadays there are two main ways to create ID or passport photos, and the first method is done almost entirely in person.
The first step of this traditional method involves taking a photograph. This is always done in an indoor setting where lighting can be easily controlled so that the picture can be taken in ideal conditions.
Many people to this day choose to opt for a professional photographer at a designated passport picture location, often a post office or official government facility. In this case, the photographer will take your picture for you for a fee, making sure that all passport photo requirements are followed.
Your picture will be taken with adequate lighting on your face and with the camera adjusted to your eye level so that the angle is perfect. The photo will also be taken on a blank white or grey screen background, as per the photo requirements.
The second step of this method is resizing and cropping the photos. A professional passport photographer will digitally handle this step for you immediately after the picture is taken, though some people who prefer a DIY approach will resize the photo themselves.
This can involve digital editing or making sure the picture is taken perfectly so that it can be cut into a perfect 2-inch by 2-inch square.
The third and final step is editing the photo for any final blemishes. This can involve brushing it up to remove any blurriness or other defects that would not be considered acceptable.
How to Make Passport Photos with Only One Click
If you’re looking for an online editor to help you adjust and crop photos so that they are perfect for your passport document, AiPassportPhotos is a highly recommended online tool you can use.
AiPassportPhotos utilizes artificial intelligence and facial recognition to isolate your face clearly from the rest of the photo and create a perfect blank background behind you for your passport document.
The only input that’s required from you is to take a picture of yourself that follows some of the general guidelines of passport photos: no one else is in the picture, your face is not obscured, your facial expression is neutral and you are not wearing excessive headwear or clothing.
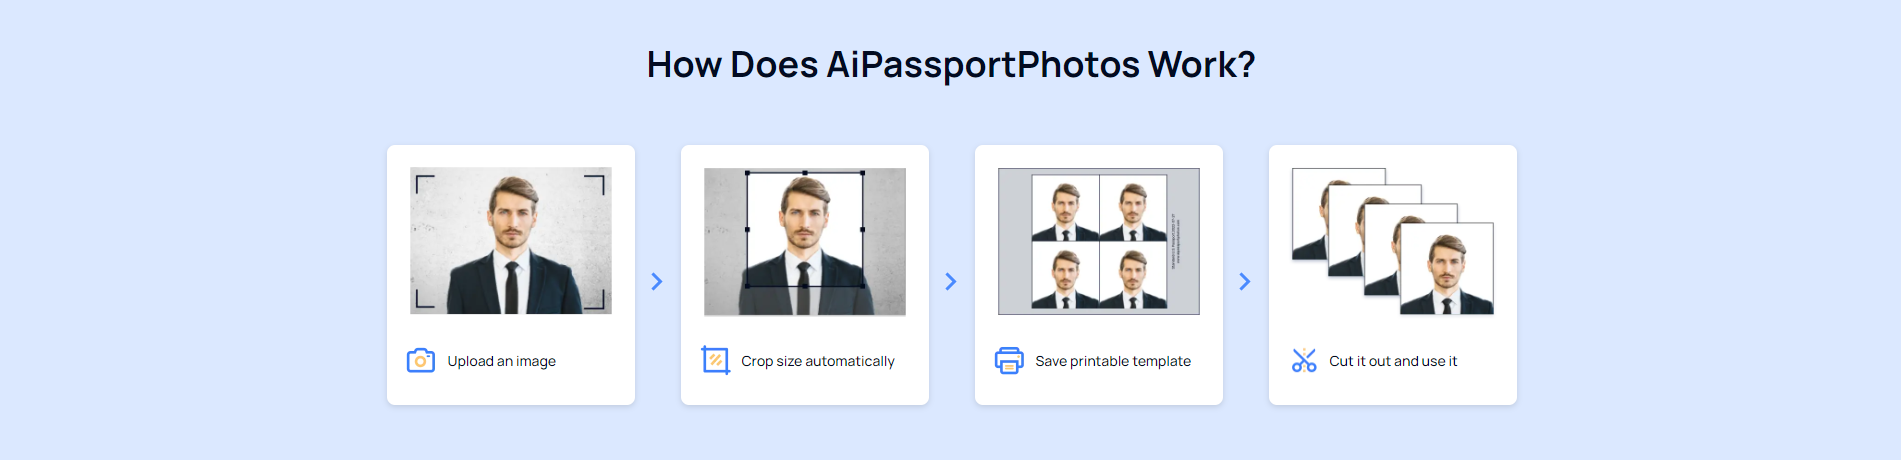
AiPassportPhotos will take care of the rest. Was your photo taken on a colorful background? It can be digitally removed and replaced with a white one. Is the color of your picture a little off? Use the photo colorizer or color correction tool to brush things up.
And the great thing is, editing photos here is quick and simple. All it takes is the push of a button and mere seconds later, your selfie will instantly become a perfect passport photo.
Once that’s done, you can crop it and resize it as an ideal passport photo template down to the pixel quality and the dimensions. You can then save it and take it with you to be printed out at a location of your choice.
Printing Your Passport Photos
Once you’ve saved your ideal passport photo template, you can take it to a dedicated photo printer that uses high-quality photo paper that’s acceptable for a passport document.
Most regions will want a passport photo printed on matte or glossy photo paper as these are the materials that provide the best colors and lighting. Popular stores like Walmart, Walgreens, and Costco provide such services, typically at a much lower price than printing out your pictures at an official government office.
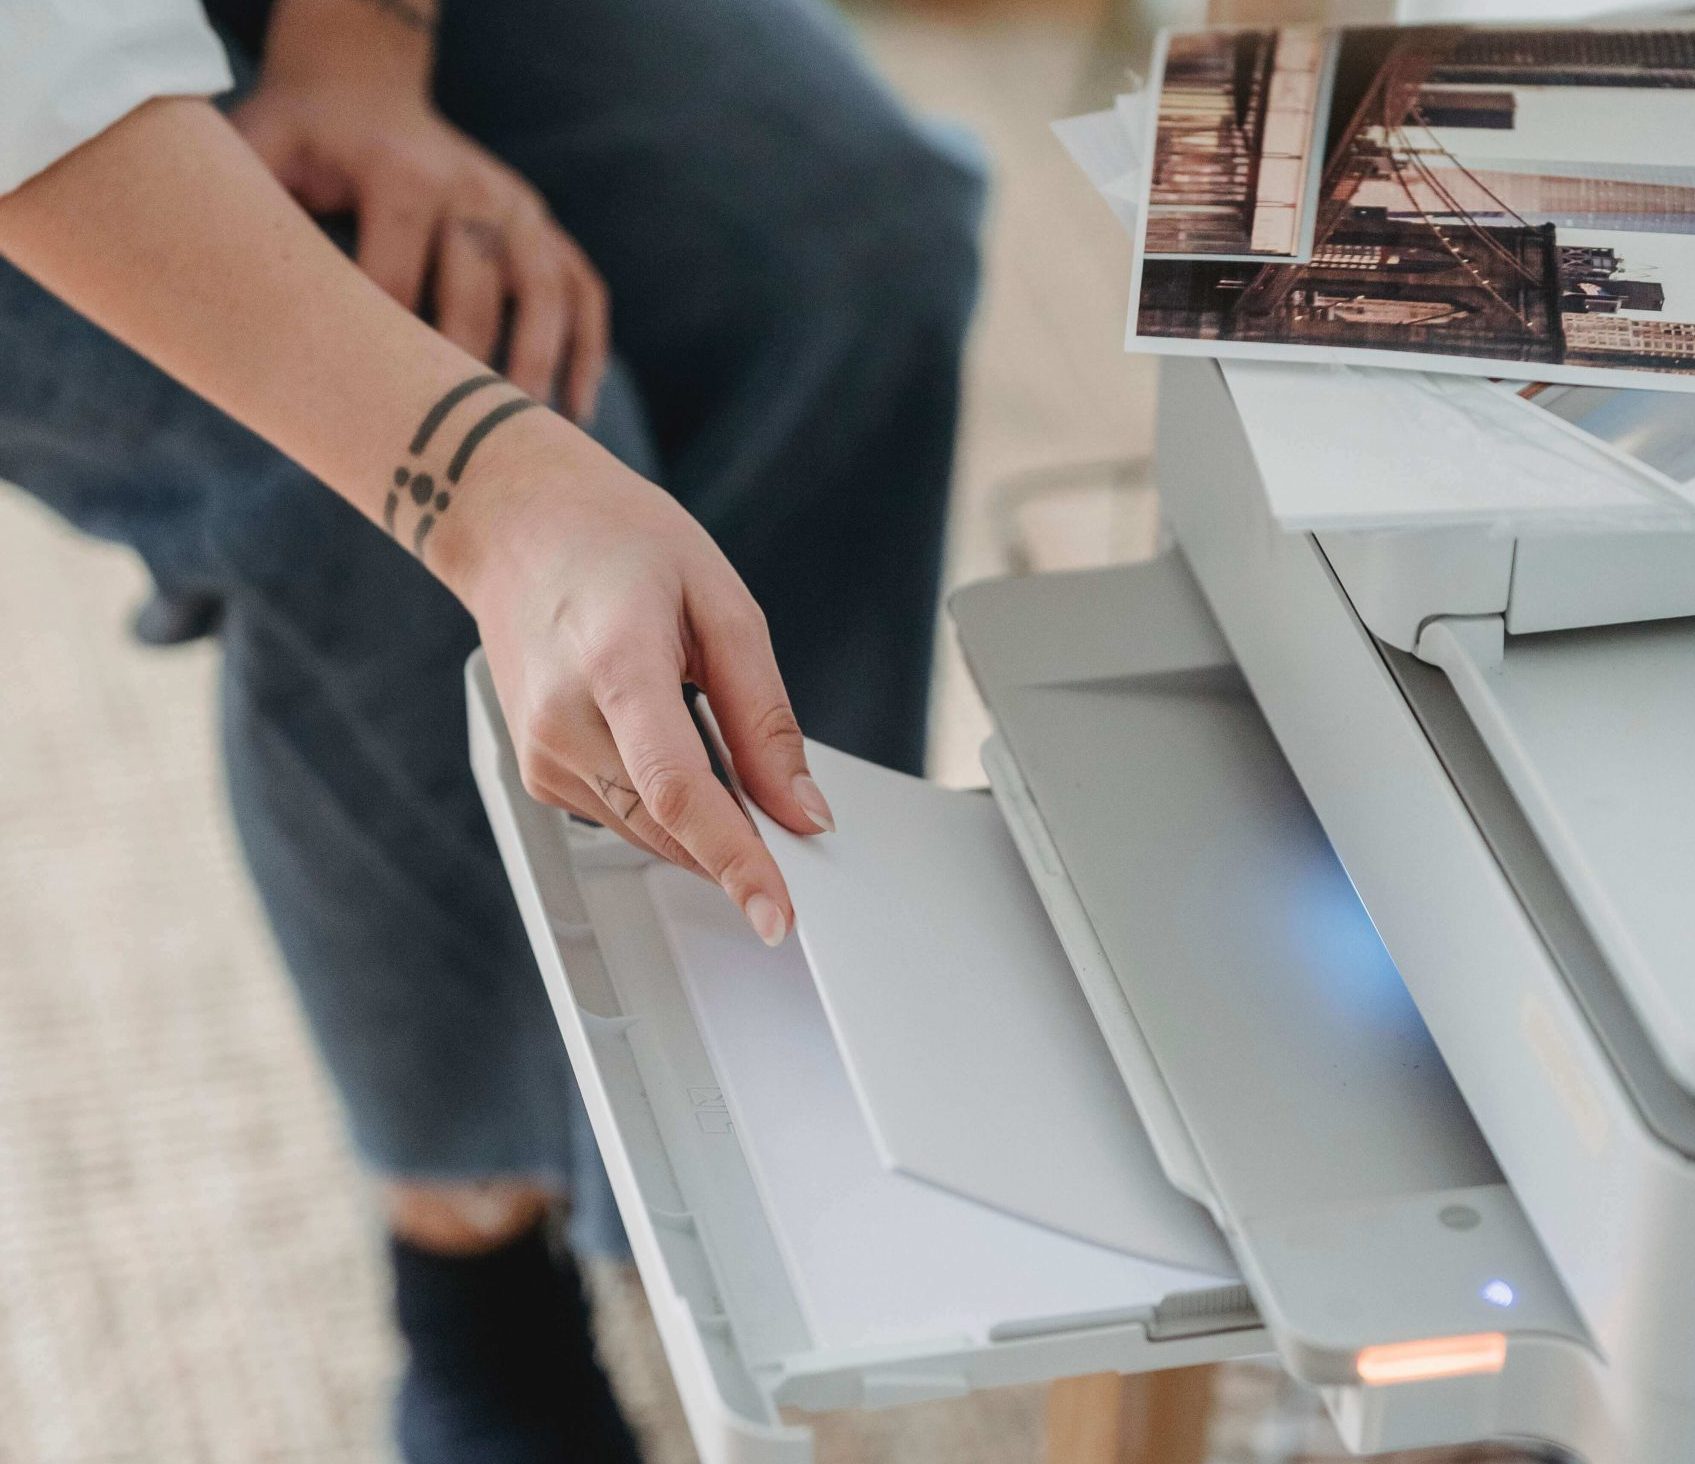
Simply take your digital passport photo template to one of these locations and ask them to print it out for you. You’ll then have the perfect passport photo that can be taken to the proper government facility where they will use it for your document. And you can even print out extras just in case you need passport-sized photos again sometime soon!