
We used to think that a biometric photo for official documents must be taken with advanced cameras by professional photographers. That is absolutely a misconception. It is possible to take a passport photo on an iPhone as long as you learn what passport photo requirements are and how to resize it correctly.
In this article, we will introduce a step-by-step guide on how to take a passport photo with an iPhone. We will also cover the official requirements of background, lighting, phone setting, position, and editing.
US Passport Photo Requirements
Before taking a photo on your iPhone, learning the US passport photo requirements is necessary. If your self-made photo doesn’t comply with the US passport photo requirements, it will be likely rejected by the officials.
If you are taking a US passport photo, your photo must be:
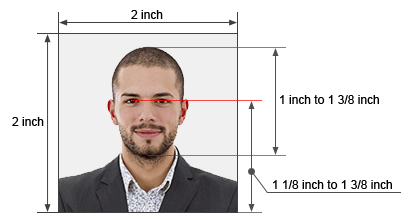
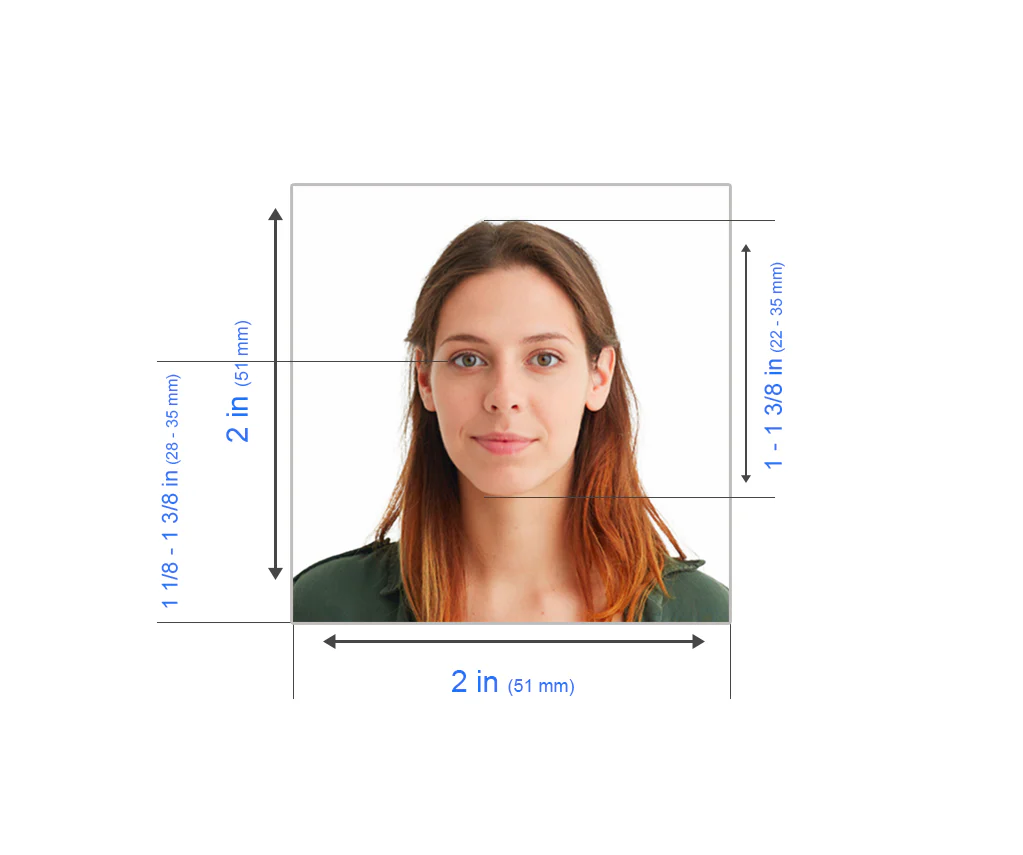
| Photo Size | 2×2 inches, 5 x 5 cm, or 51 x 51 mm |
| Recency | The photo must be taken within the last 6 months. |
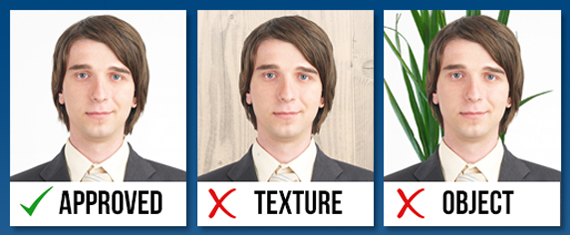
| Background | Plain white or off-white |
| Head Position | The head measurement from the chin to the top of the head should be 1.29 inches. |
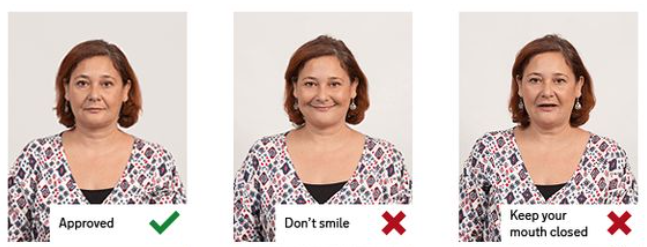
| Facial Expression | Look straight at the camera. Keep a neutral expression, both eyes open and mouth closed. |
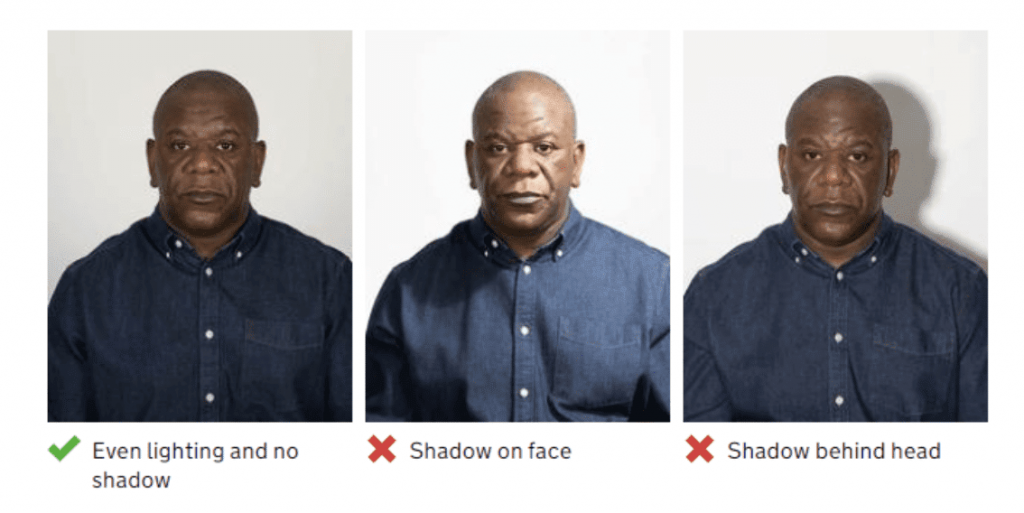
| Shadows | Avoid any shadow on your face. Let the light evenly spread on the face and avoid shadows, stains, or distracted items in the photo. |
| What to wear | Wear casual clothes. Avoid wearing uniforms or camouflage. |
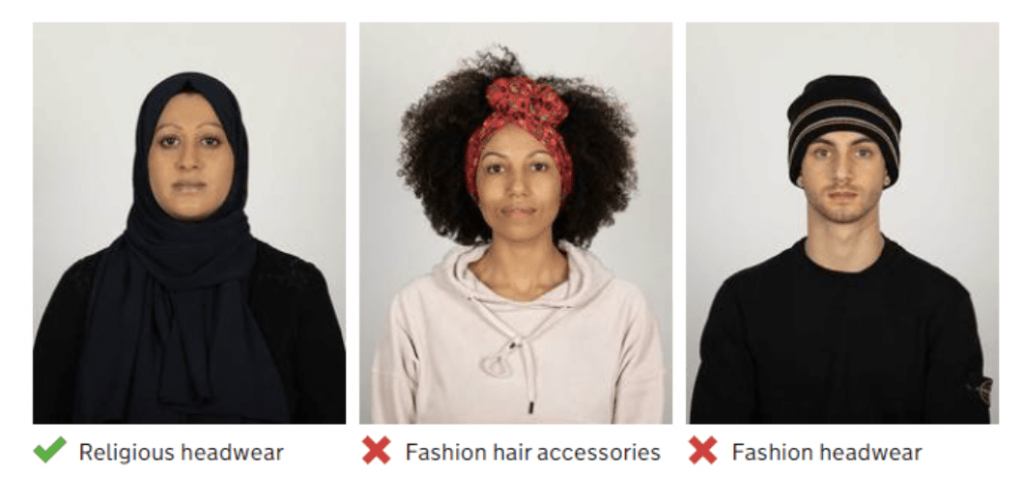
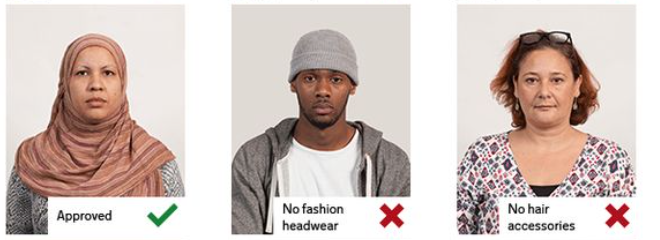
| Accessories | You can wear small accessories which won’t cover your facial characteristics. Don’t wear sunglasses glasses or headbands. |
| Religious Covering | Daily-worn religious coverings are allowed in the passport photos. However, you’ll need to show your whole face. |
How To Take a Passport Photo with Your iPhone
After learning the US passport photo requirement, taking a passport photo with an iPhone is quite simple by following the steps below.
Keep Your Face Clean & Clear
A passport photo is used to recognize your identity at the entry checking point, so it must review your real appearance. It is suggested to take off all decorative accessories, such as hats, scarves, glasses, nose rings, etc that might cover any facial parts. Religious headgear and prescription glasses are acceptable, but you have to offer related statements.
Most authorities do not pose restrictions on makeup. That is to say, for better temperament, moderate or natural makeup is acceptable. However, heavy makeup that changes your look must be rejected. For example, don’t use smoky eyes, colored contact lenses, colorful eyeshadows, etc.
Even if you don’t put on any cosmetics, please wash your face beforehand because stains of oily skin would not only look unpleasant but also hinder approval.
Choose Proper Background & Lighting
The US government requires a plain white or off-white background for passport photos. There might not be a studio backdrop at home, so you can stand or sit in front of a white wall or curtain a few feet away.
Some countries might have different standards for colors. It’s ok if you can’t find a suitable one because we will introduce an editing tool to adjust the background in the final step.
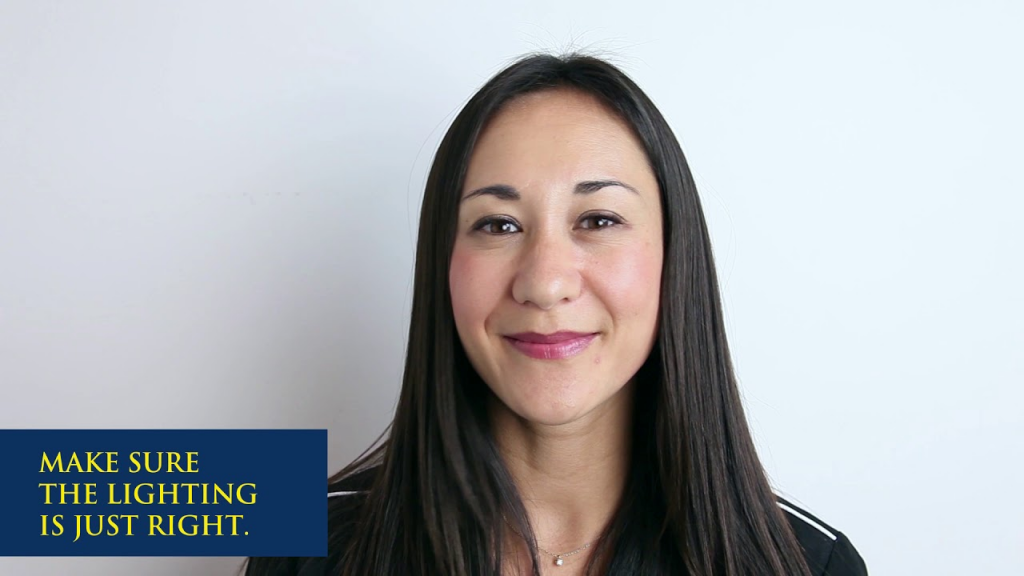
In order to prevent shadows on the photo and reflect the natural skin color, you should look for a well-lit room. Daylight is preferred. Stand by the window and face the light source. Avoid dawn or dusk because there would be dim lighting or golden hues.
Set Up Your iPhone & Shooting Parameters
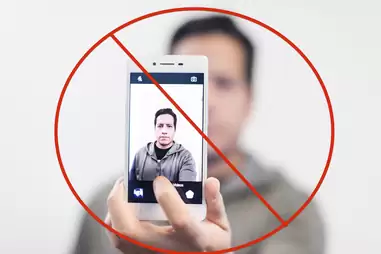
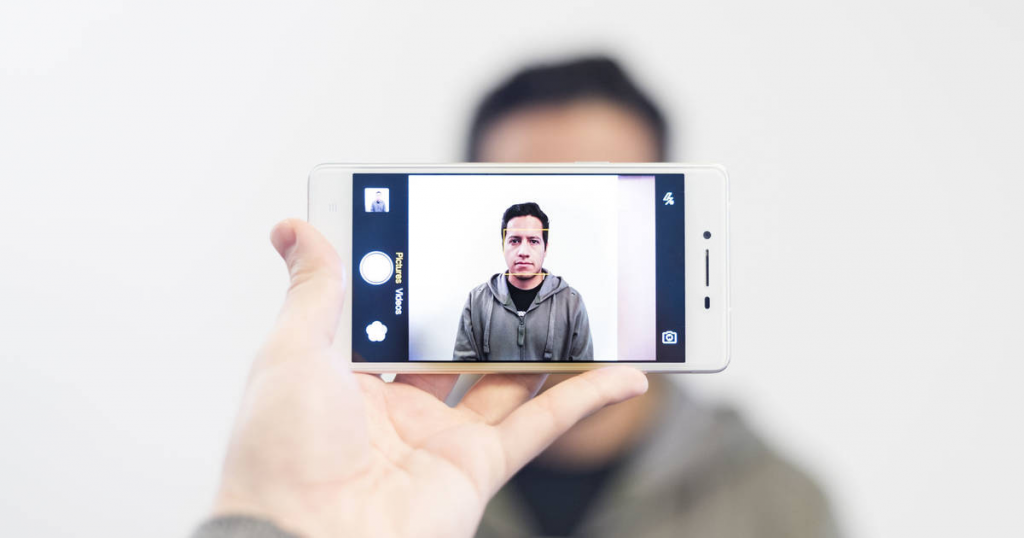
Selfie is prohibited, so don’t use portrait mode to take a passport photo on your phone. You’d better ask your friend or family member to help. If impossible, use a tripod to raise your iPhone to eye level and turn to the rear camera which usually takes clearer images.
Don’t zoom or add any filters and effects that will distort your look. Use the standard mode of the default camera of the iPhone instead of any third-party camera app.
In the event of taking the photo without other people’s help, you can put something at the place you are going to stand/sit (like pillows or dolls) and let the camera focus on it. Run to that item and shoot a picture so that your face is clearly seen.
💡Bonus Tips:
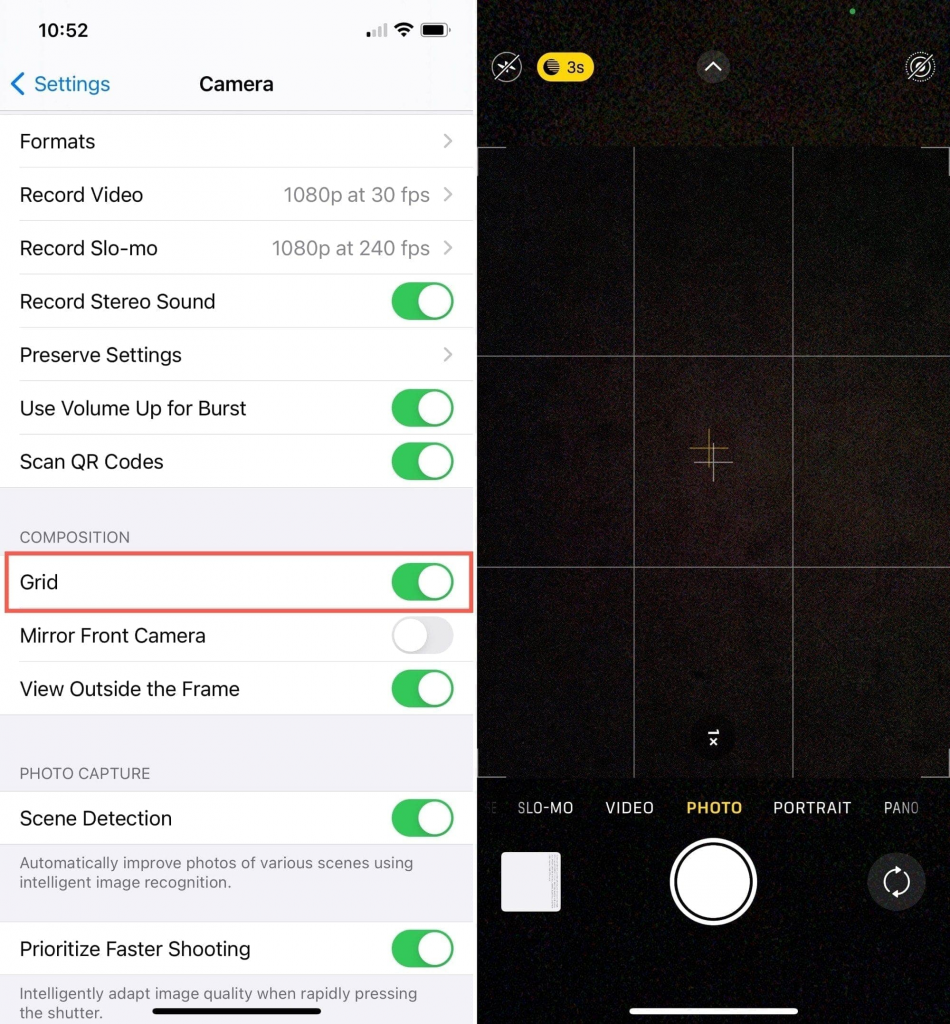
Adjusting the iPhone camera setting will help you take high-resolution photos. Here how:
- HDR: Enable HDR (High Dynamic Range) for better detail in both dark and light areas. This can be toggled in the Camera app.
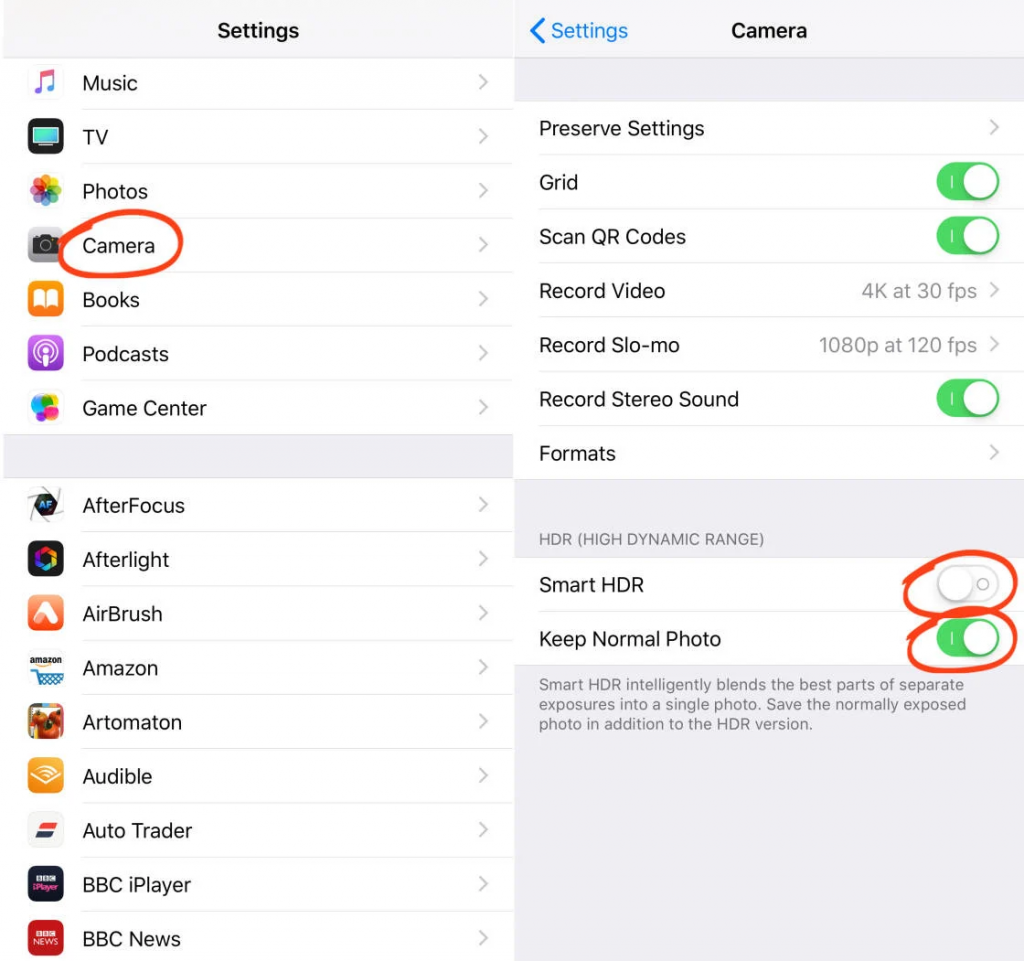
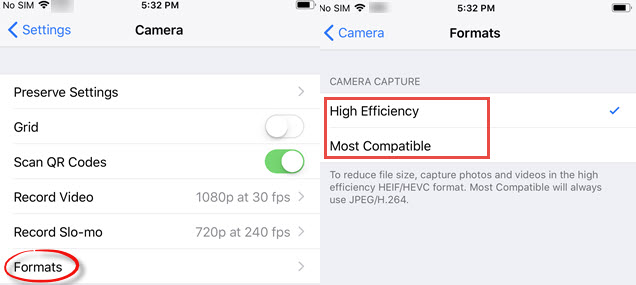
- Resolution: Ensure your camera is set to the highest resolution. Go to Settings > Camera > Formats and select High Efficiency for the best quality.
- Grid: Turn on the grid to help with composition. Go to Settings > Camera and toggle on the Grid.
Pose Within the Frame
An iPhone is equipped with grid lines that help novices take well-composed pictures. Since only your shoulder and head would be visible in the frame, ask the photographer to keep your head in the middle grid and shoulder along with the bottom line. It helps to ensure you face to the front without tilting, looking up and down.
Take the Photo
Then you are ready to take a shot. Capture more shots so you can choose the most suitable one. Use continuous shooting mode if possible. Check clarity, facial expressions, position, and shadow primarily. Never mind the size and frames which could be cropped and straightened in the next step.
Resize Your Passport Photos
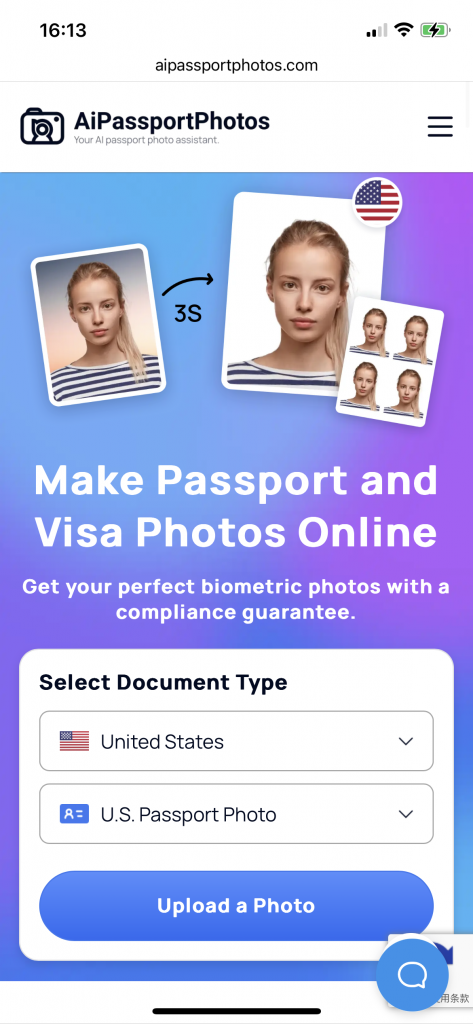
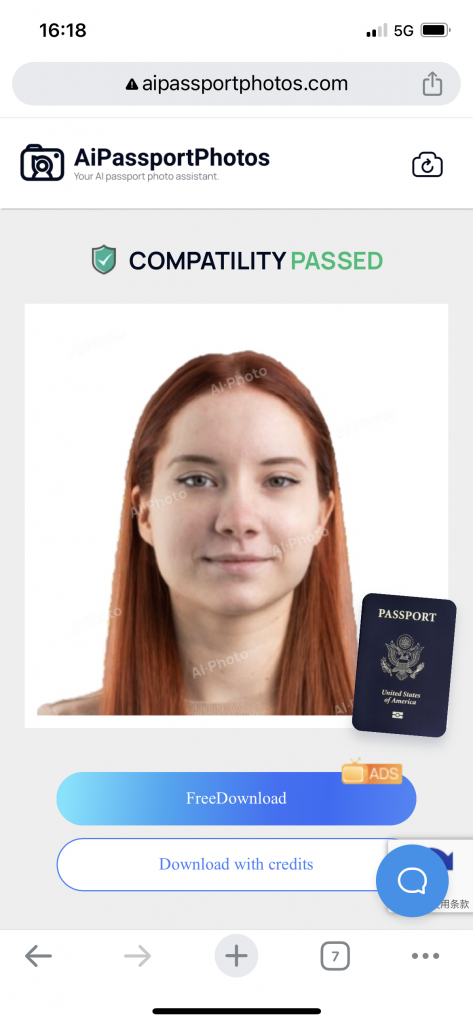
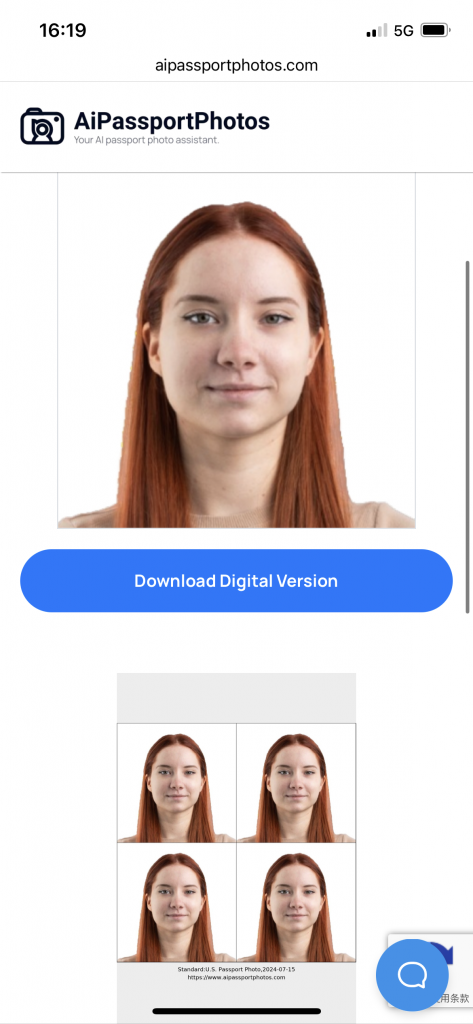
Now that the best photo is chosen, it’s time to straighten or crop the photo. Although these simple adjustments could be achieved with the built-in editing feature of the iPhone, we still want to recommend AiPassportPhotos passport photo maker.
AiPassportPhotos is an online photo editor to resize your pictures to 2×2 inches with one click. To resize a US passport photo, simply upload a photo to AiPassportPhotos.
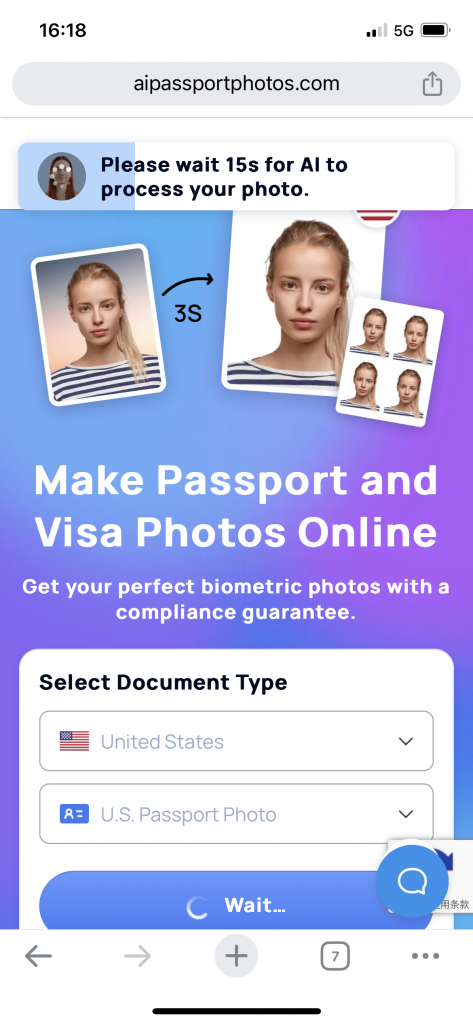
Wait for AiPassportPhotos to process the photo. The tool will detect your photo and check its compliance.
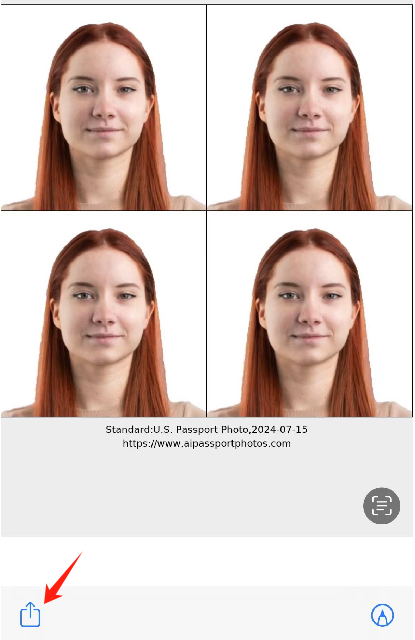
Preview the passport photo.
😍 Here’re are some benefits if you use an online passport photo maker:
- Remove and change the unqualified background
- Seamless passport photo cropping
- Straight-forward interface
- Compliance checked
Tips to Take Passport Photos on iPhone
In order to take a satisfactory shot on the first try, here are some useful tips that ensure the quality of passport photos.
Phone Setting
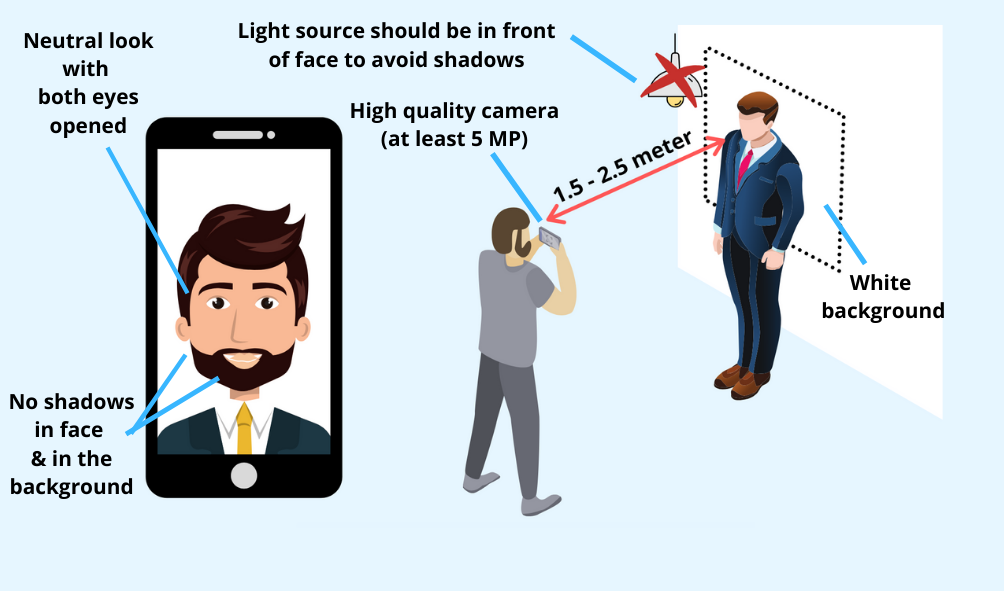
As the authority requires the applicant to look straight at the front instead of watching around, it is suggested to set the phone at eye level. That is to say, imagine that the eyes and phone are two points, the line between them should be horizontal. It is easy to achieve if you have a photographer. Ask him to adjust in accordance with whether you are sitting or standing. If not, raise the camera with tripods or fix it on the table or shelf. Please bear in mind that a selfie with a front camera is not allowed.
Posture
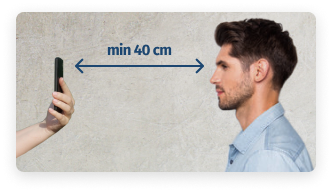
In order to get the best results, it is important to keep a proper distance between the subject and the phone, the subject, and the wall. For example, you should stand or sit 30-50cm in front of the wall and about 1.5m away from the photographer. In this case, we can avoid projecting shadows on the background.
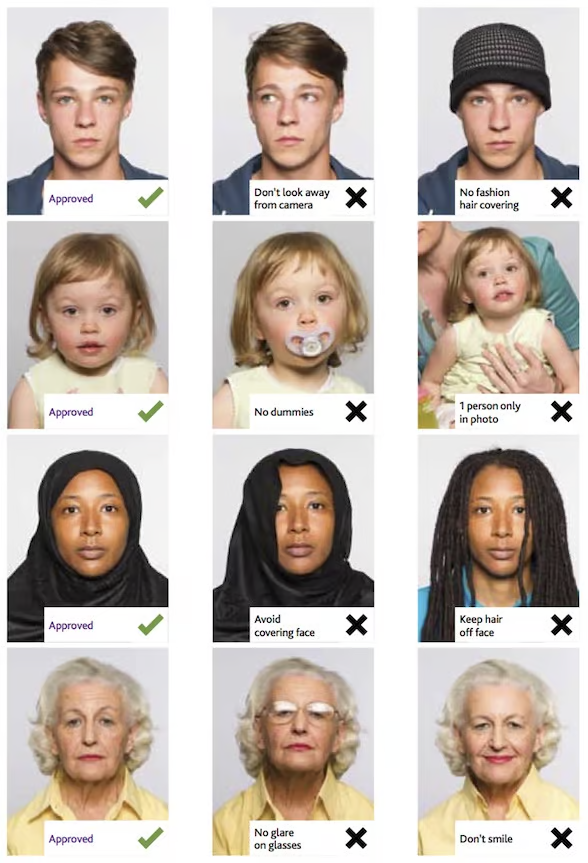
Relax and look at the camera with your head in the center. Don’t tilt, shrug shoulders, or slouch because it makes you look depressed and dull.
Lighting
Either extra strong or dim light influences exposure and results in shadows, which is not acceptable for passport photos. Make sure to take advantage of medium light and illuminate the person evenly on the face. Natural daylight is highly recommended. It is suggested to take photos during the time except for dusk or dawn on a sunny day. Let the person face the light source. If the sun shines on either side of the person, use artificial supplement light to shine from the other in case of any shadows.
Background
The applicant should be the only subject in the passport photo, so please make sure there are no distracted items around the person. It is essential to take baby passport photos. Parents usually use toys or snacks to comfort babies. Make sure not to capture them in the frame.
Dressing
The only official requirement for passport photo dressing is to wear colored clothes. However, we all know that improper dressing would also damage the photo quality, so here are some hidden dress codes.
Wear dark colors in contrast to the plain background. Always keep away from pure white clothes in passport photos because they would blend into the background and become hard to recognize.
Wear casual clothes. Some of you wear uniforms for work, but please take them off before taking passport photos. Don’t try to be too casual or fashionable. Off-the-shoulder tops and vests look beautiful in daily life, but they might make you look naked in an identification photo because the photo is cropped to show the head and shoulder only. Moreover, glitters like beads, sequins, and so on are popular to attach to outfits, but please avoid wearing clothes with similar items if they reflect light. In a word, T-shirts, blouses or jackets in pure color or plain patterns are favorable.
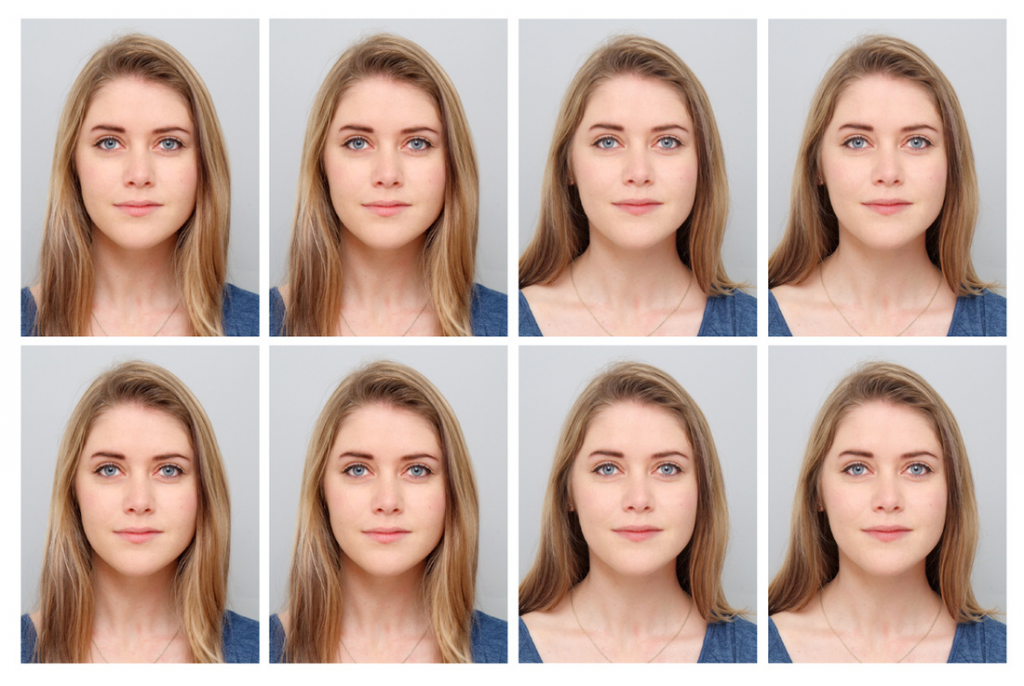
Facial Expressions
Poster models must show rich expressions, but you are supposed to look serious and natural on an official certificate. Stick to the principle of opening eyes and closing mouth. Don’t wink, frown, twitch your mouth, pout or giggle because they will not only make you look emotional but also distort your facial features. Once the officer can’t identify your original look, your application is very likely to be turned down.
How to Print a Passport Photo from an iPhone?
Printing a passport photo from an iPhone is straightforward with the right tools and steps.
Use a Wireless Printer
Before printing, ensure your wireless printer is connected to your iPhone’s Wi-Fi network.
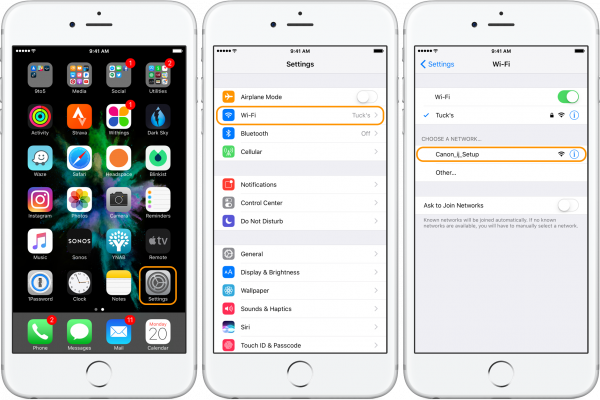
Open the Photos app, select the passport photo, tap the Share icon, and choose Print.

Select your printer, and the number of copies, and use high-quality photo paper.
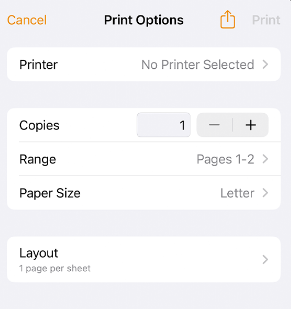
Tap Print to start printing.
Photo Printing Service
- Use the app or website of a photo printing service like Walgreens, CVS, or an online service.
- Upload the passport photo from your camera roll.
- Follow the prompts to select the print size and quantity, ensuring high-quality photo paper if available.
- Place your order and choose between home delivery or in-store pickup.
FAQ
Where can I take my passport photo?
You can easily take your passport photo at home using your smartphone or digital camera. Ensure you have good lighting and a plain white or off-white background, and follow the official guidelines for facial expression and positioning. After taking the photo, use an online passport photo maker like AiPassportPhotos to crop your photo to 2×2 inches. This method is convenient and free, allowing you to take your passport photo at your own pace.
How to take a good-looking passport photo on iPhone?
To take a good-looking passport photo on your iPhone, make sure you rest well before night. Try to wear natural makeup and find a well-lit area to take the photo. Follow the above guide to take the picture and crop it on AiPassportPhotos.
Can I use my iPhone camera for a passport photo?
Yes, you can. However, we recommend you to set up the iPhone camera on HDR and High Efficiency. Click here to view the guide again.
Is there a free passport photo app for iPhone?
There’re plenty of free passport photo apps for iPhone. However, we highly recommend you to use a web-based photo editing tool to make the passport photo. Without downloading any app, you can make a compliant passport photo within seconds.
Take Away
The biggest advantage of taking a passport photo on a phone is time- and money-saving. Time has gone when you have to drive to a photo studio and queue up for hours. When it comes to how to take a passport photo with your phone, we hope this passage will guide you thoroughly through it. Start your DIY passport photo with your iPhone right now and get ready for your trip.