
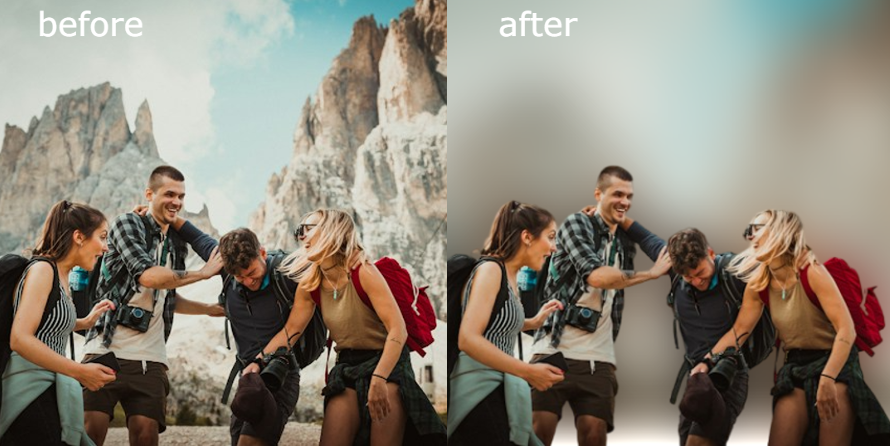
Privacy has now become the focal point to protect people from the invasive nature of social media and online sharing. Nevertheless, we may capture the faces of other people accidentally we don’t want to identify openly in public. Here, we are going to discuss easy techniques that will help you to blur faces in images for privacy reasons and avoid changing the style and the content of the picture.
How to Blur Face Online
Here we will guide you on how to blur online faces. Read through the following details to find out the top websites, their features, steps, pricing, and other useful and important information. Keep reading to learn!
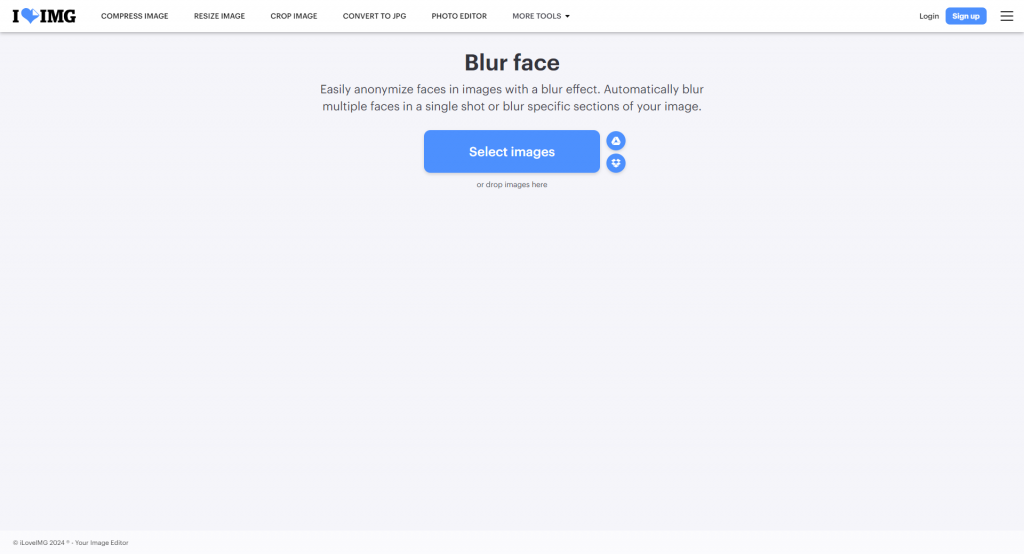
iLoveIMG
iLoveIMG is an online image processing system that makes available practical tools for editing, optimizing, and converting images. It is able to handle regular editing tasks such as cropping, resizing, rotating, adding filters, etc. Some of the key functions of this feature include the Blur Face tool that identifies and blurs faces in photos thereby assuring the user’s privacy.
Here are the steps to blur faces in photo quality using iLoveIMG
Step 1: Go to Blur Face on iLoveIMG’s website.
Step 2: Click on “Select Images” to upload the images you desire to blur or upload them from your Google Drive or Dropbox.
Step 3: Select “Automatic detection” and let the tool find faces in the picture itself.
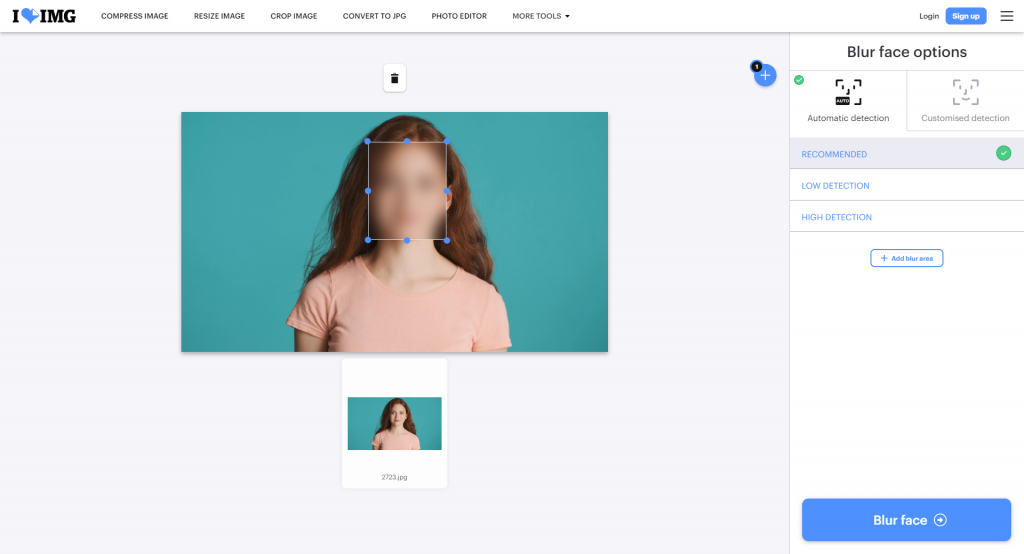
Step 4: Decide between “Recommended,” “Low” or “High” levels of detection according to your tastes.
Step 5: Press “Blur Face” to apply the blurring effect to all the faces detected in the picture.
Features
1. Advanced enhanced tools for blurring faces in photos.
2. AI-powered features for automatic blurring.
3. Quick and easy process.
Pricing
1. Free plan with limited features.
2. Paid plan starting at $4.
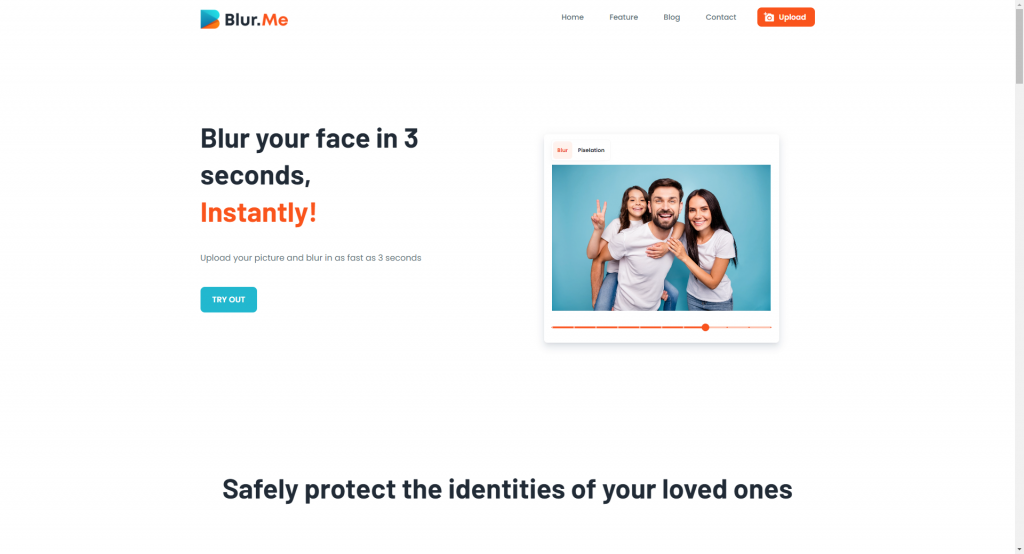
Blur.me
Blur.me’s face-blurring function makes blurring faces in photos an effortless process. Fast identification makes the blurring process automatic, so the user is not required to make a manual identification. The tool can be used to apply the blurring effect only on certain faces or remove it completely for quick and effective management of privacy online. On the other hand, you can easily blur everyone’s face in a photo except yours, just simply click a bounding box for your face.
How to perform Blur.me?
Step 1: Open the Blur.me website on your devices.
Step 2: Click on “Try Out” and you will see a new popup window.
Step 3: Click the “Upload the Image” and one-click blurring. It also allows you to adjust blur intensity and size.
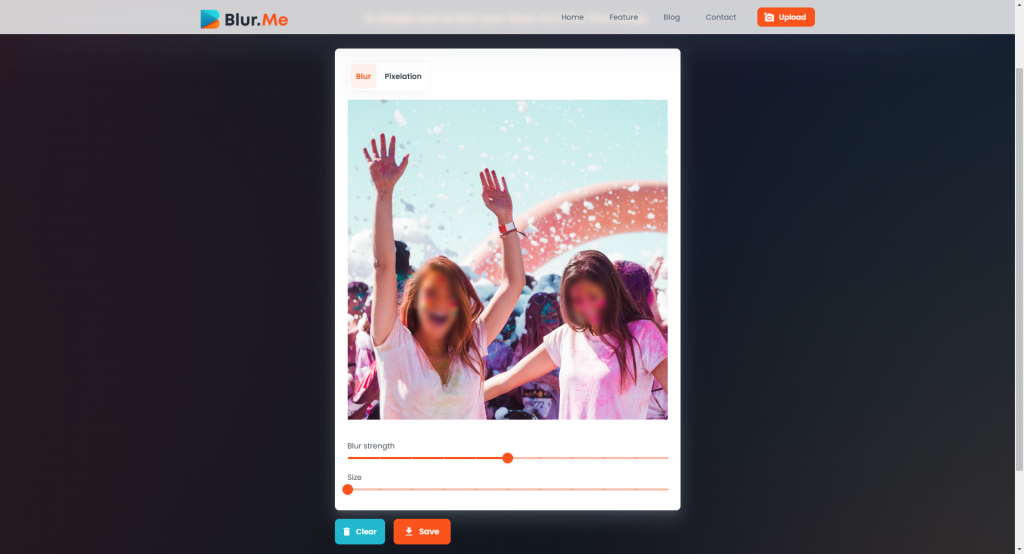
Step 4: Preview the photo and download it.
Features
1. Easy to understand user interface.
2. You can easily and quickly blur faces in the image without distortion.
3. Free usage available.
Pricing
Free trial plan
Piscart
Piscart has the ability to blur faces in images, whether it is for privacy purposes or the artistic touch. With such an option, the users only need to make a mouse click on faces for blurring and define the amount of blurring. Piscart provides different options and varieties of blurring, which allows customers to control the effect up to their tastes. This feature is user-friendly and is apt to be used where safeguarding personal privacy is absolutely necessary or where artistic elements have to be added to the photos.
Step 1: Open the Picwish AI website on your devices.
Step 2: Click the “Upload Image” icon and upload the photo that you want to blur.
Step 3. Then choose the “Blur” option from the Effects tools tab, and select the “Smart Blur” tool, which automatically detects faces and blurs them.
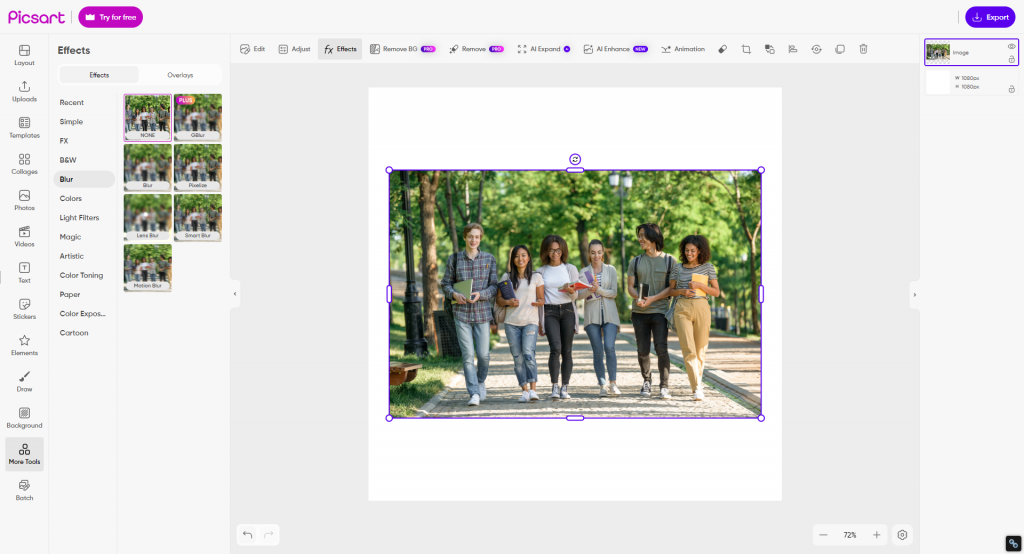
Step 4: Preview the photo and download it.
Features
1. Easy-to-use interface, so you don’t need to master technical skills.
2. This photo program helps you blur your image quickly.
3. Four blur effects are available, including radial blur effect, motion blur effect, tilt-shift blur effect, and bokeh blur effect.
Pricing
1. Picsart has 2 pricing edition(s), from $55.99 to $74.98.
2. Try for free.
Mobile Apps to Blur Faces
In this tutorial, we will show you how to blur the faces in a photograph using an app. Find the services you require according to your specific requirements.
Markup tool
The first one is the built-in photo editor of the iPhone. Nevertheless, it is essential to acknowledge that the native iPhone photo app does not have a direct blur feature. As opposed to this, you can blacken faces using alternative tools like the marker pen.
Markup is a wonderful function available in the iPhone Photos application. With it, you can draw lines having different thicknesses simply on the picture. Using the markup marker with adjustable color, transparency level, and thickness is more preferable to blur the image without losing its beauty.
Follow these steps to blur faces.
Step 1. Open your photo to the iPhone Photos app.
Step 2. Click on the Edit button in the top right corner.
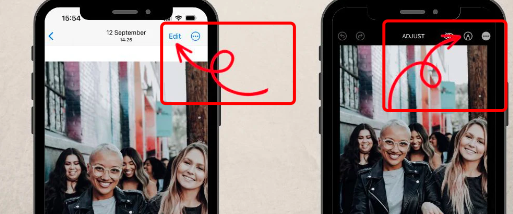
Step 3. Tap on the Pen icon for markup tools.
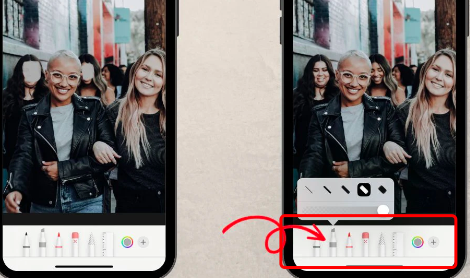
Step 4. Select the marker from the menu at the bottom and change the thickness as it suits you.
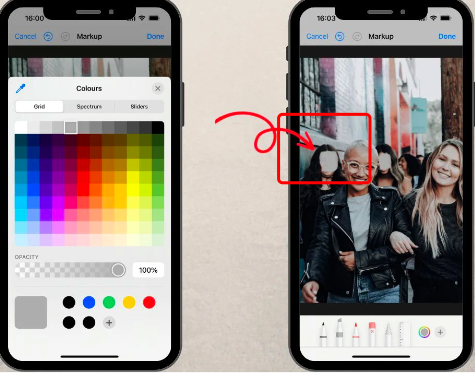
Step 5. Choose the preferred color and regulate its opacity.
Step 6. Use the marker to draw lines across those faces you intend to conceal.
Blur Face
Blur Face is an innovative photo editing app that can blur people’s faces to guard their privacy or accentuate the mystique of the images. Whether you intend to post photos on social media without revealing your identity, or if you wish to create an artwork with a mysterious temperature, Blur Face is what you need.
Here are the steps to use it.
Step 1. Go to the Google Play store to download and install the Blur Face app.
Step 2. Launch the app and select the desired photo from the gallery on your device or take a new photo within the program.
Step 3. Then use the tools to highlight those faces you want to be seen in the photo. The same program auto-detects faces, however, manual intervention is still possible.
Step 4. Adjust the amount of face blur in order to make them harder to see.
Step 5. After the editing process, save the photo. Then share it through social media platforms, email, and other means of communication.
How to Blur Faces on PC
Here, we’ll teach you how to add a blur effect to faces in a photograph using the software of your PC. Be aware of the tools and techniques that are right for you, whether it’s for privacy protection or artistic expression.
Microsoft Word/PowerPoint
Microsoft Word or PowerPoint can be used to blend faces or parts of an image. This is a convenient option if you are already working with these applications. Nevertheless, such methods apply uniform blur to the whole image, so if you want to make a blurred image selected, you should know the advanced image editing software like Photoshop or Gimp. Here’s a step-by-step guide on how to blur faces using Microsoft Word or PowerPoint.
Step 1. First, open either Word or PowerPoint on your Windows 11 / 10 PC.
Step 2. Begin with a blank document or presentation where you bring the image or icon.
Step 3. Go to the “Insert” tab and pick “Pictures” first. Then, choose the image you would like to add to blur the face on it.
Step 4. Click on the image to select it after inserting the image. This should display “Picture Format” at the toolbar’s top.
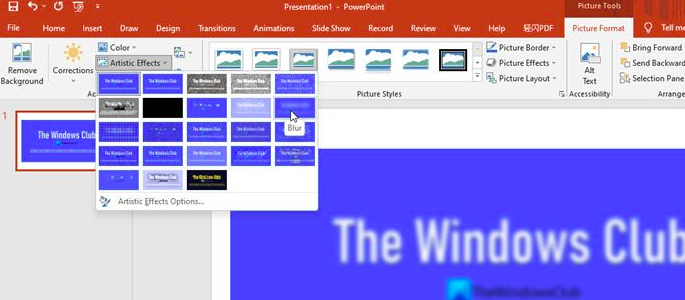
Step 5.Apply Blur Effect
– Firstly, within the “Adjust” section under the “Picture Format” tab, look for the “Artistic Effects” dropdown.
– Select the “Blur” effect by clicking the drop-down menu. It is normally the option five on the second row.
Step 6.Adjust Blur Effect
– To do that, you have to select the “Artistic Effects Options”. Here usually a tab appears on the right part of the pop-up window.
– By adjusting the “Radius” slider you can increase or reduce the blur effect till you get the desired level of blurriness.
Alternatively, you can create a similar blur effect using the “Picture Correction Options”
Step 1.Select the image.
Step 2. Go to “Picture Format” tab.
Step 3. Click on the “Corrections” that displayed in the “Adjust” dropdown menu.
Step 4.Choose “Picture Correction Options…”.
Step 5. On the “Format Picture” tab that appears, drag the “Sharpness” slider until you achieve the best blur outcome.
Photoshop
Adobe PhotoShop offers face blurring as simple technique with its pixel-perfect precision and guarantees the privacy while maintaining the facial characteristics of the persons in the photo. Following these steps will help with blurring faces.
Step 1. Go to the app on your device.
Step 2. Click “File” and select “Open”, pick the image file to edit.
Step 3. Select the Marquee Tool from the toolbar, or else press “M” on your keyboard.
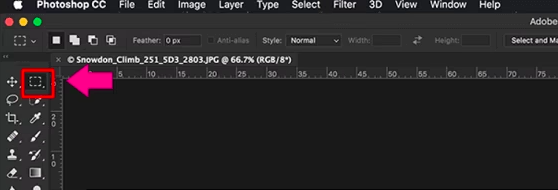
Step 4. With the Marquee Tool, draw a selection in the shape of a face which is to be blurred.
Step 5. Go to “Filter”, then “Blur”, and choose “Gaussian Blurbing”. Turn the radius until the face on the picture becomes unrecognizable.
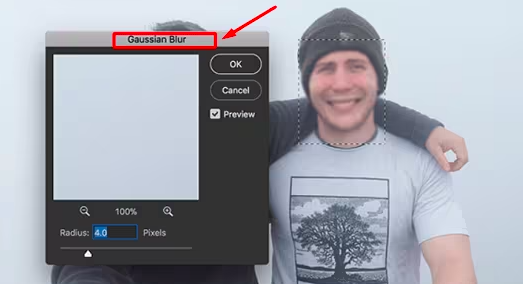
Step 6. Click “OK” to see how the blur effect will look like.
Step 7. Save the photo after editing on your device.
How to Blur Faces with AI
Need to boost the image privacy? Get acquainted with AI-driven tool AiPassportPhotos which makes it easy to blur face and background in photos as desired. It might be a future feature yet the application has achieved identifiable obscuring of faces and surrounding objects to a certain degree currently. Whether you are going to share your blurred face photos on social media, publish them online, or even want to erase them, the easiest way to do this would be through this tool.
Here are the steps to improve photo quality using AiPassportPhotos
Step 1: Go to AiPassportPhotos photo background blur.
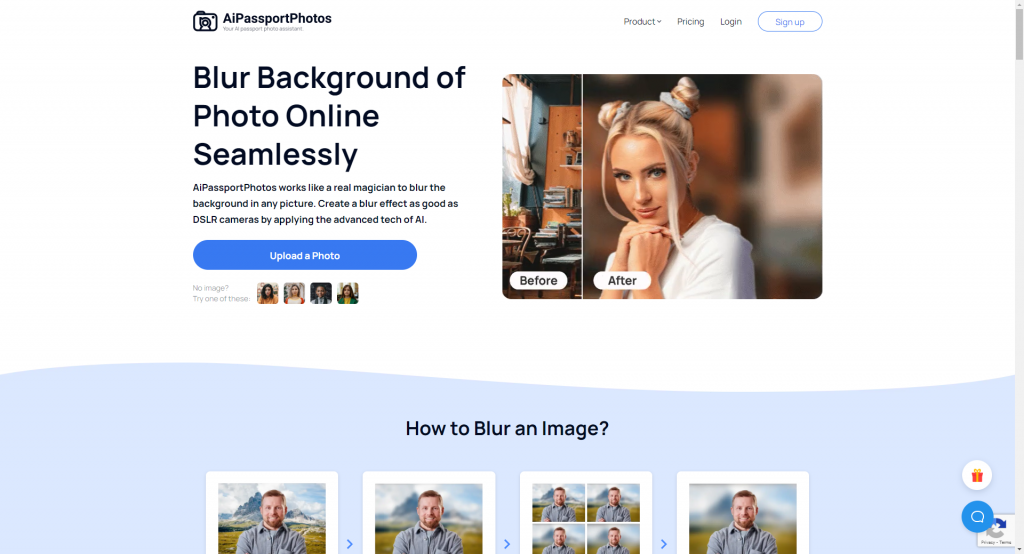
Step 2: Click the “ Upload Image” button and upload the photo that you want to blur.
Step 3: Preview the results then download and save the blurred photo.
🔎Read Also: How to Blur License Plate in Photo
Frequently Asked Quesions
Q1. Can you blur faces in Instagram?
A1. Sure, Instagram now gives people a tool called “Focus” which can be used to blur the background and make faces sharper in photos. Nevertheless, there is none in this one and doesn’t come a face blurring tool. To change the Instagram photos in order to blur some faces you need to use a special app and do the photo editing before posting the picture.
Q2. What is the shortcut to blur faces on iPhone?
A2. There isn’t a quick way for adding blur to faces provided on the iPhone itself. Alternatively, this can be done by using different photo editing apps that many App Store providers offer. These apps generally have functions such as facial recognition (face detection) and blurring.
Q3. How to blur faces in a video?
A3. Faces can be blurred in a video using any video editing software like Adobe Premiere Pro or Final Cut Pro. However, there are some free video editing software like DaVinci Resolve or Shotcut you can use to do the blurring.
Here we list the Adobe Premiere as an example.
Step 1. Import your video.
Step 2. In the project panel, right-click on the video clip and select “New Sequence from Clip” to generate a sequence for your video that matches the settings.
Step 3. Duplicate the video layer.
Step 4. Use the Gaussian Blur filter.
Step 5. Adjust the blur settings.
Step 6. Make a mask for the faces.
Step 7.Track the mask (optional).
Step 8. Fine-tune and preview.
Step 9. Export your video.
Conclusion
To sum up, many face-blurring alternative techniques are available, but we’ve shortlisted the best options for you here. What makes this option unique is the extensive editing features that not only allow you for facial blurring but also error correction, color adjustment and quality enhancement. Each tool is endowed with unique features, alongside their pros, cons, and pricing structures. Think about which tool is best for your editing needs, your level of expertise, and your budget. These features will let you process your photos, store them safely, and stay private in a convenient manner.