
Have you ever found that we took a photo of beautiful scenery but only to find that the color of the photo changed?
Have you ever been disappointed that the printout photos didn’t match what is displayed on the screen?
Are you confused that the same photo looks different on different devices?
The tricks are the background, lighting and camera settings. To solve these problems, it is recommended to color correct photos.
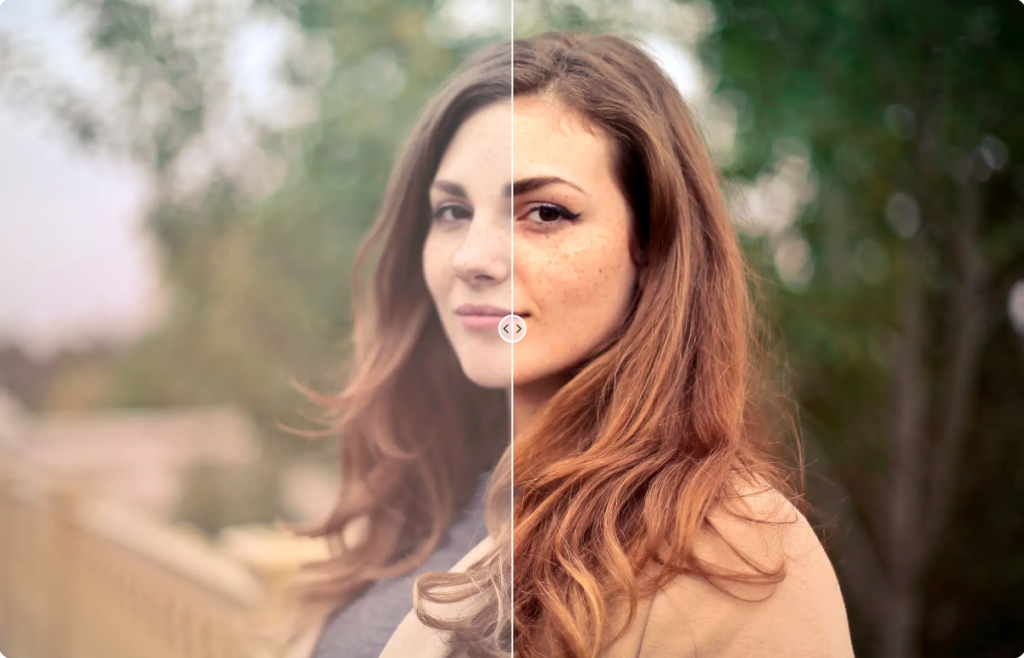
Color correction is a common step in post-editing photos, which refers to balancing out colors and recovering the accurate colors of the original scene to the largest extent. In this passage, we would talk about some basic knowledge and how to color correct photos. Even if you know nothing about photo editing skills, there is also a user-friendly and automatic correcting tool for you.
What is Photo Color Correction?
Color fix involves several aspects like exposure fixing, saturation, contrast, lights and shadows. It is even necessary to color correct black-and-white photos.
We all heard of warm and cold light. It is not simply a kind of feeling, but related to light temperature which influences the difficulty of color correction.
Sunshine in the early morning (right after sunrise) and at dusk (right before sunset) would reflect a yellowish glow, which is called warm light.
Daylight on cloudy days would generate blue hue in photos and produce cool-toned color, which is called cold light.
Electric lights also change color temperature. It is not easy to distinguish between light bulbs labeled Daylight, Warm White or Cool White with bare eyes. However, if we take pictures under these 3 types of light, they would display different colors because the way our brain filters colors varies from the cameras.
In a word, photo color correction aims to adjust the colors so it looks natural and reasonable just as what we see in the real world.
Why is Photo Color Correction Important?
As Cameras are getting more and more advanced, we can take clearer and more amazing photos. However, cameras save photos as RAW files which seem less saturated than JPG or PNG pictures when transferred to the computer. In this case, color fixing is necessary to make them look more real.
Secondly, sometimes the camera setting might go wrong, thus shooting unqualified photos. Photographers would color correct photos instead of discarding them.
Additionally, color correction is necessary for product pictures. Color plays an important role in attracting customers to browse and place orders. Once the product color displayed online looks different from the real one, there would be a misunderstanding and even complaints.
Last but not least, color balance is the basic step of retouching photos, setting the foundation for further color grading.
How To Color Correct Photos?
Many photographers hold the opinion that color correction is only designed for expertise. That’s not the truth. With the development of machine learning, AI tools could also finish the complicated process with one-button operation, which is extremely friendly to beginners. Next, we are going to explore traditional manual and automatic color-fixing methods.
Manual Color Correction
Manual color fix requires certain basic knowledge of color matching and photography, so you can tune the color to a suitable level. If you are confused about the terms and settings in your desktop or mobile software, just pay attention to the following aspects.
Saturate/Desaturate
A picture contains more than single color. Color balance means there should be stronger and weaker colors within the frame. For example, if you want the tree greener or the flowers more vivid, increase the saturation. If you want the background darker and less attractive, reduce the saturation.
Color saturation means the color intensity of a photo. By increasing saturation levels, the color becomes sharper and more vibrant. By reducing saturation levels, the color gets mute or even pale. The more saturated the picture is, the more vivid and dynamic it will be, but remember to keep it at the proper level. Professional photographers tend to saturate subjects and desaturate shadows to make the whole frame look comfortable. Painters used to adjust saturation by adding complimentary colors and tuning the portion of each color. Now, things become easier. Besides presets in cameras, post-editing tools also allow users to tune saturation through the following features:
Saturation slider: adjust intensity of different colors
Hue: change the color value on palette
Photoshop sponge tool: saturate or desaturate
Levels/Curves: create highlights and shadows
Adjust Shadows, Highlights and Mid-tones
A natural-looking photo should be of color balance among shadows, mid-tones and highlights.
Shadows refer to dark areas when taken in a poor lighting environment. They not only cover details on the image but also fail to highlight your main subject.
On the contrary, highlights indicate the brightest areas in the photo. Supposing that the photographers want to focus on a certain subject, they would project enough light on it. A good photographer should be experienced in the intensity of light in case of overexposure.
Mid-tones mean the neutral areas which are neither too bright nor too dark between shadows and highlights.
This color correction method is available in many mainstream editing tools. For example, there is a Shadow/Highlight command in Photoshop, highlight and shadow sliders in PhotoWorks/Fators, etc.
Apply the Brightness/Contrast
The Shadow/Highlight command does not simply darken or lighten a photo. In order to adjust overall tone range, we can use a contrast slider. Brightness/Contrast applies nonlinear changes to the image. That is to say, all pixel values would be shifted along the curve, which causes loss of image details. Please make sure to move the slider bit by bit in case of over-adjustment and image deformation. We don’t recommend sacrificing the image quality to fulfill color correction.
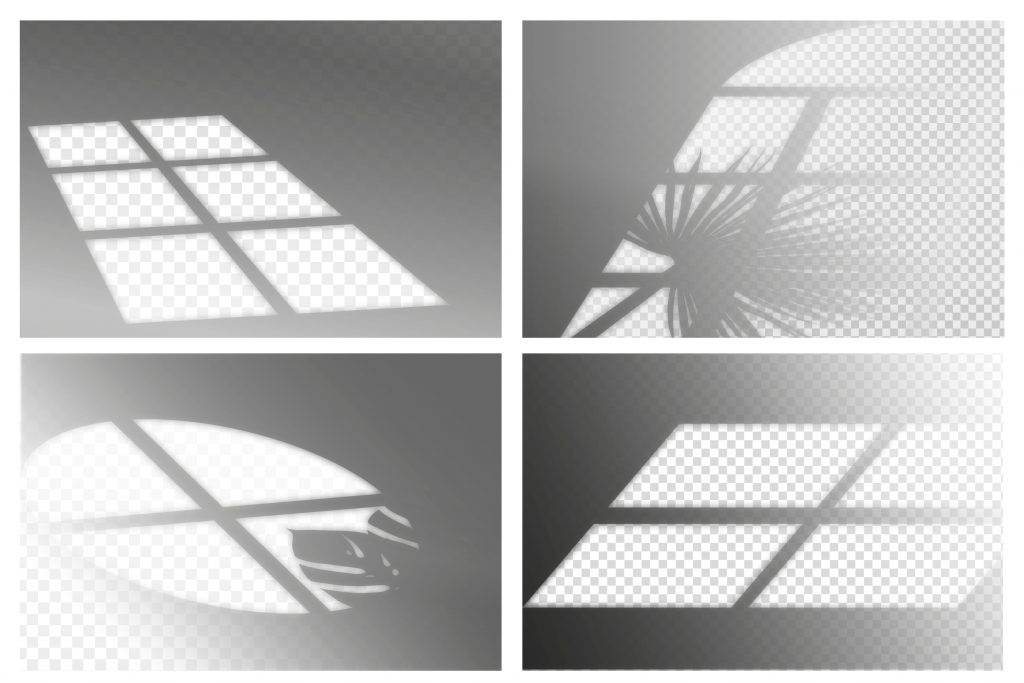
Apply Masks and Vignettes
The tips above are overall adjustments within the frame. For better effect, you can tweak specific areas. Masks and vignettes are another common skill to color correct photos. Masks refer to iris-shaped circles with harder edges. For example, if you want the subject’s eyes slightly pop, you can apply a power window or a mask around the eyes so that it becomes brighter and more standout. Vignettes mean darkening the edge, creating a suspenseful and mysterious feel.
Easy Guide on Color Correct Photos on Photoshop
Photoshop is an advanced tool, but there are still some basic settings to get started quickly.
Go to “Filter-Camera-Raw Filter”. There pops up an interface where you can adjust exposure, contrast, highlights, shadows, saturation, etc.
For more precise correction, you can also visit the “Image” on the top bar where you can find Hue and Saturation, Auto Corrections, Auto Contrast, etc.
Automatic Color Correction
The correction quality depends on the tool you choose. For non-professionals, a basic-level or automatic color fix tool is more recommendable.
Offline AI Program
Considering the real needs of photo editing novices, PhotoWorks is equipped with “Auto Correction” feature in the Enhancement module which automatically brightens dull color, adjusts exposure, creates contrast and distinguishes highlights and shadows. While moving the slider left or right, the upper histogram will change accordingly. Even color distribution means color balance is done.
Online AI Program
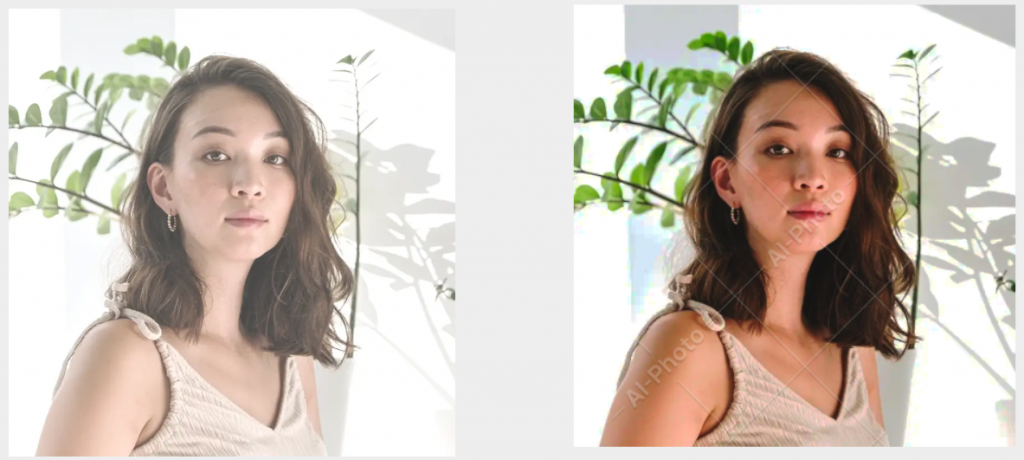
Storage space is one of the most concerning problems today. Photo and video editing software usually take up far more space than others. That is why many people are seeking online editors. AiPassportPhotos is one of the top-rated examples of AI color correction programs.
The built-in deep learning algorithms would automatically go through the recognition and adjustment procedures once the photo is uploaded. Intelligent modules analyze the photo and decide suitable values of exposure, contrast, highlights and shadows, which saves users the trouble of looking for proper values of each aspect.
Difference Between Color Grading and Color Correction
Color correction is a process of editing to correct differences between what is actually seen and what is displayed. Adjustments must comply with the real scene.
Color grading is a process of recreation, which is related to mood, atmosphere and style. The results could be artistic, real or hyperrealistic. Whether is color looks realistic or not does not really matter. It depends on what you want to convey, such as warmth, happiness, sadness, etc. Color grading is usually applied to a series of photos with similar subjects and lighting so as to make the whole collection balanced and cohesive.
We can say color correction makes photos look like what they should be while color grading makes photos look like how you want them to.
Summary
Judgment of perfect photos varies from person to person. When it comes to photo color correction, we have to avoid either excessive or insufficient adjustment. The key to creating high-quality photos is to carefully learn about the techniques we mentioned in this passage and practice makes perfect. If you have no confidence in manual tuning, start with the automatic color fix tools first and cultivate an understanding of color balance.