
When you dress beautifully and go out with your friends, whether it’s from a crowded coffee shop or park, you will take many lovely selfies and group photos with others. But what if you don’t want to let others know where you are when you post these beautiful photos on Instagram, YouTube or Twitter? Here the blurring background, a common technique, may do the trick for you, keeping the focus on the most important part of the portrait photo and removing the hard lines and distracting details in the background. From some professional photographers, while you usually want your subject to be tacky sharp, other parts of the image being blurry will support the subject and make your image more impactful and create a dreamy effect. Let’s see how we can do that.
Approach 1: Blur Edges with Adobe Photoshop
There is no doubt that blurring edges with photoshop is so beneficial, enjoying a lot of popularity in recent times due to its sophisticated results and easy useability. To blur the part of your background in Adobe Photoshop, you can use the Blur tool, which is in the Filter menu. What’s more, for those who have high demands on photo results, you can use effects in the Blur Gallery to blur a background in Adobe Photoshop, which provides a variety of powerful blurring tools and effects, including Field Blur, Iris Blur, and Tilt-Shift tools to choose from. You can use all of these to blur the background and create more excellent blur effects. Here’s a general process to follow:
● Select and open the image you want to blur in Photoshop.
● Create a duplicate layer of the background by right-clicking on the Background layer and selecting Duplicate Layer.
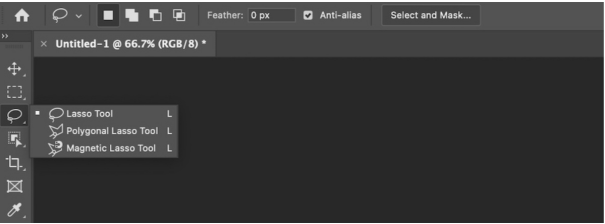
● Use a selection tool, such as the Lasso tool and Marquee tool, to select the part of the background that you want to blur. Go to Filter > Blur and choose the type of blur you want – Guassian Blur, Smart Blur and so on.
● Adjust the intensity of the blur effect you want to apply by using the Opacity option in the Layers panel.
● Once you are satisfied with the blurring results, save the image by going to File > Save As, choose the desired format and select a position.
Photoshop is one of the top apps for blurring edges, but we need to subscribe and pay for it monthly after a 7-day free trial. This is not a good choice for those who don’t use Photoshop very often. In this case, we will take you through some other impressive types of software that help do the trick, unblur images online and transform your images into pieces of artwork in a second.
Approach 2: Blur Edges with Canvas
You won’t have as many options with Canva as you would with something like Photoshop. Tools such as layer masks and filters would make a task like fading the edges of a photo a breeze. Canva has a ton of pre-made gradients that you can use in your projects. If set correctly, these pre-made gradients can give off the effect of blurring the edges of your photo. However, that doesn’t mean doing this in Canva will be difficult, it’s actually pretty easy.
● Select and upload the image you want to blur the edge on your canvas.
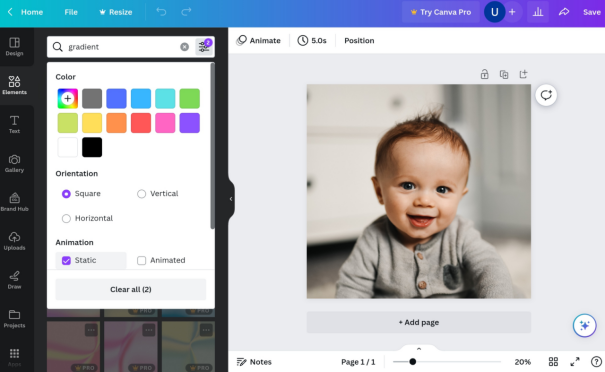
● Click the Elements tab on the left toolbar. In the Search bar, type Gradient Transparent.
● Select a gradient and use the side handles of the bounding box to extend either side of the gradient. (Extending the side with solid color will add more color to your gradient while extending the side with transparency will add more transparency to the gradient and subtract from the color. )
● Once you are satisfied with the gradient color, move your gradient into place.
● Select Gradient to reveal the Mini Options bar. Click the Duplicate button to copy and paste a copy of your gradient onto the canvas.
● Keep duplicating and lining up new copies to create a stack of gradients. It can take 8 to 15 copies to get the effect you’re going for.
● If you want to fade the edges of your entire photo, repeat the same process for each of the other edges of the image.
The other way you can blur the edges of a photo is with Canva’s Blur app. Blurring the edges of your image with the Blur app can be faster than the gradient method and give your photo a cool-looking feel. But you need a monthly paid version of Canvas. It is available on Macs, Windows, Android and iPhone.
Approach 3: Blur Background with AiPassportPhotos
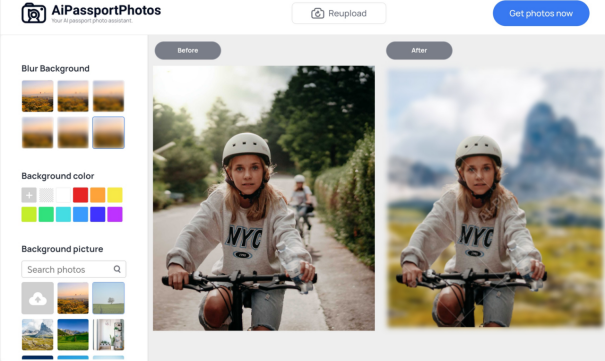
But for those who don’t want to spend a lot of time blurring their selfies, or those who need to deal with tons of product photos, trying to grab your potential buyer’s eyes with clear and focused images and let your product stand out in the market. This way, you will find that a single click blurring flashy or cluttered backgrounds can save you time and effort. Here we can try blurring photo background with AiPassportPhotos online seamlessly. Unlike other software that blurs edges, this online photo editor blurs the entire background directly with advanced AI technology that makes any image stand out.
● Go to the website and select Blur Background from the Product toolbar.
● Select and upload an image that you want to blur the background on AiPassportPhotos.
● One-click blur and wait for AI to process your photo.
● Once you’re done, you will see the contrast between unblurred and blurred photos, move on to further personalized editions, such as 6 different levels of blur effects available to choose from. You can use the blur intensity to create a focus on your portrait.
● If you are satisfied with the result, save a picture and select a location on your device.
AiPassportPhotos works like a real magician to blur the background in any picture, creating a blur effect as good as DSLR cameras by applying advanced AI technology. The image blurrer comes with an intelligent focus function to automatically identify which area to blend into the background. One-click operation can easily handle multiple pictures once in a while, saving time and effort. It is great for content creators to showcase their creativity and increase social media presence, and for photographers to complete repetitive photo processing tasks by using the picture blurer and spending less on camera lenses or expensive tools.
Conclusion
Background blur is an excellent tool to help draw attention to specific subjects in an image, which makes the picture less distracting. Most people want to blur background with the pictures in portrait photography, product photography, and other cases where the subject needs to stand out — however, it’s always a matter of personal preference. So hide locations and surrounding objects to protect your privacy now.