
Photoshop and other photo-editing software have become more widely available, particularly in these digital times. Photoshopping someone into a photograph is a common technique that allows for seamless image manipulation and element addition. This tutorial will show you how to properly photoshop someone into a picture with just a few simple steps, whether your goal is to bring a distant buddy into a group photo or create a fantasy setting with a celebrity.
How to Photoshop Someone into a Picture
Photoshop is powerful enough to cope with various image editing problems. Of course, adding someone to a picture is also a piece of cake with the help of Photoshop. However, the software is not easy to use for those beginners with little photo editing skills. But don’t worry, check out the step-by-step guidelines here to learn how to add a person to a photo in Photoshop.
Step 1. Launch the Adobe Photoshop software and open the image with the person you want to add to another photo.
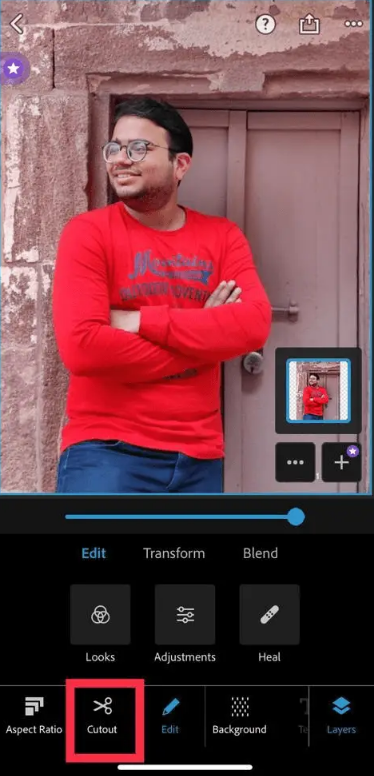
Step 2. Cut out the person with the object selection tool in the side toolbar.
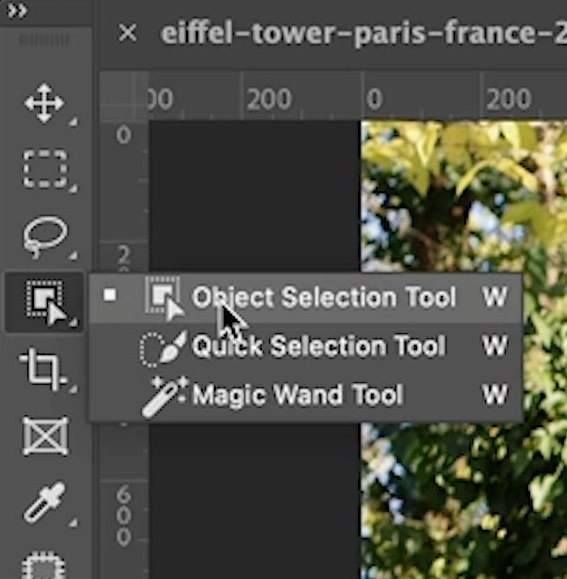
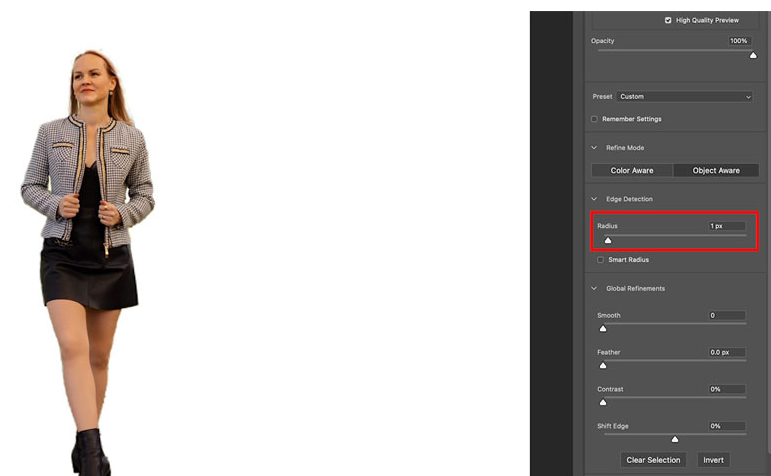
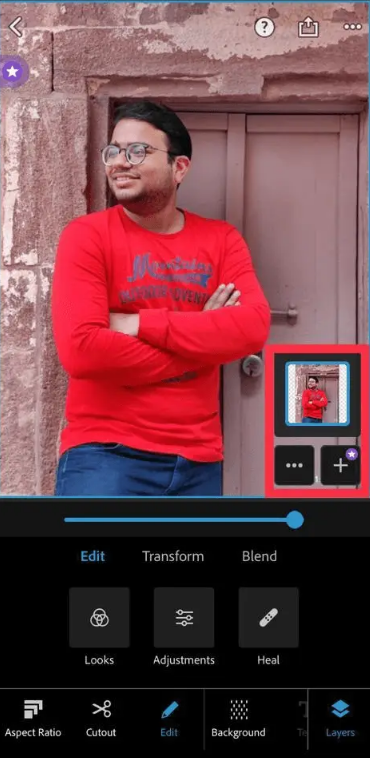
Step 3. At the top, select Select and Mask. Here’s where we improve the selection edges. To get started, set the radius to 1.
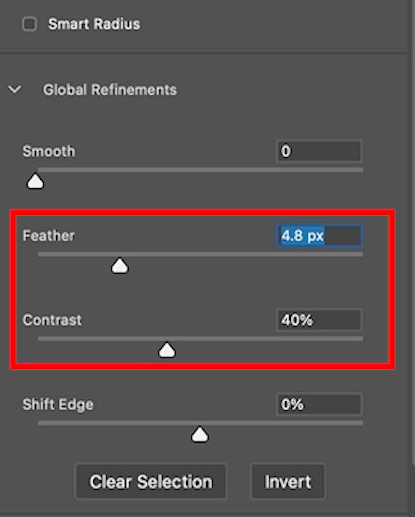
Step 4. Add some feathers and contrast to smooth out any jagged edges.
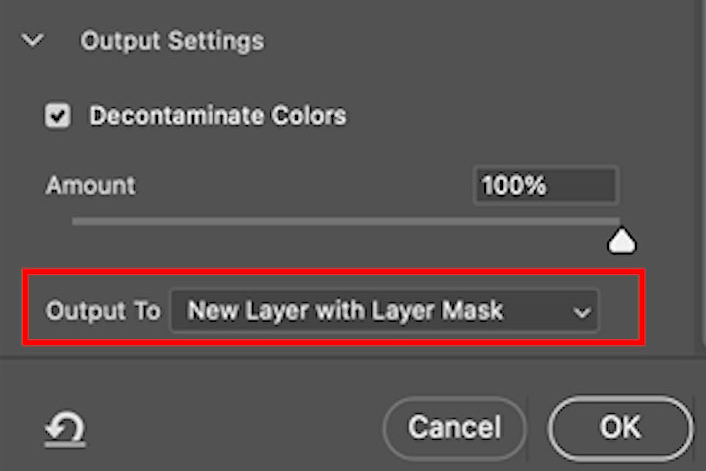
Step 5. Activate the color decontamination feature and select “New Layer with Layer Mask” from the output.
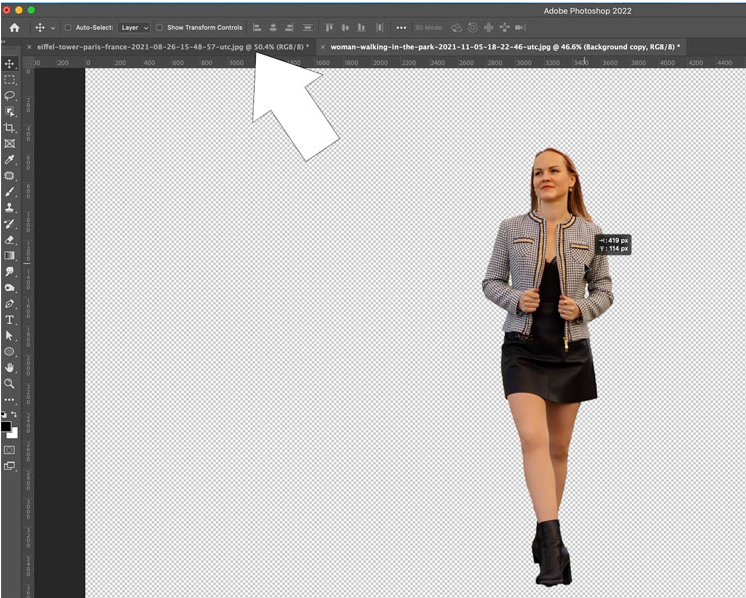
Step 6. Select the active move tool (V key). To move a picture up to the tab of the image we are moving it into, click and hold the picture. Hold the picture until it opens. Move the pointer to the center of the image and release it.
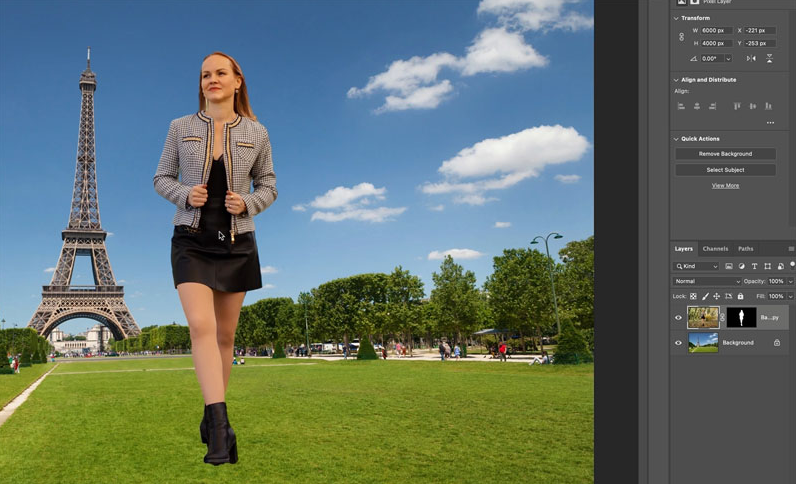
Step 7. There will be two layers now. The new layer must be made to match the background.
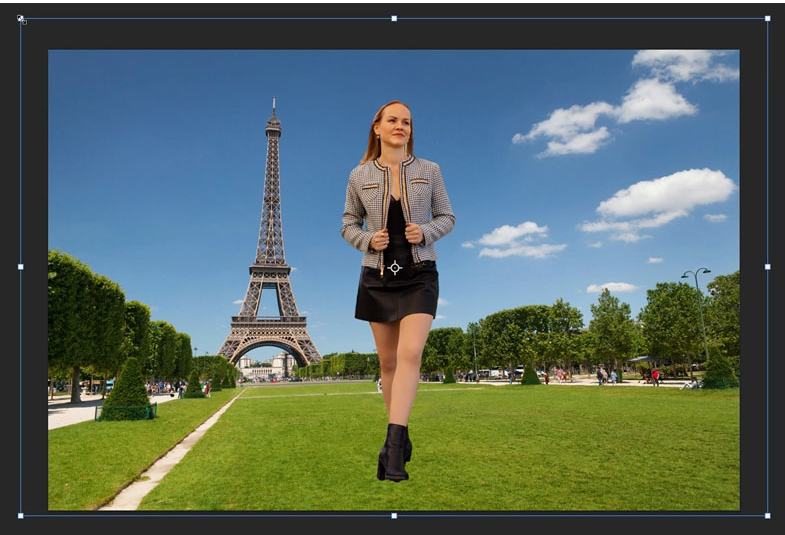
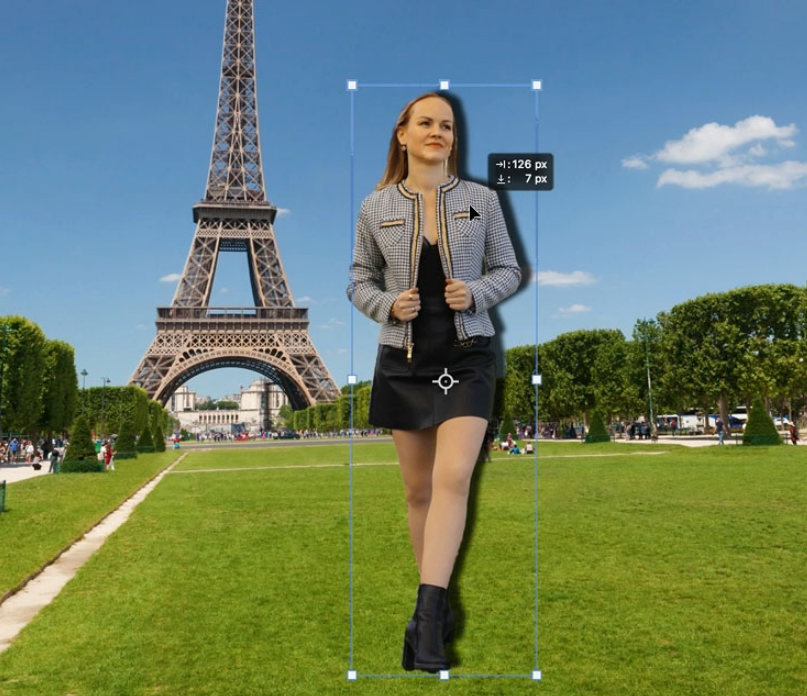
Step 8. Press Cmd/Ctrl+T for Free transform. Choose Flip Horizontal. Then zoom out the portrait to adjust the size. Then press Enter to apply the changes.
Step 9. The figure against the new background has distinct color tones and saturation right now. Now let’s get this fixed. Verify that the person’s layer is the one that is active right now. Pick Neutral Filters under the Filter. Click the Harmonization filter.
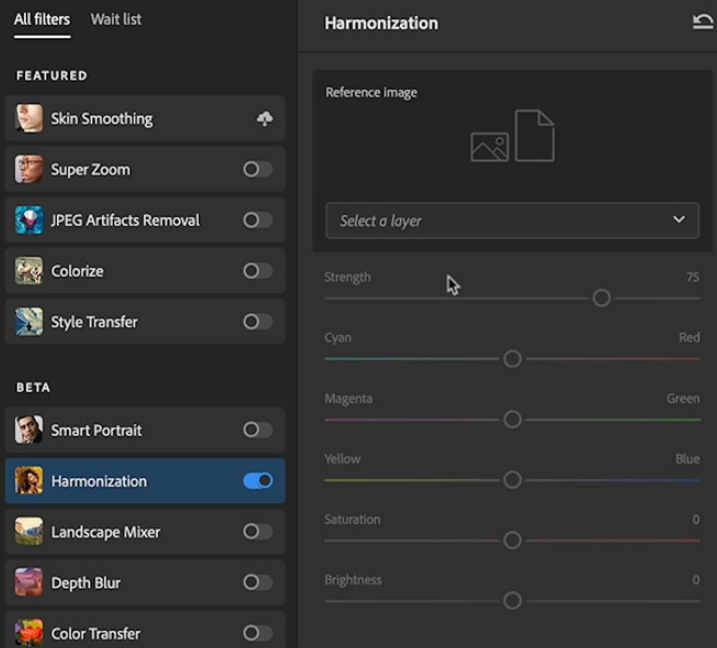
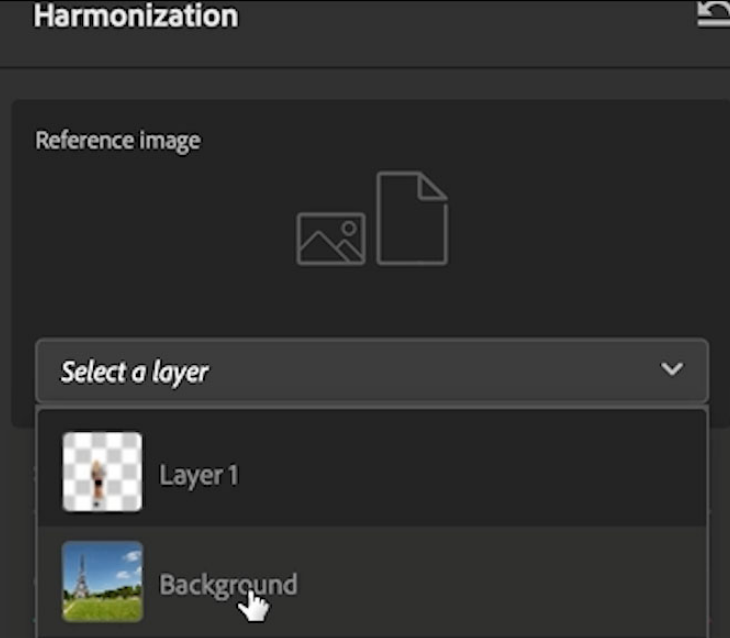
Step 10. Click Select a Layer, then choose the background. In this way, you have balanced the color of the background and the person.
Step 11. At this point, the figure appears to be hovering in midair. Adding a cast shadow is a crucial step. This shadow works its magic to give the impression that the subject of the picture is actually there and not merely frozen in time. Select Drop Shadow and FX. To alter the shadow’s softness, adjust its size.
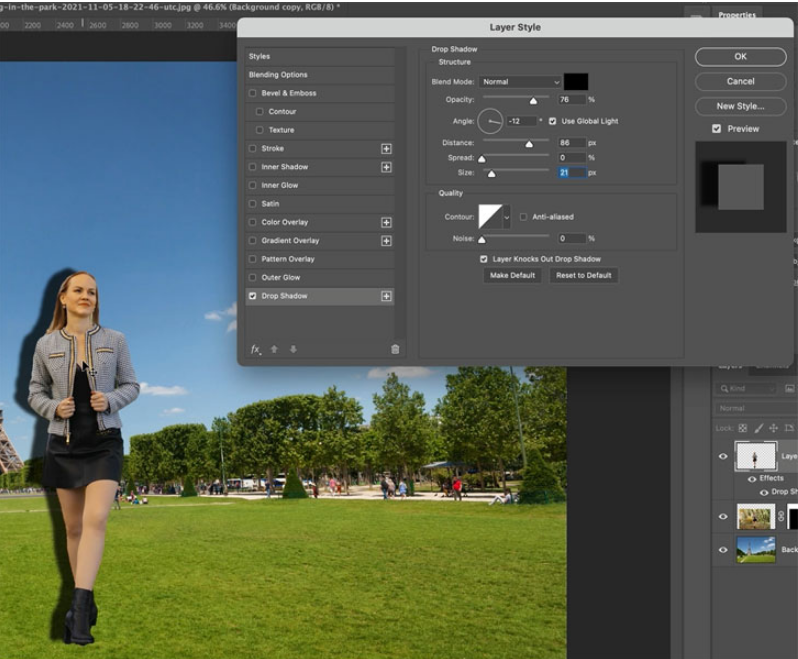
Step 12. In the layers panel, right-click on the word FX to split the shadow as a separate layer. Select Generate Layer. You will now have access to a manipulable independent layer. Ensure that the Shadow layer is chosen. Select Ctrl/Cmd+T to shape it.
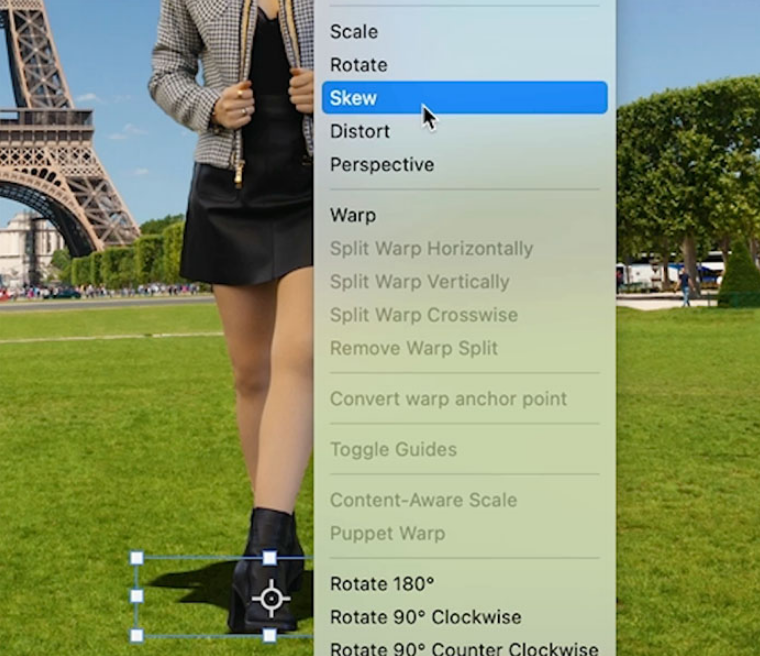
Step 13. To make the shadow appear to match the photo, drag down on the bounding box. Use a right-click to select Skew. To adjust the angle, drag the shadow’s top.
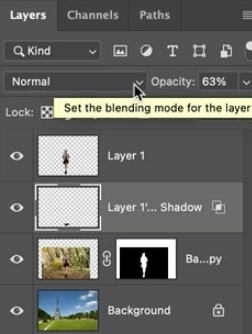
Step 14. Lowering the shadow’s opacity to match the image is the last stage. Select the shadow layer and change its opacity. Here, 63% works quite well.
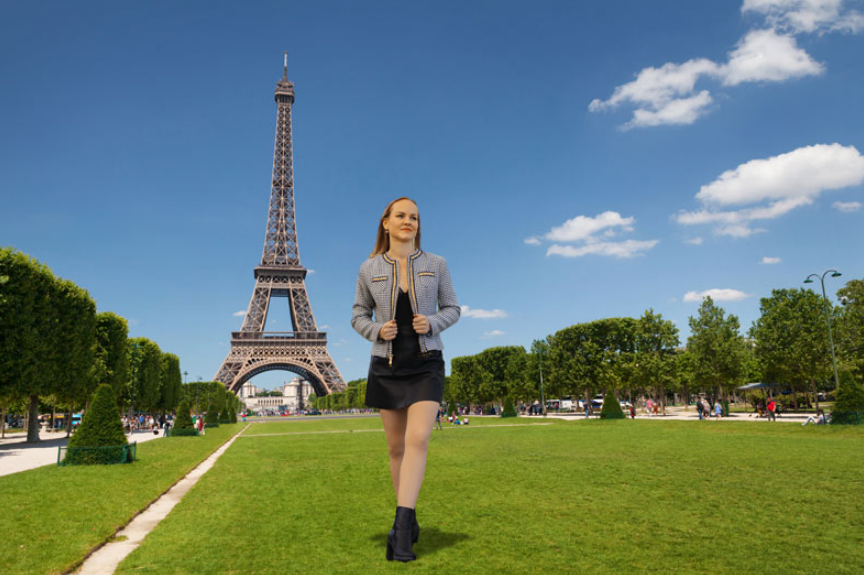
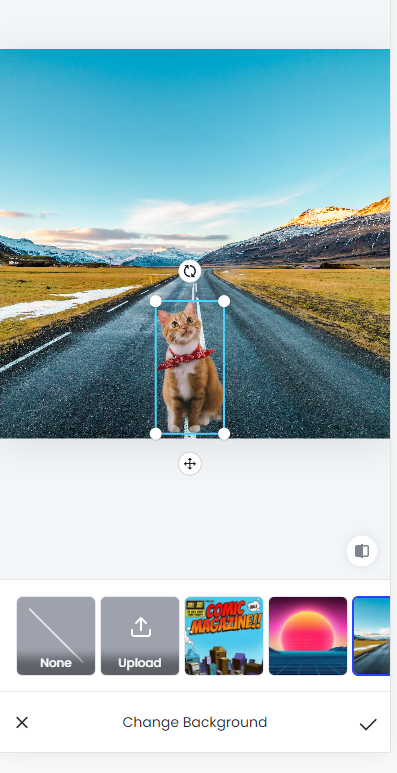
👀 The result of photoshop someone into a picture:
How to Photoshop Someone into a Picture on iPhone
Apart from the Adobe Photoshop software, several useful apps allow you to add a person to a photo. Check the three proven ways to photoshop someone into a picture in the following.
iPhone Built-in Feature
Numerous new features have arrived on your iPhone with the release of iOS 16 by Apple. On iOS 16 and later, you can cut out any person and object from a photo easily. Then make it a sticker to paste on other images. Check how to use this new feature on your iPhone to add someone into a picture for free:
Step 1. Open the Photos on your iPhone and target the image you want to edit.
Step 2. Press the person or object you want to cut out for seconds. Then choose the Add Sticker option.
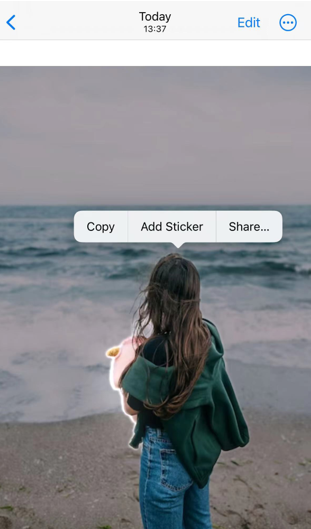
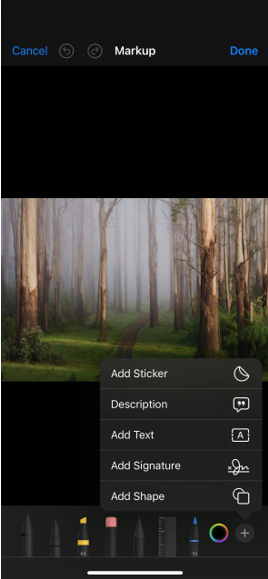
Step 3. Open the image you want to add the person to. Click Edit, then choose the Markup icon and select Add Sticker.
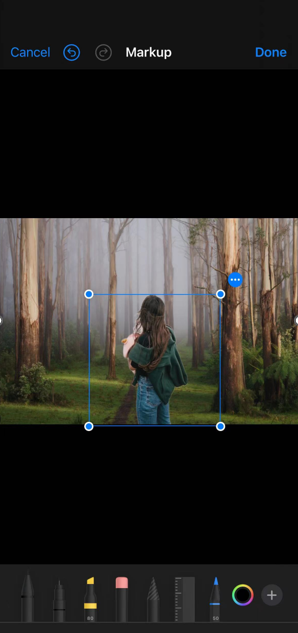
Step 4. Add the sticker you cut out before and adjust its size. After that, press Done to finish.
Photoshop Express
Photoshop Express is the iOS app version of Adobe Photoshop. With it, you can directly photoshop someone into a picture. Here’s how to use Photoshop to add a person to an iPhone photo:
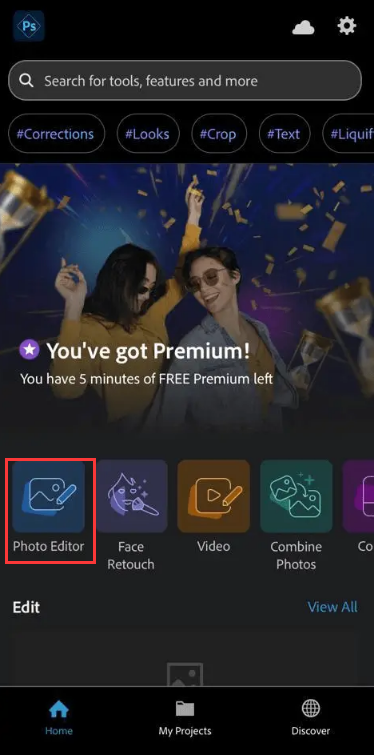
Step 1. Open Photoshop Express on your iPhone, then go to the Home tab and select Photo Editor. Add your image to edit.
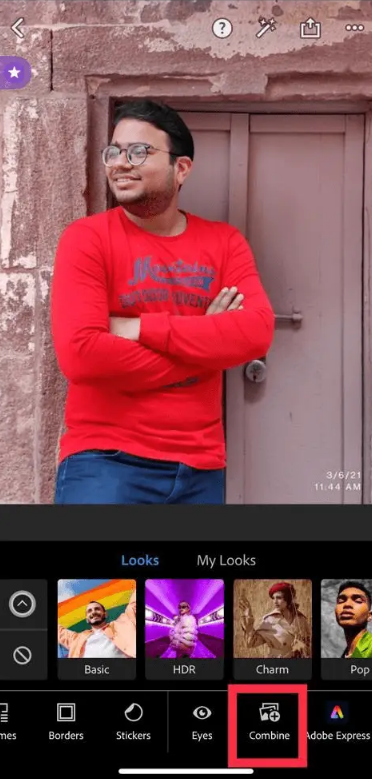
2. When the image opens, select Combine from the bottom menu by swiping all the way to the right.
3. A menu appears; choose Cutout from the drop-down list. Photoshop Express would automatically eliminate the background and separate the individual.
If you find that the Auto cutoff is not producing correct results, you can further restrict your selection by manually picking or subtracting the area.
Step 4. The person’s thumbnail shows up on the right; click the plus symbol at the bottom of it. Select the photo that you wish to include the individual in now.
You might tap and drag the thumbnail that appears above the individual to move it below.
Step 5. Save the file to your device by tapping the Download icon located at the top of the screen.
Fotor App
You may easily complete the task of cropping someone from a picture by opening the Fotor app. See how to include individuals in the pictures below.
Step 1. On your phone, download and launch the Fotor app.
Step 2. Locate and select the photo from your photo library for which you wish to remove the backdrop. Then wait for the background removal process.
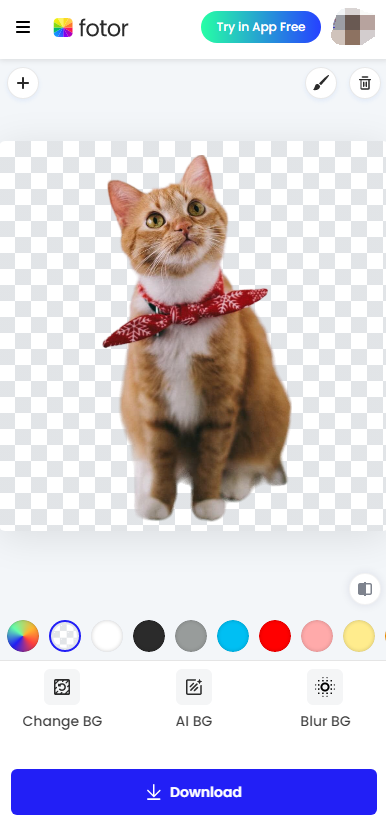
Step 3. You will see the transparent image after a short while. Then, select the change BG feature and set your chosen image as the new background. To achieve the ideal typography, you can change the person’s or object’s size and location.
How to Add Someone to a Picture without Photoshop
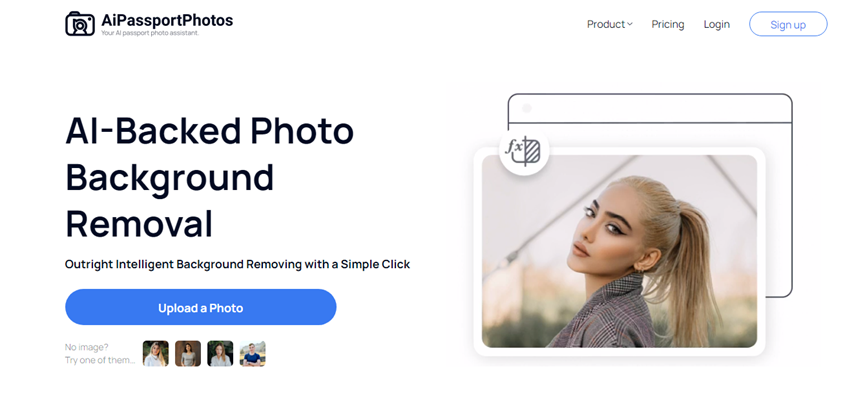
If you deem that the Photoshop software is too complicated to use, you can also try other easy-to-use tools to add someone to a photo. AiPassportPhotos is an AI-powered free photo background removal. You can use it to cut out the person and change the photo background.
How to remove background with AiPassportPhotos:
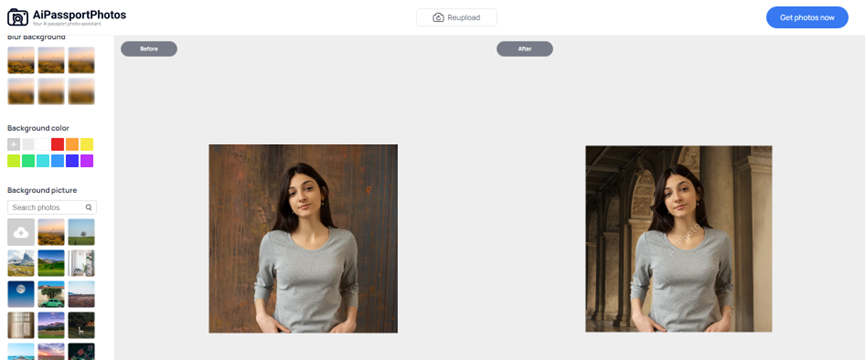
Step 1. Open AiPassportPhotos’ website. Then upload your image.
Step 2. Wait for the AI image background removal process. Then upload your image as a new background or select a default background.
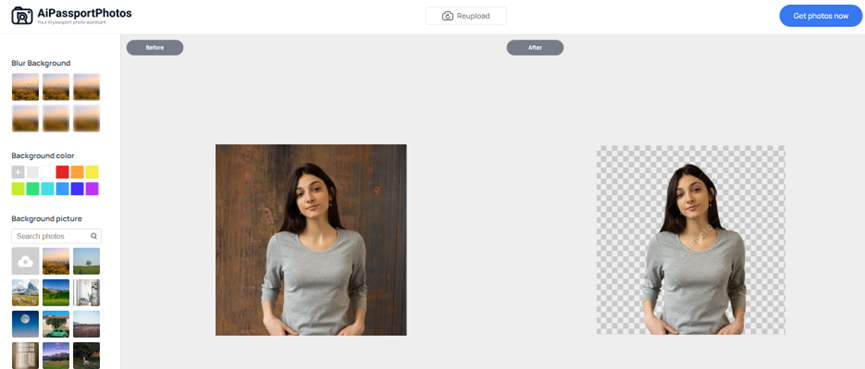
Step 3. Click Get Photos now to download the changed photo.
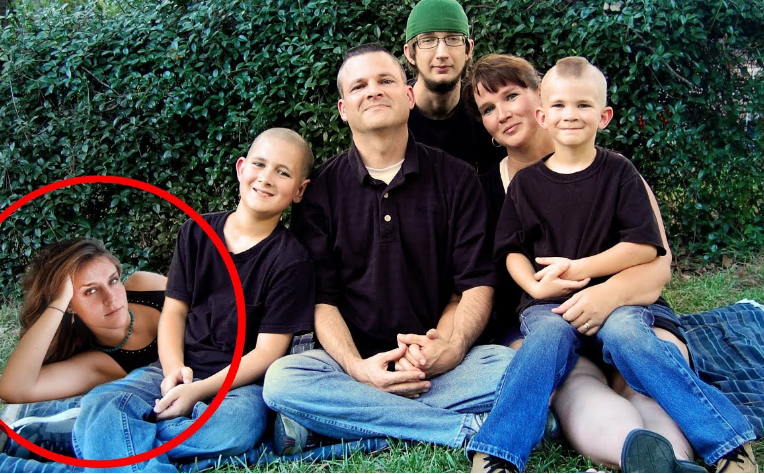
How to Add a Person to a Group Photo
Sometimes, we may need to add an absent person to a group photo. Photoshop can do that effortlessly. Just follow these steps to add a person to a group photo in Photoshop.
Step 1. Launch the Photoshop software and select the picture that contains the person you want to add to a group photo from the gallery.
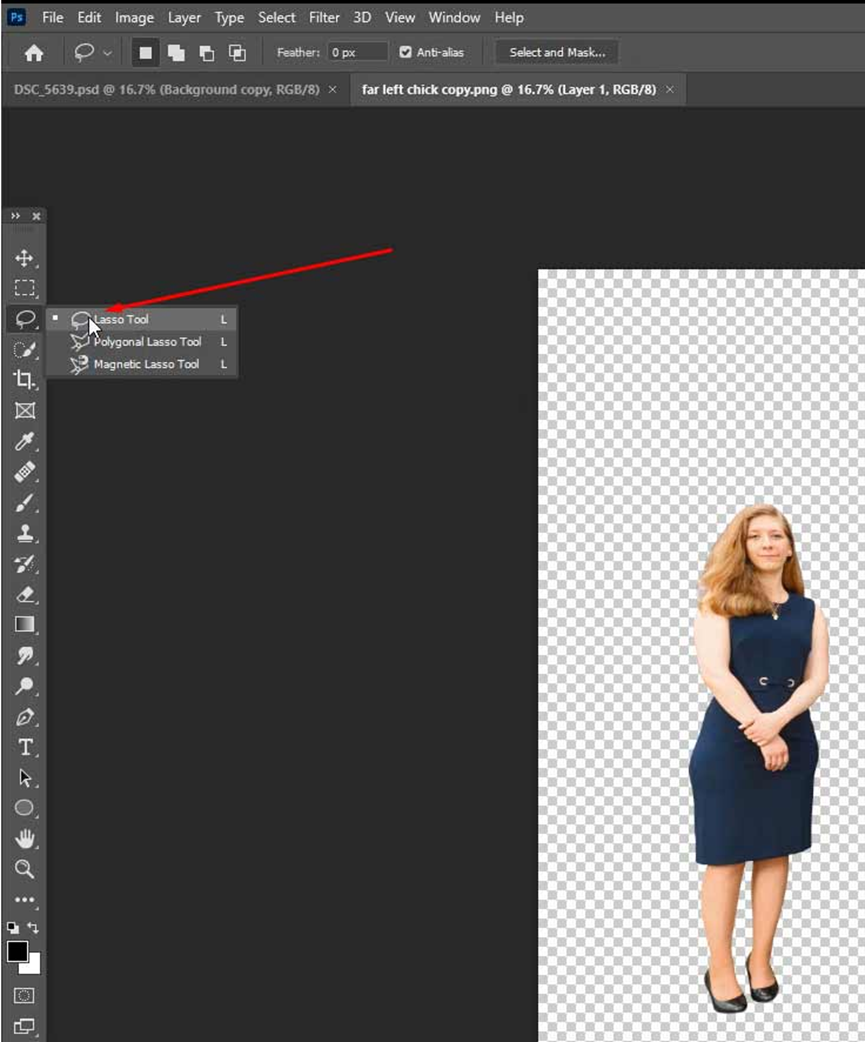
Step 2. You must first open the figure snapshot in Photoshop to remove the backdrop from the figure. Next, pick the Lasso Tool in Photoshop from the toolbar. Holding down the left mouse button, start at a location near your figure and loop around it numerous times.
Once you have drawn around the subject, the lines you initially drew will transform into highlight lines—dash lines that move lines across the subject’s body.
Step 3. Choose the Edit menu item from the drop-down menu at the top of the screen. From the pull-down menu, you will have the ability to copy. You now have to open the earlier group photo that you took. Please click on the image to pick it up after it has opened. After that, go back to the Edit menu and choose Paste from the drop-down menu that shows up.
Step 4. After choosing the figure layer, pick Free Transform from the drop-down menu under the Edit menu option. Holding down the shift key, click on the box’s corner. Then, drag the box inward to reduce the size of the figure.
Step 5. To make the figure look like it’s a part of the picture, remove the original backdrop that surrounds it. Select the figure layer by opening the layer pane. Press the button labeled “mask layer.” Next, choose the tool with a rectangle eraser on it—the eraser—from the left toolbar. It is about halfway down the bar.
Click the down arrow to adjust the brush size to about 60 or 70 pixels by sliding the arrow over or entering the new size. Additionally, set the hardness to 0 at the menu’s bottom. At this point, you may mostly eliminate the excess backdrop encircling your figure. Always want to approach the figure as closely as you can without removing any of it.
Step 6. To isolate the figure, you’ll need to remove the remaining background. Adjust the brush size to a value between 20 and 30 pixels by adjusting the eraser settings at the top.
The hardness must be raised to at least 50. When you’re done using your eraser, you can enlarge the image by using the + sign or the percentage slider located at the bottom of your window.
Step 7. Click the move tool at the top of the toolbar. Once you’ve clicked it, hold down the left mouse button as you grasp the layer of the isolated individual and drag it to the desired spot.
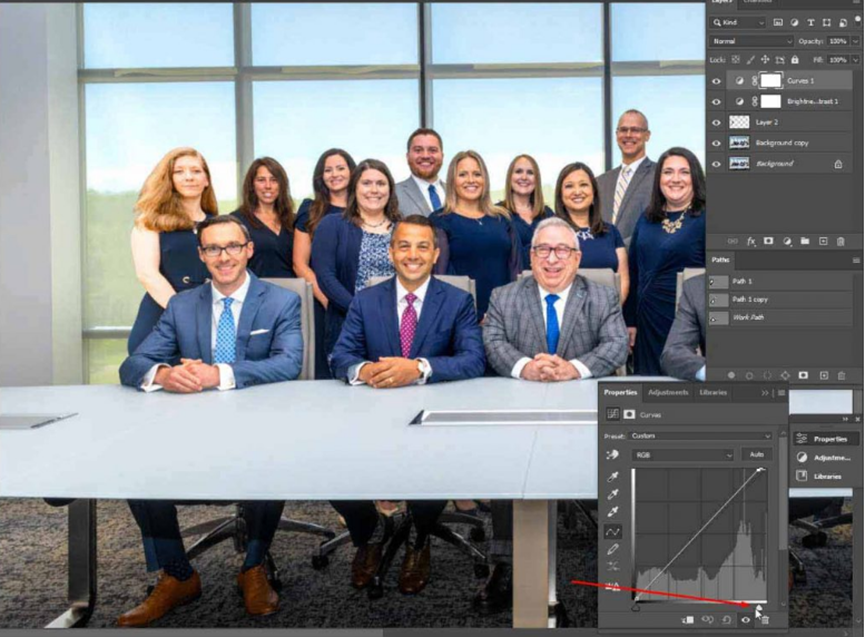
Step 8. The figurines should now match in color. Once the figure layer has been selected, click the icon next to the mask button at the bottom of the layer screen. A bicolored circle is on it. Clicking it will bring up a menu screen. A dialog window appears when you select the Curves option. It will be a square with a line through it on the diagonal. Select the midway, midway down, and midway up lines on the centerline.
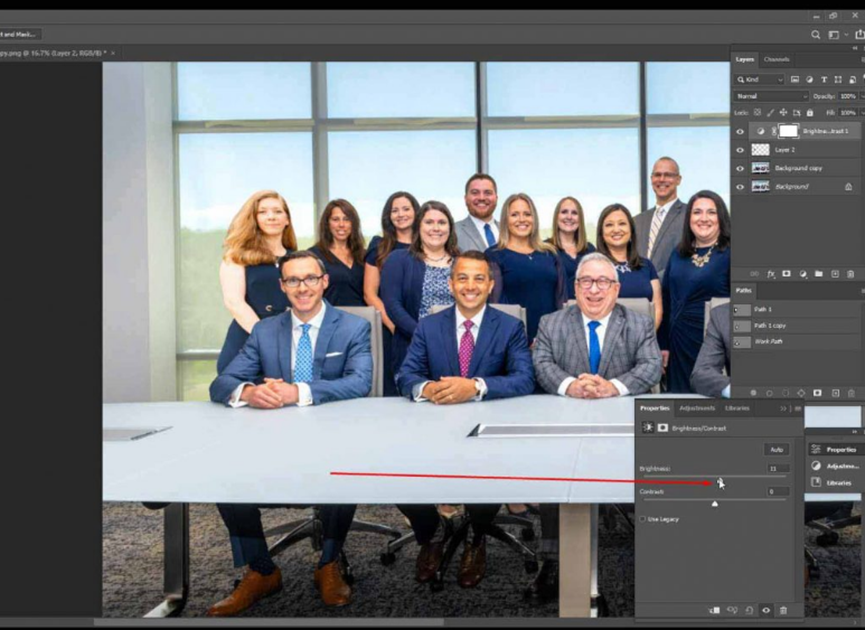
Click on each of the dots that appear to move the line. Play around with the levels in this selection. Light and contrast can be added or subtracted as you move the bars up and down. Adjust the layer until it has the same appearance as the group layer. If there is only a small difference between the layers, you can use the Image menu bar to change the contrast and brightness. Simply drag the lines forward and backward.
It can also be necessary to change the lighting in the original group photo. You may adjust it by selecting the same icon from the bottom of the screen when you go to the backdrop layer, and then do the same with the figure layer until the two layers are almost the same.
Step 9. Lastly, you need to balance the skin tones. Before continuing, confirm that your figure layer is selected. Press the identical bi-color circle at the bottom of the layer screen to select Hue/Saturation from the menu.
Brightness, Hue, and Saturation may all be changed via the screen. The highlight and lowlight colors will shift in hue. Colors on your screen can get brighter or duller depending on the saturation level.
The Bottom Line
In this detailed guide, we have shown how to photoshop someone into a picture effortlessly. As the most powerful photo editing software, Photoshop helps you cut out the person and paste it on other images with a realistic result. However, you can see that the steps are tedious and hard for beginners. Alternatively, you can select several effective tools, like AiPassportPhotos online, the inbuilt feature on iPhone, the Fotor app, etc. All of them can make a great result in adding someone to a photo. Just have a trial of these tools and change the background of your photo or add others to a group photo easily.