
4×6 is one of the most common sizes for printed photos. Resizing a photo to 4×6 is essential for printing standardized images like passport photos, social media snaps, or framed memories. However, improper resizing can lead to many issues, such as distortion, pixelation, or even rejection from the authority. This guide will introduce detailed instructions on a 4×6 photo size example and how to reduce 8×11 photos to 4×6.
8×11 vs 4×6 Photos: Size, Application & More
Before heading to the cropping tools, it is essential to figure out “How big is a photo 8×11?” and “What size is a 4×6 photo?”. Here is a comparison in terms of sizes and uses.
| Feature | 8×11 Photo (width x height) | 4×6 Photo (width x height) |
| Digital size (dpi=300) | 945 x 1299 pixels | 471 x 708 pixels |
| Physical size in inches | 3.15″ x 4.33″ | 1.57″ x 2.36″ |
| Physical size in cm | 8 x 11 cm | 4 x 6 cm |
| Physical size in mm | 80 x 110 mm | 40 x 60 mm |
| Aspect Ratio | 11:8 or 1.375:1 | 3:2 or 1.5:1 |
| Common Uses | Flyers, photo albums, postcards, scrapbooks, greeting cards | Passport photo, visa photo, driver’s license photo, profile picture, etc. |
3 Methods to Reduce 8×11 Photos to 4×6
To ensure photo quality and avoid distortion, resizing photos from 8×11 to 4×6 must be precise. It is common to do that with desktop applications, online tools, and mobile apps. This section will offer tailored solutions for different skill levels and scenarios.
Method 1: Using Photoshop (Desktop)
Adobe Photoshop is a professional image-editing desktop software developed by Adobe. With multi-purpose complicated panels, it is designed for advanced photo editing and designing. It can adjust aspect ratios, resolution, and composition at the pixel level without quality loss. Images are resized and cropped in a few steps.
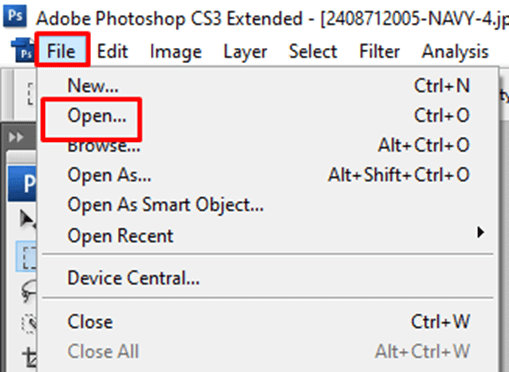
- Open Photoshop and click on the “File” option in the upper left corner and then the “Open“ in the drop-down menu to load your 8×11 photo. You can also press the keyboard shortcut “Ctrl + O” to select a picture from the local file.
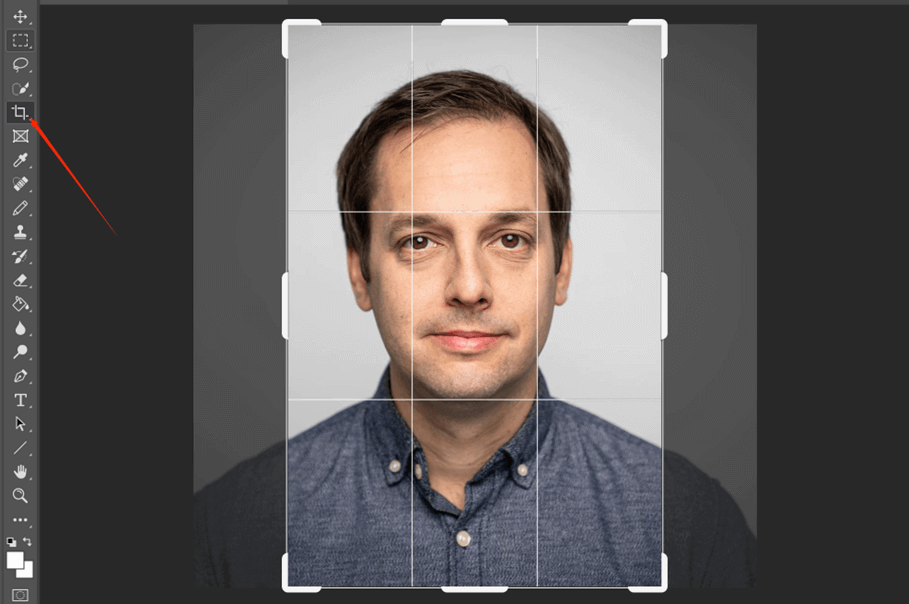
- Select the Crop Tool from the left side toolbar and the photo is framed with a crop box.
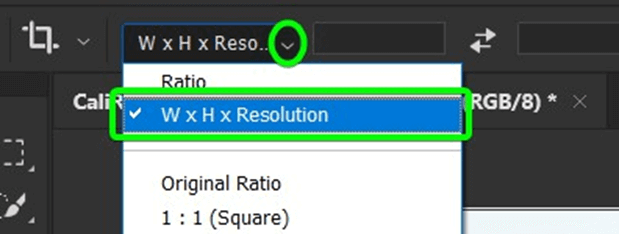
- Choose “W x H x Resolution” from the top menu. Then enter 4×6 photo in cm (4cm for width, 6cm for height) and 300 for resolution to lock the aspect ratio. Moreover, make sure not to check the box beside the “Delete Cropped Pixels”.
- Drag the crop boundaries to crop out the essential part, for example, the face and upper shoulders for ID photos.

- After cropping, press the Enter key to finish resizing. Click on the “File” option at the upper left corner and choose “Save as“ from the drop-down menu. Choose where you want to save the picture and choose JPEG or PNG as the file format.
Method 2: Free Online Tools
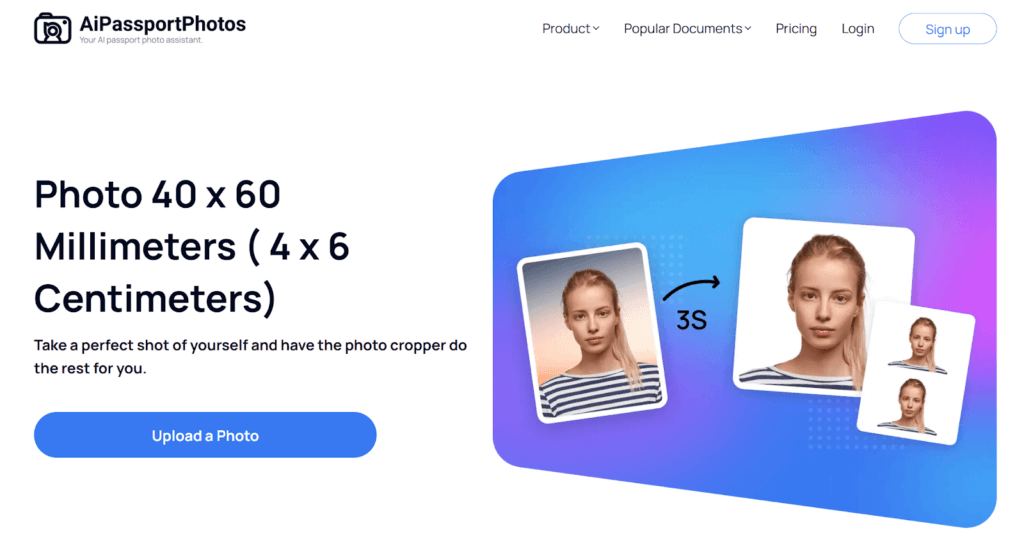
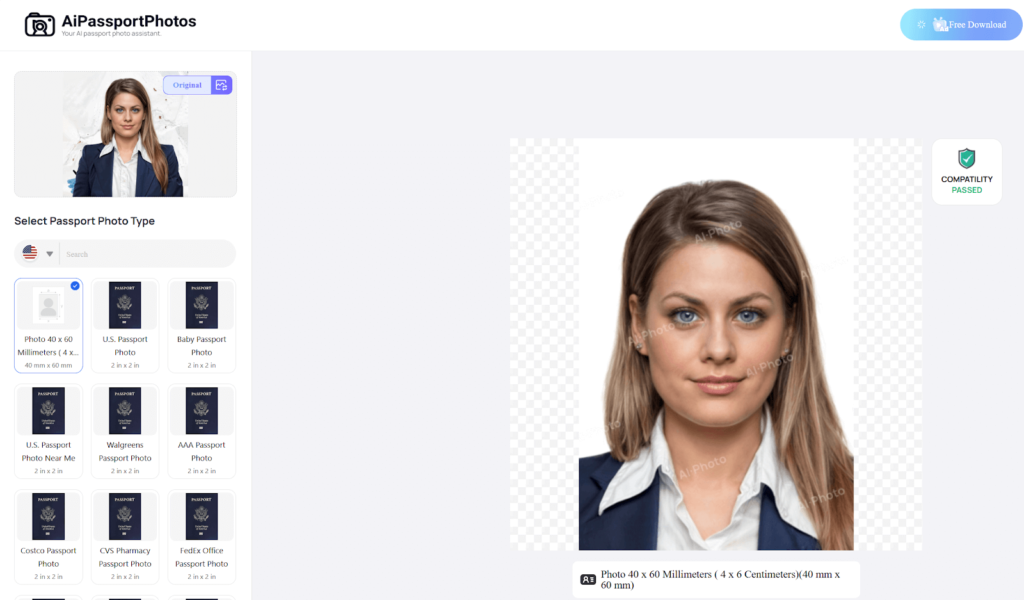
As AI technology develops, many automatic online tools are launched. They feature a more concise page and easier operation than Photoshop, which is more suitable for beginners and batch processing. Most importantly, it does not require complicated installation or charge fees. We will take AiPassportPhoto, equipped with a perfect passport photo template 4×6, as an example to introduce how to crop a picture.
- Visit AiPassportPhoto’s 4×6 Template Tool with either a computer or a mobile device and click on the “Upload a Photo”.
- Click on the “Open image” button and choose the 8×11 photo from the local file or drag the photo to the dashed box on the right.

- Wait for the tool to scan the picture and resize it to 4×6 cm. The whole process runs automatically and takes about 15 seconds, after which it will jump to the page below. If you are satisfied with it, click on the “Free download” button in the upper right corner.
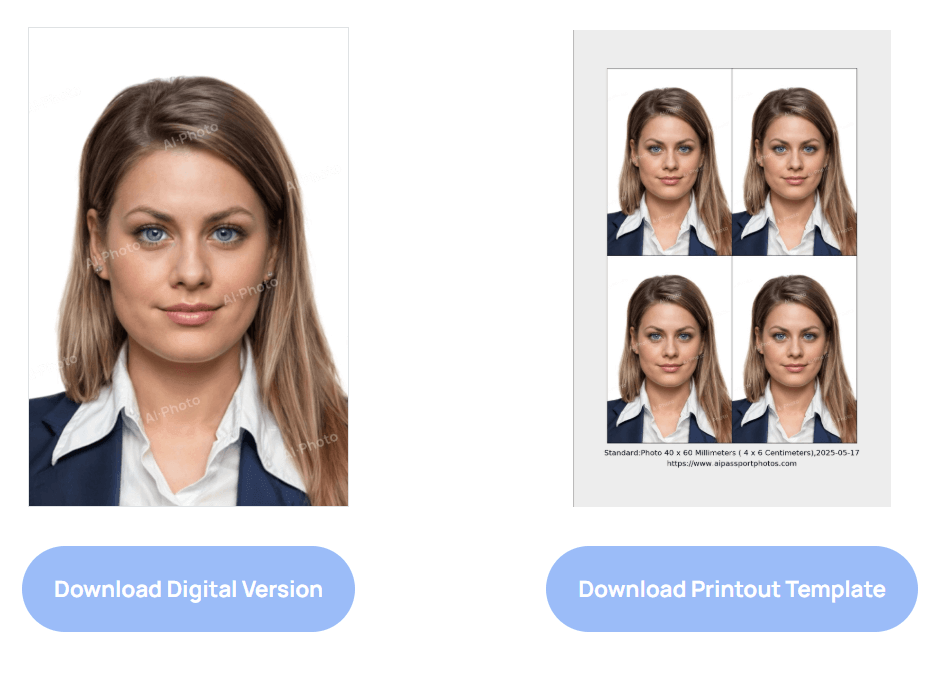
- A digital version and a printout template are available. Just choose the one that you need and save it on your device.
Method 3: Mobile Apps
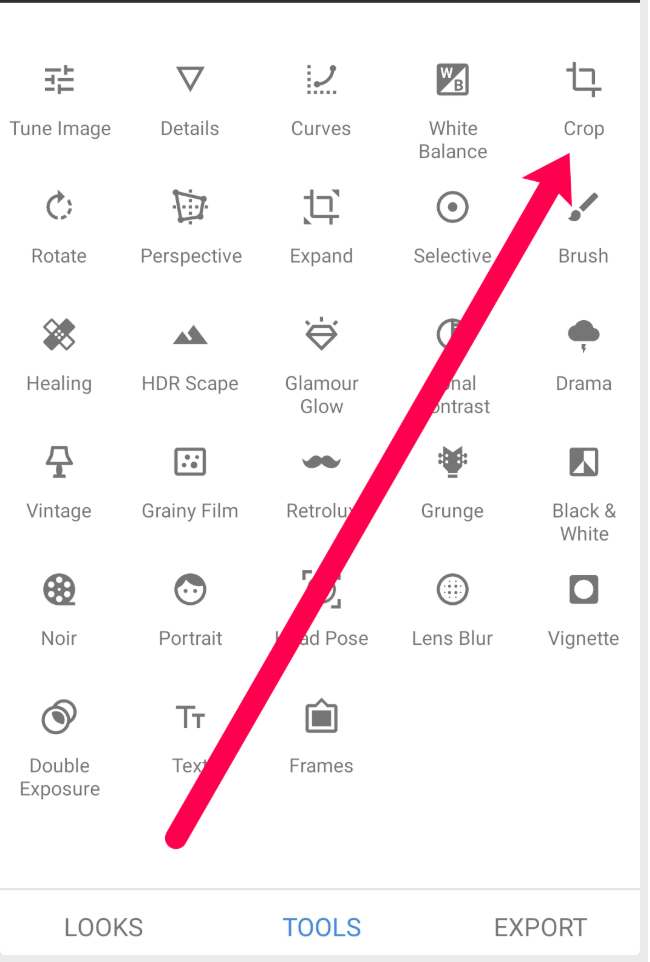
Compared with computers, mobile phones and tablets are more commonly used. Mobile Apps are more friendly and efficient, especially when you take photos with smartphones, you can edit the picture instantly. Snapseed, developed by Google, is a free mobile app offering powerful photo-editing tools, including cropping and resizing. The tool is compatible with both Android and iOS mobile devices. To make a 4×6 photo, just follow the steps below.
- Open the 8×11 image in Snapseed and tap the “Tools” at the bottom of the screen and tap the “Crop” function.
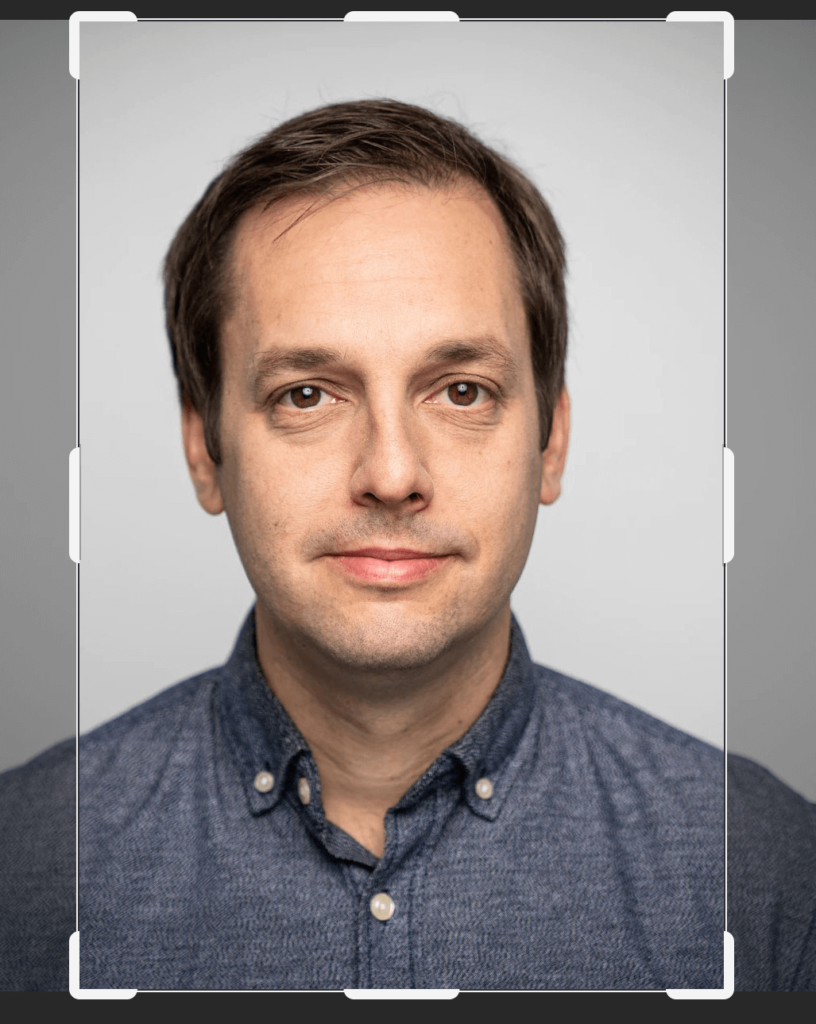
- Select 3:2 for Aspect Ratio, drag the crop boundaries to refine composition, and click on the checkmark at the bottom to confirm resizing. Finally, you might adjust brightness, contrast, and structure to generate higher-quality photos. However, please note that digital alteration is usually prohibited if the photo is used to apply for official documents, such as passports, visas, etc. Moreover, the 3:2 aspect ratio isn’t always equal to 4×6 cm, which means the results might not be suitable for those with strict size requirements, such as passport photos, visa photos, and so on.
Common Mistakes to Avoid When Resizing 8×11 Photos to 4×6
Resizing photos from 8×11 to 4×6 may seem straightforward, but minor errors can lead to blurry prints, distorted subjects, or non-compliant ID photos. To keep your resized 4×6 photos sharp, proportional, and ready for use, these common mistakes should be avoided.
- Wrong Aspect Ratios
The photo might be stretched or squished when changing an 8×11 photo to a 4×6 frame, thus leading to the wrong aspect ratio. It is suggested to set the 2:3 ratio in advance instead of resizing freely.
- Low-Resolution Outputs
Low resolution can result in pixelated photos or blurry prints, so remember to adjust the resolution, preferably 300 DPI for the digital version or 600 DPI for prints.
- Improper Background
ID photos require a clean background. Some rejected photos feature shadows or patterns behind the subject. Therefore, it is advisable to replace the background with a professional photo maker, for example, AiPassportPhotos.
- Missing Critical Details
Some details might be cut off when resizing a photo, such as ears, heads, or shoulders. To avoid this problem, make sure to check the official guidelines for the specific document and preview crops before saving.
- Wrong Paper Type
Photos printed on common print paper might fade, smudge, or damage easily. For commercial use or official uses, opt for glossy or matte photo paper to preserve vibrancy and detail.
- No Quality Checks
Pixelated edges, vague facial features, or alignment issues are easily ignored. It can be detected by magnifying the image in editing software to check sharpness and preview the post-edited result before saving or printing it out.
FAQ
Can I resize 8×11 to 4×6 without cropping?
No. They have different sizes and aspect ratios, so cropping is a must.
What’s the best paper type for 4×6 prints?
Professional photo paper is recommended to ensure color accuracy and durability. Either glossy or matte photo paper is acceptable.
How do I resize a photo to 4X6 on my iPhone?
Online tools (i.e., AiPassportPhotos) and mobile Apps (i.e., Snapseed) work on iPhone. Just follow the instructions stated above to resize a photo.
What is the easiest way to resize photos?
It is easiest to use automatic tools, like AiPassportPhotos or Snapseed, to accurately resize the photo.
How big is a photo 4×6?
It refers to a picture measuring 4cm in width and 6cm in height.
Summary
Resizing 8×11 photos to 4×6 is straightforward with the right tools. For professional photographers, Photoshop is the most versatile. For casual prints, free apps like Snapseed work well. For ID photos, AiPassportPhoto provides a qualified passport photo template 4×6. Just pick a suitable one according to your needs. Always verify dimensions and resolution to avoid reprints.