
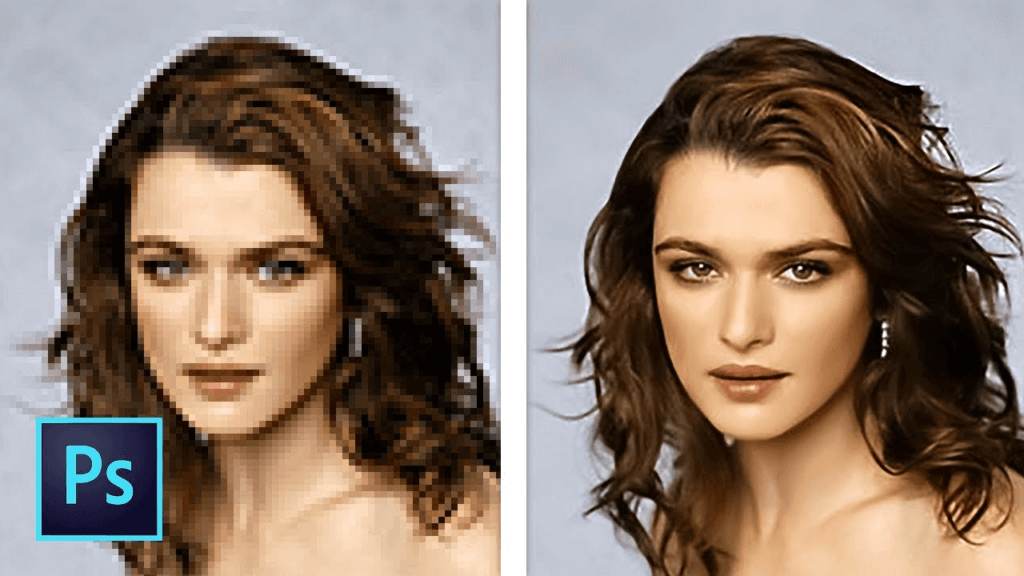
Sometimes you take a good photo, but the lighting is bad or it seems blurred. Many people want to fix this and make the picture clearer. You will be instructed on how to enhance the quality of photos in Photoshop in this step-by-step tutorial step by step. Even beginners can accomplish it and improve their images.
Benefits of Enhancing Photos Using Photoshop
Photos are not perfect. They are sometimes too dark, blurry, or lack color. You can simply enhance your photos in many ways using Photoshop. Below are the most significant reasons people use Photoshop to enhance photo quality:
- Repair low-quality images: Remove the blur and increase the sharpness to clear the image.
- Improve portrait: It brightens up faces, smooths the skin, and fixes lighting.
- Basic color and brightness correction: Adjusts tones and corrects underexposed or overexposed areas.
- Restore old photos: Fixes faded color and scratches.
- Professional look for web or print: High-quality, clear photographs create a stronger impression and are better for printing.
Essential Setup Before Enhancing a Photo in Photoshop
A good editing result depends on your good preparation. Follow these steps at the beginning to get everything in place to see your improvements turn out nicely and smoothly:
- Verify that your computer meets the Photoshop system requirements using the provided checklist. Its RAM should be at least 8GB, it should have enough free space, and it should have a supportive or latest processor for the best.
- It is better to run a higher operating system since this improves Photoshop’s performance.
- Access the Adobe website and get the latest version of Photoshop downloaded. Follow the onscreen instructions to install it.
- You’ll need to have an Adobe ID to run Photoshop. You may sign up or use an account you already have (There is a 7-day free trial available for new users).
- Save a copy before you start editing any images, since it will keep your files safe from improper editing.
- Prepare your work environment with a high-resolution monitor. Be sure the room is well-lit. You can observe details and vivid colors with the help of this setting.
- Prevent lag by ensuring that all games, browsers, and programs using much memory are closed before you open Photoshop.
How to Enhance a Photo in Photoshop
After good preparation and setting up, you can now start to edit. Photoshop provides many tools for users to enhance the photo quality and fix the low resolution. Here are some useful methods for beginners.
Basic Adjustments
These are basic adjustments to improve your image. They modify the light, color, and tone.
a. Brightness & Contrast
Image > Adjustments > Brightness/Contrast.
Adjust the sliders to get a brighter image and enhance dark spots. Increase contrast to enhance details.
b. Levels & Curves
Image > Adjustments > Levels or Curves.
Use Levels to fine-tune shadows, midtones, and highlights. Use Curves for more brightness and contrast control.
c. Hue/Saturation & Vibrance
Proceed to Image > Adjustments > Hue/Saturation or Vibrance.
Hue makes the color tone lighter or darker. Saturation brightens or darkens colors. Vibrance adds color without making the skin tones too red.
d. Color Balance
Proceed to Image > Adjustments > Color Balance.
Use this to fix color problems. Use shadows, midtones, and highlights to get natural colors.
e. Exposure
Image > Adjustments > Exposure
This is useful when a photo is overexposed or underexposed. Use it with caution so as not to lose detail.
Detail Enhancement
These filter tools sharpen your image to make it clearer.
a. Smart Sharpen
Go to Filter > Sharpen > Smart Sharpen.
Enter the amount 50–150%. Use a radius of 1.0–2.0 px. This restores missing details.
b. Unsharp Mask
Go to Filter > Sharpen > Unsharp Mask.
Enter the amount and radius like Smart Sharpen. This also sharpens soft or blurry images.
Remove Noise and Grain
Noise is generally found in low-light or cell phone images. Removing it can enhance picture quality in Photoshop.
a. Remove Noise
Filter > Noise > Reduce Noise.
Use default parameters. Increase Strength slowly. Check “Remove JPEG Artifact” if needed.
b. Use Camera Raw Filter
Filter > Camera Raw Filter > Detail Tab.
Use Noise Reduction and Color Noise sliders to enhance the image.
Enlarge Small-Res Images
You can resize low-res to high-res images by resizing with appropriate settings.
a. Image Size Tool
Image > Image Size.
Define width and height. Choose “Preserve Details 2.0” as a resample. Define resolution at 300 ppi for print or 72 ppi for web.
b. Enhance in Camera Raw
Go to Filter > Camera Raw Filter.
Right-click in the Camera Raw filter window over the image preview and choose Enhance.
In the pop-up window, check the box for Super Resolution.
Click Enhance to have Photoshop double the size of the image with improved detail.
It is a great way to change low-resolution to high-resolution images in Photoshop.
5 Photoshop Alternatives to Enhance Photo Quality Instantly
Not all people use Photoshop or want to learn how to use it. There are certain people who need a simpler way to enhance their photos. In that case, online tools can prove helpful. Such online tools are easy to use and function with a few clicks. Here are five Photoshop alternatives that can improve your photo quality immediately.
AiPassportPhotos
AiPassportPhotos is a smart website that helps you instantly enhance photo quality. With AI technology, it can denoise blurry photos, remove noise, and elevate resolution. You can apply it to portraits, old photos, or social media photos. The platform also offers other features like background removal, face retouch, and upscaling photos. All these happen online, instantly, and without downloading anything.
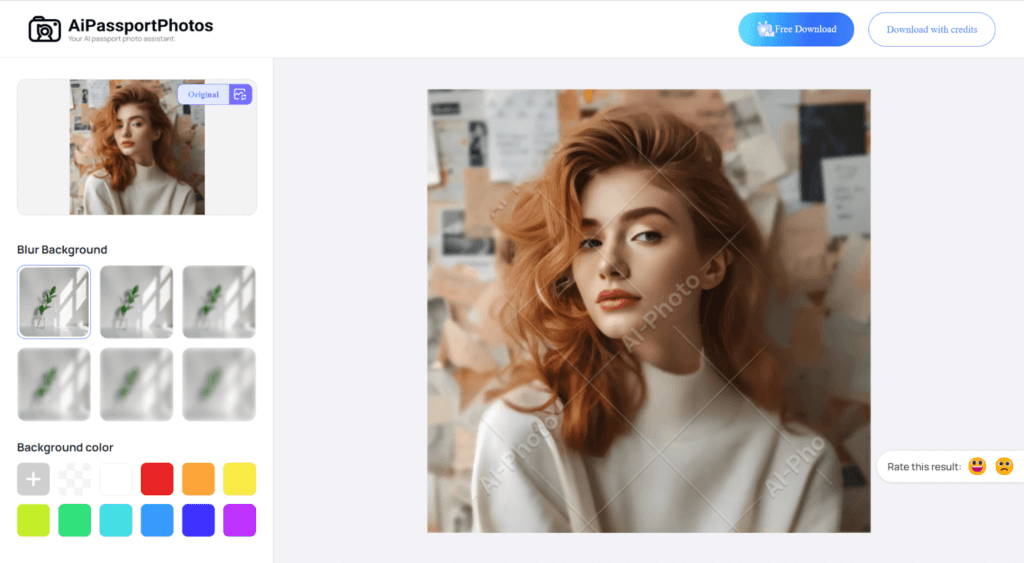
😍What we like:
- Better and clearer results in seconds
- Comprises additional tools on the platform
- Simple and intuitive interface
- Completely free to use
PicWish
PicWish uses advanced AI to restore low-quality images and sharpen them. It comes with dedicated portrait, anime photo, and text image modes. You can use it to apply focus, brightness, and clarity enhancements. PicWish also has its bulk editor mode, where you can restore up to 30 images at once, efficiently and easily.

😍What we like:
- Gives anime and text-enhanced dedicated options
- Fixes portrait problems with AI face detection
- Batch editing feature for quick photo improvement
AirBrush
AirBrush lets you improve photo quality at a click with AI. It brightens, enhances contrast, and sharpens with one tap. The platform also reduces image noise and colors to make them clearer and more balanced. You can even resize low-resolution photos for printing or sharing. AirBrush supports up to 50 photos in a batch, making it ideal for rapid editing on a computer or mobile.
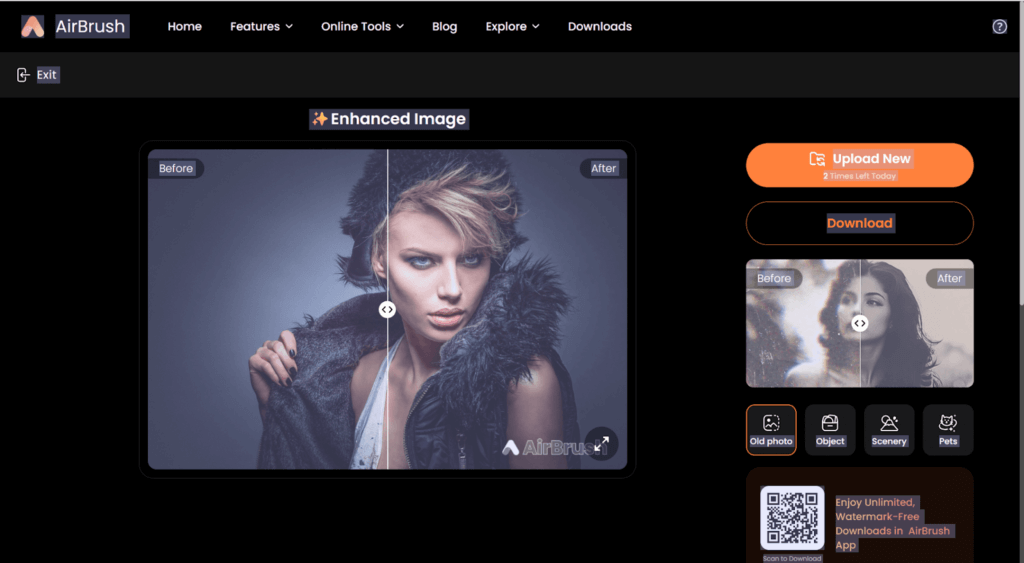
😍What we like:
- Smart color and contrast adjustment
- Noise reduction for cleaner results
- Batch bulk up to 50 images at a time
Pica AI
Pica AI is a simple image tool that converts blurred or low-resolution images into bright and clear ones. It can sharpen grainy or vintage pictures, restore colors, and increase the resolution of a picture. It is easy to use and ideal for phone or computer photo editing.

😍What we like:
- Restores old and faded photos
- Sharpen faces and details
- Makes the colors look vivid and real
- Upscales photographs without degrading quality
SnapEdit
SnapEdit AI Photo Enhancer can fix blurry or low-quality photos, sharpen faces, and enlarge images up to 4 times. It is simple to use and works great for portraits, artwork, or aged photos. Just upload the picture, choose a mode, and let the AI do the work. It supports a broad range of styles and delivers prompt results for all kinds of photos.
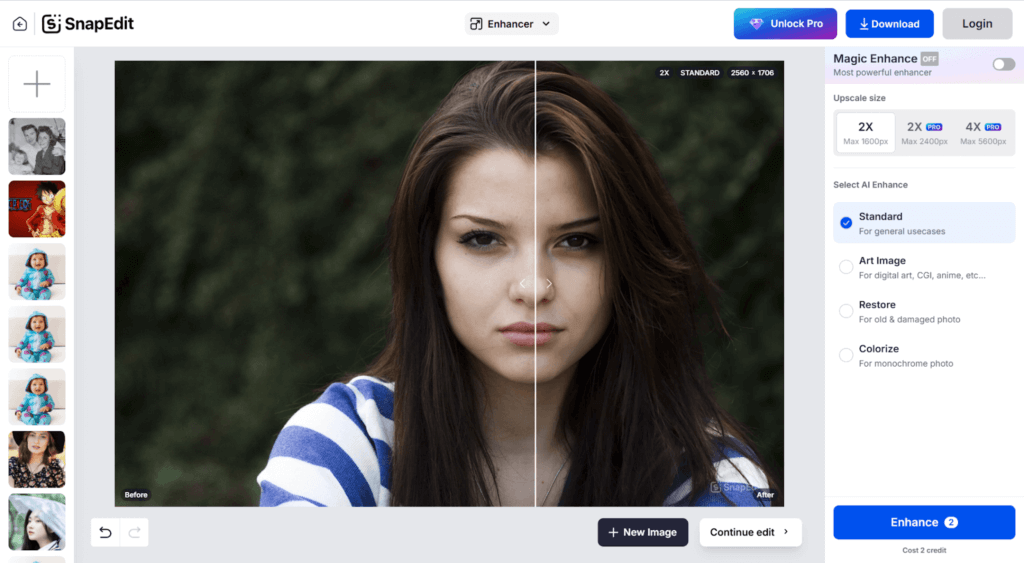
😍What we like:
- 4 modes: Standard, Art, Restore, and Colorize
- Upscale photos up to 4X
- Fix old, damaged, or black-and-white photos
- Easy to use with a clean design
FAQ
How to make image HD in Photoshop?
Select Image > Image Size. You can set a higher resolution and then check Resample > Preserve Details 2.0. Click on OK to apply. In this way, you can easily enhance your images to HD quality.
How to enhance portraits in Photoshop?
You can follow the steps below to enhance your portraits in Photoshop:
- Open your photo in Photoshop.
- Go to Filter > Camera Raw Filter.
- Use sliders to adjust clarity, texture, exposure, and contrast.
- Click OK to apply changes.
- Select the Spot Healing Brush Tool to fix skin spots or blemishes.
If Photoshop feels hard to use, try AiPassportPhotos for one-click portrait touch-up.
What’s the easiest way to enhance a photo in Photoshop?
There are a couple of easy ways to enhance your image. A great one is to visit Image > Adjustments > Auto Tone. It corrects brightness and contrast automatically. The other is to open Camera Raw Filter and select Auto. It optimizes color and detail in a single click. You can try them out and determine which one works better.
What’s the best format to save enhanced photos for websites?
Use JPEG for a smaller size and fast loading. Choose 80–90% quality to keep good detail.
For transparent images, save as PNG.
Conclusion
Photoshop is a powerful tool that helps you improve photo quality and turn low-resolution images into clear, high-quality pictures. It offers great control, especially for enhancing portraits and detailed edits. For users who find Photoshop difficult or need faster results, the AI tools mentioned are a good choice to easily enhance photos with less effort.