
Do you wish to change the size of a photo to 35mm x 45 mm? These days it has become very easy and obvious to resize or crop photos. However, cropping it to a specific size might be too complicated. Additionally, submission of wrongly sized pictures in your passport application can cause disqualification from government authorities. Luckily, there are various ways this article will show you about converting a photo into 35mm x 45 mm. So let us start right away!
What Is 35mm x 45mm Photo Size
The standard size of the passport photo is 35 x 45 mm photo, and the photo’s width is 3.5 cm and height is 4.5 cm, which is equivalent to 1.38 x 1.77 inches and 827×1063 pixels.
When to Use 35mm x 45mm Photo
The size of 35 mm in height and 45 mm in width is widely used in standard ID photo sizes, such as passports, visas, and driving licenses. Learn how a 35mm x 45mm size photo work:
| Country | Document Types |
| Australia | Australia Passport Photo |
| India | India Driving Licence Photo |
| Indonesia | Indonesia Visa Photo |
| Ireland | Ireland Passport Card Photo |
| Ireland | Ireland Employment Permit Photo |
| Ireland | Garda Age Card Photo |
| Mexico | Mexico Passport Photo |
| Mexico | Mexico Driving License Photo |
| Mexico | Mexico Military Card Photo |
| Netherlands | Netherlands Passport Photo |
| Netherlands | Dutch ID card Photo |
| Netherlands | Dutch Driving License Photo |
| South Africa | South Africa Smart ID Photo |
| South Africa | South Africa Passport Photo |
| South Africa | South Africa Driving Licence Photo |
| South Korea | South Korea Passport Photo |
| South Korea | South Korea Driving License Photo |
| United Kingdom | UK Driving Licence Photo |
| United Kingdom | UK BRP Photo |
| United Kingdom | Sia Licence Photo |
How to Resize a Photo to 35mm x 45mm
In this section, we will provide 5 available methods on how to resize a photo to 35mm x 45mm online. Different ways have their own merits and demerits, you can choose one of them to achieve the best result.
Adobe Photoshop
| Difficulty | *** |
| Duration | 10 minutes |
| What you need | 1. Adobe Photoshop 2. PC |
When we want to resize a photo, most people will think of Adobe Photoshop for the first time, which is a professional image editor and provides comprehensive features and tools for image editing. However, it might be pretty challenging for a beginner if you do not have plenty of in-demand skills. In this part, we will give you a detailed guide on how to resize a photo to 35mm x 45mm through Photoshop, let’s dive it into.
Step 1: Launch Adobe Photoshop and open the photo you want to resize in Photoshop.
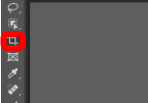
Step 2: Choose the “Crop” tool from the left-hand side toolbar.
Step 3: Set the required aspect ratio in the top bar: 35mm in width and 45 mm in height.
Step 4: Now you can click and drag the crop tool to select the area of the image that you want to resize. Then press the “Enter” key on your keyboard if you the desired area is chosen.
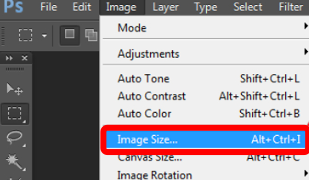
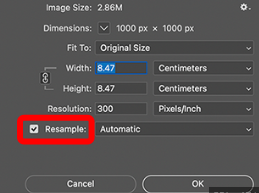
Step 5: Choose the “Image” tab and then select “Image Size” in Photoshop. The dialog box will pop up and be sure to select the “Resample Image” option. Click “OK” to apply the changes.
Step 6: Finally, save your newly resized image on your computer.
Microsoft Paint
| Difficulty | ** |
| Duration | 5~8 minutes |
| What you need | 1. Microsoft Paint 2. Window PC |
Microsoft Paint is another easy-to-use graphics drawing program that you can use to resize a photo to 35mm x 45mm. This tool has been pre-installed in all versions of Microsoft Windows. Including brushes, shape generators, pens, and erasers, you can use to create different types of images. To access the Microsoft Paint to resize a photo, follow the steps.
Step 1: Launch the Microsoft Paint and open the photo you want to resize in Photoshop.
Tip: Microsoft Paint is found in All Programs > Accessories.
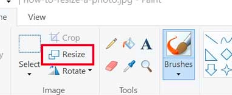
Step 2: Click the resize icon from the Home tab.
Step 3: Choose the pixels option and make sure ‘Maintain aspect ratio’ is selected.
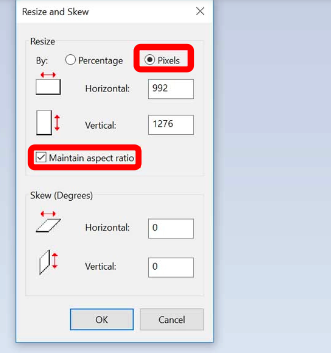
Step 4: Input the 827×1063 pixels (equivalent to 35mm x 45mm) respectively for the image, then click “OK ” to apply the result.
Step 5: Now save your newly resized image on your computer.
Microsoft Word
| Difficulty | ** |
| Duration | 5~8 minutes |
| What you need | 1. Microsoft Word2. PC |
If you are looking for another popular tool to resize a photo to 35mm x 45mm, Microsoft Word will be your best option. Many people are familiar with Microsoft Word, but fewer of them know it can resize a photo seamlessly. Resizing an image in Word is very easy, in this tutorial, we can explore the different tools and features in Word to resize a photo without losing its quality. Let’s take a look at how to use it.
Step 1: Launch Microsoft Word on your PC and import the photo that you want to resize in Microsoft Word.
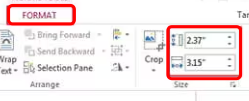
Step 2: Click the “Format” tab from the “Picture Tools” tab.
Step 3: Open the “Size & Position” window, unselect “Lock aspect ratio”, and then enter the value you want for Height and Width, for example, enter 35mm in width and 45 mm in height.
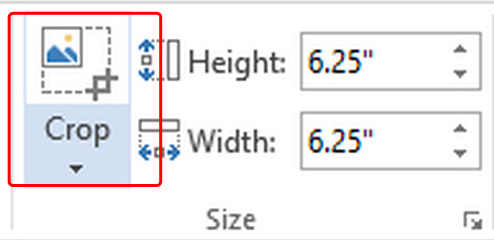
Step 4: Similarly, you can use the Crop option to apply the result.
Step 5: Now save your newly resized image on your PC.
Photos App
| Difficulty | ** |
| Duration | 10 minutes |
| What you need | 1. Photos App2. iPhone |
The built-in application on iPhone allows users to view, organize, and edit their images whatever size they like. Additionally, it provides the following four units of measurement: pixels, millimeters, centimeters, and inches. The Image Size app is the easiest way you can resize any image you prefer. If you need to resize an image without losing image quality, here’s how to use the iPhone’s built-in image resizing tools.
Step 1: Open the Image Size app on your iPhone.
Step 2: Tap the photo icon in the top left part of the screen.
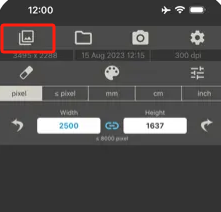
Step 3: Now import the photo that you want to resize in the Photos app. Tap Choose in the bottom right corner.
Step 4: Now you can input the measurements in the Width and Height text boxes you want the image to have. And then you can see a preview of the final image size at the bottom of the window.
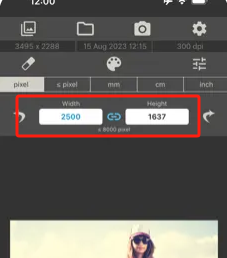
Step 5: Finally, tap the download icon to save your newly resized image on your phone.
AiPassportPhotos
| Difficulty | ** |
| Duration | 1 minute |
| What you need | 1. AiPassportPhotos 2. Any device |
AiPassportPhotos is one of the best online tools that provides a range of features to resize an image. It allows you to resize photos to 35x45mm, 2×2 inch, 50x70mm and more. Apart from photo resizing, it comes with automatic background removal, which can remove busy background for your documents. Additionally, along with dozens of photo templates in the database such as photos for passports, ID cards, driving licenses, and visas, to a certain extent, it dramatically improves your efficiency. Only in several simple steps, you can receive your admission resized picture in less than 3 seconds.
Step 1: Upload any image to AiPassportPhotos
Step 2: Wait for AI to resize your image
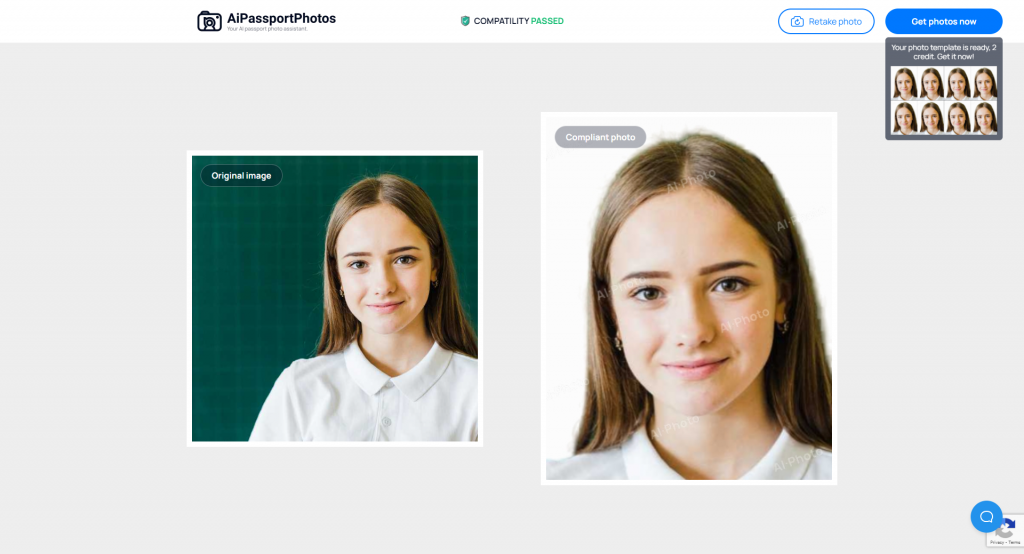
Step 3: Preview the results then click the “Get photos now” button to download the images.
How to Print a 35mm x 45mm Photo
There are two available methods for you to print a 35mm x 45mm photo, the first one is to go to a professional photo studio, and the other is to set your home printer to print your 35mm x 45mm photo. There is no doubt that going to the photo studio is a very convenient method as the staff will do everything for you and help you to check it for compliance in no time. Yet, this method might cost a lot of money compared with a home printer. Obviously, using your home printer to print your passport is not an easy thing, bear in mind that they must be printed to a professional standard on special paper. In addition, the image must have the correct size, such as height and width.
FAQ
Q1: How do I reduce the MB size of a photo?
A1: There are several ways to reduce the MB of a photo. You can compress your original photos by saving them into a JPG or a TIF file using image editors, like Lightroom, Photoshop, etc. Because JPGs can maintain reasonable image quality at a relatively small size. Also, you can use the Photos App on Windows PC to do that. Just follow the steps below:
Step 1: Choose the image you want to reduce the size and double-click on it.
Step 2: Then choose Resize image
Step 3: Now you can reduce the size of the image and/or quality level.
Step 4: Click “OK” to save the compressed image.
Q2: How do I resize a large amount of photos?
A2: You can easily batch resize images in Windows using the free “Image Resizer for Windows” tool from Microsoft’s PowerToys.
Here’s how to do it.
Step 1: Download and launch the Image Resizer utility on your PC.
Step 2: Choose the photos you want to batch-resize.
Step 3: Right-click on the selected photos, and choose “Resize Pictures”.
Step 4: Select the desired size, and click “Resize”.
Step 5: Finally, your images will be resized and saved in the same location.
Conclusion
We’ve reviewed 6 available tools and alternatives for you. These proven ways allow you to resize a picture easily, such as offline applications like Photoshop, Microsoft Word, Paint, Photos app and online resizers such as AiPassportPhotos, you can use any of the tools based on your actual requirements, skills, and budget. But if you’re looking for a straightforward approach to resizing an image, AiPassportPhotos photo editors are specifically tailored to you.