
When you need to apply for some licenses in the Philippines like the driver’s license, the photo must be compiled with the official requirements including the size of 1×1, background, etc. This article is hence to share the methods of how to make a compliant 1×1 inch size photo for the Philippines. If you are in need, read below.
Specifications of Philippine 1×1 photo
Before you make a 1×1 inch photo, there are some other specifications you need to know in case the photo is not qualified.
| Size in inches(in) | 1×1 |
| Size in millimeters (mm) | 25 x 25 or 25.4 x 25.4 |
| Size in centimeters (cm) | 2.5 x 2.5 or 2.54 x 2.54 |
| Resolution DPI | 600 dpi |
| In pixels (px) | 600 x 600 px |
How to Edit a 1×1 inch Picture?
If you have prepared the photo, you are ready to edit a 1×1 inch photo. Here are the guides for multiple choices.
How to Make 1×1 Pictures in Microsoft Word
You can use Microsoft Word to resize the photo to the exact height and width. Here is how to use it.
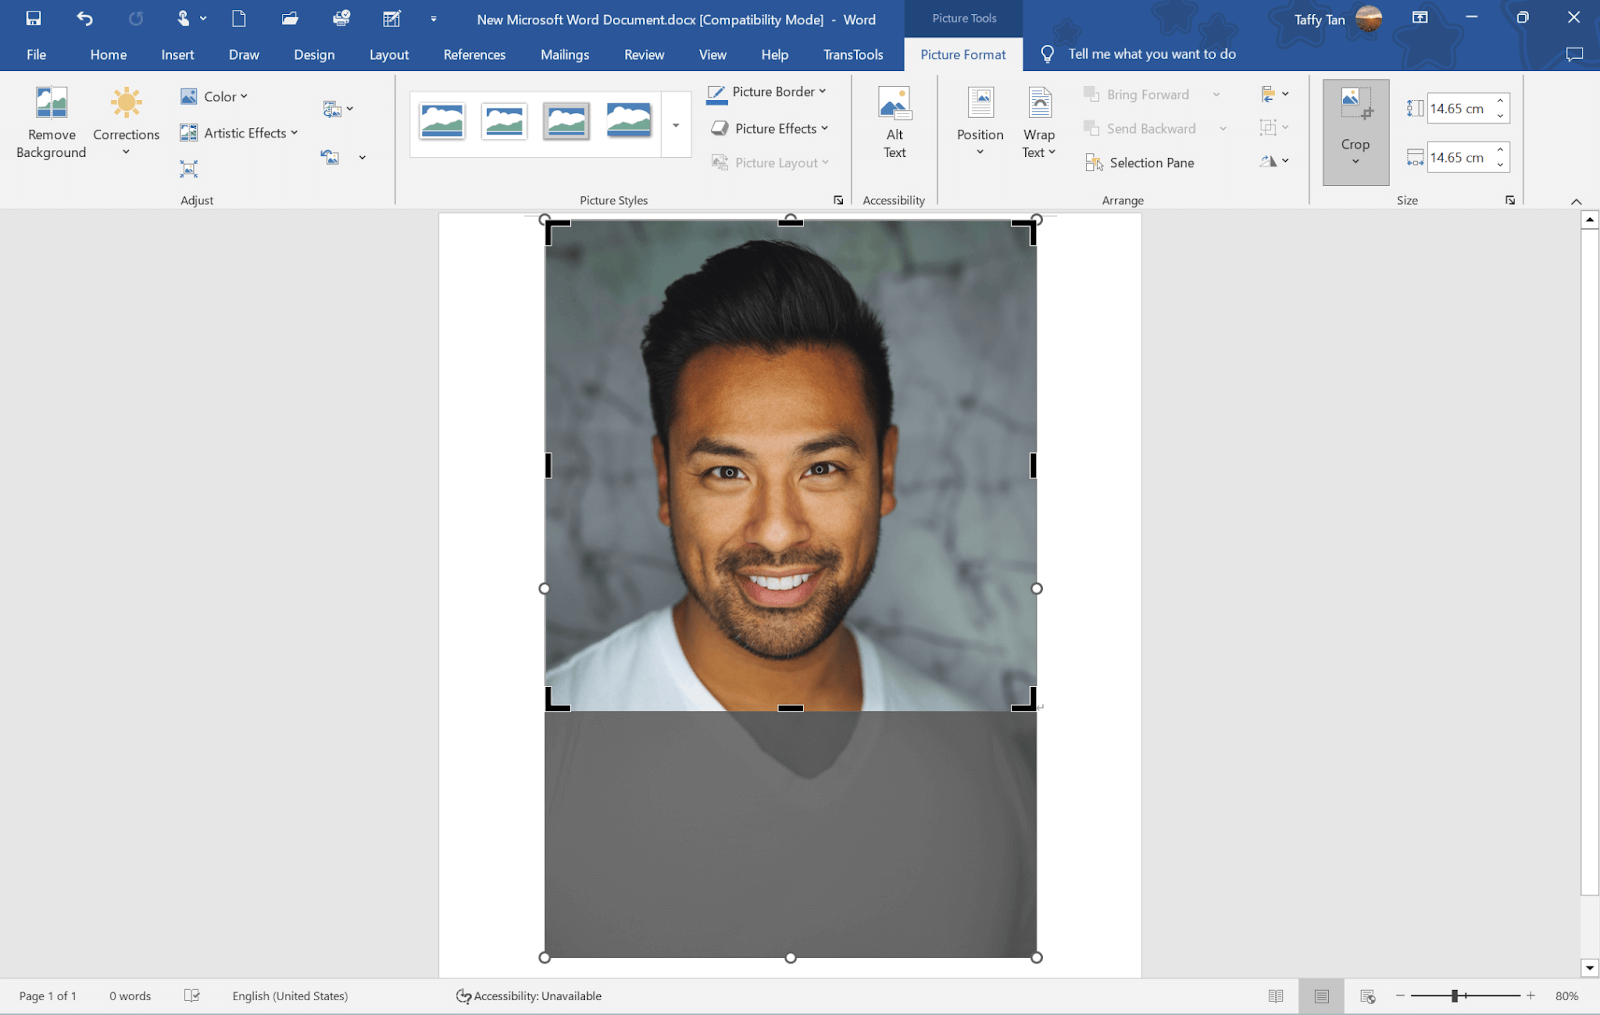
Step 1. Insert the photo you want to edit.
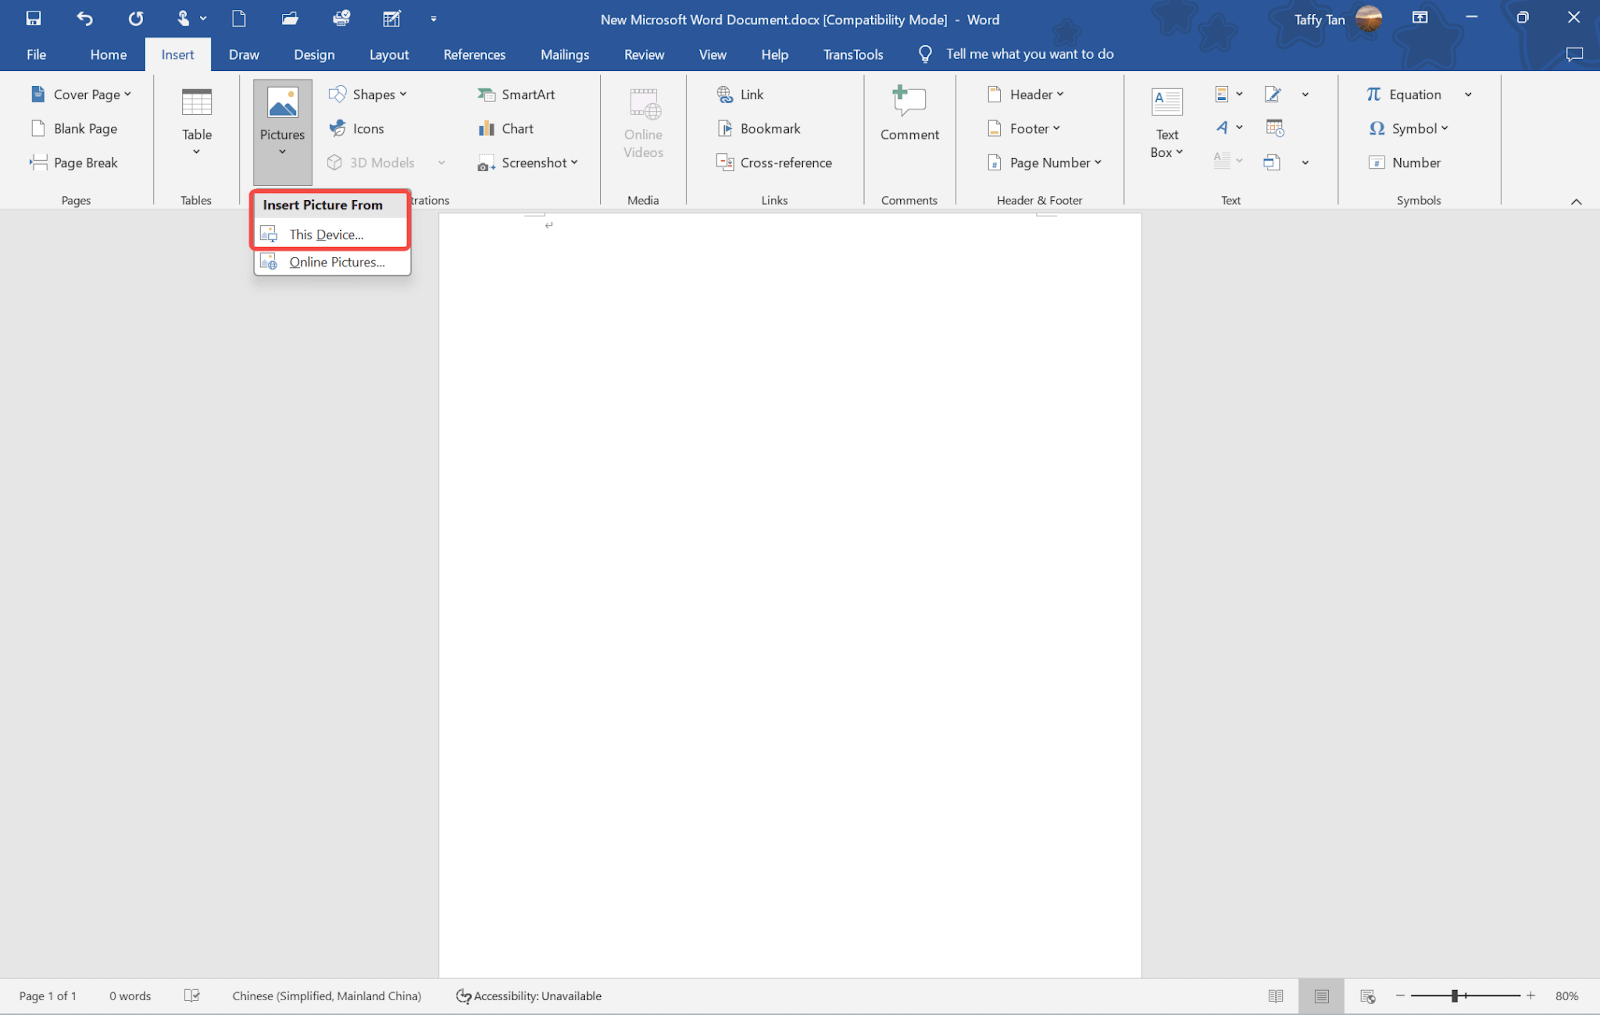
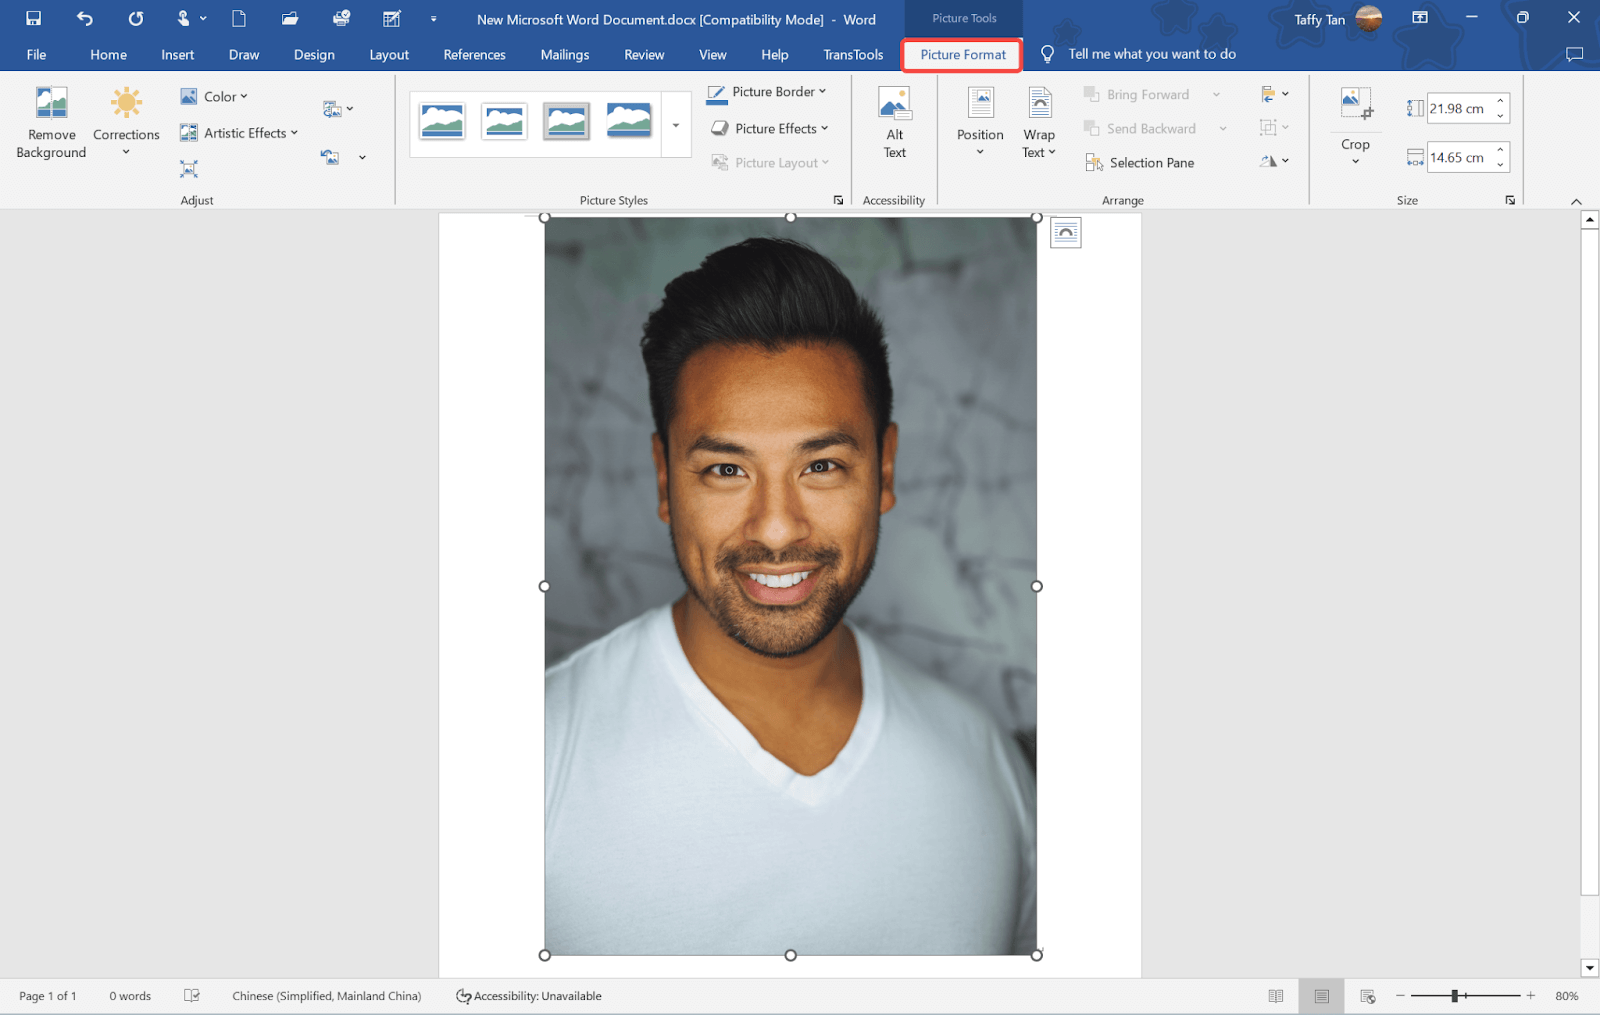
Step 2. Click the photo. On the picture form tab, you can see the size group.
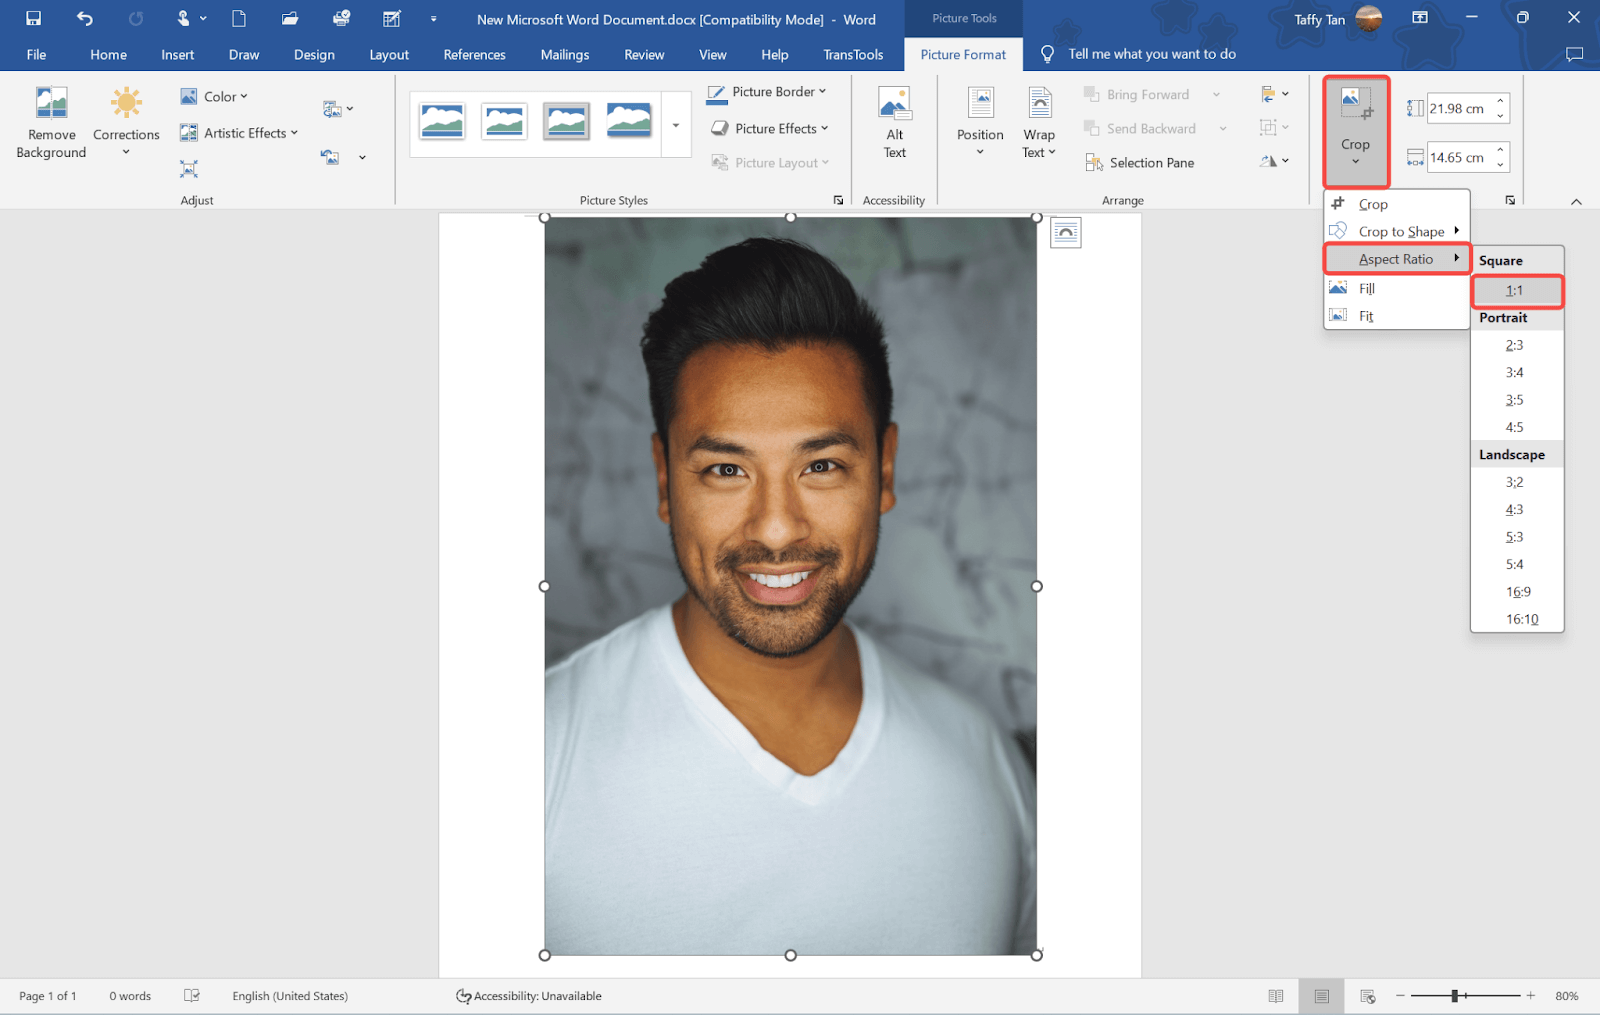
Step 3. Click the Crop button > click Aspect Ratio > click 1:1. This is to ensure the photo will always be the square shape when changing the height and width.
Step 4. Adjust the photo with your mouse. Drag the photo to make the face in the proper place and make sure your shoulders can be seen in an appropriate position.
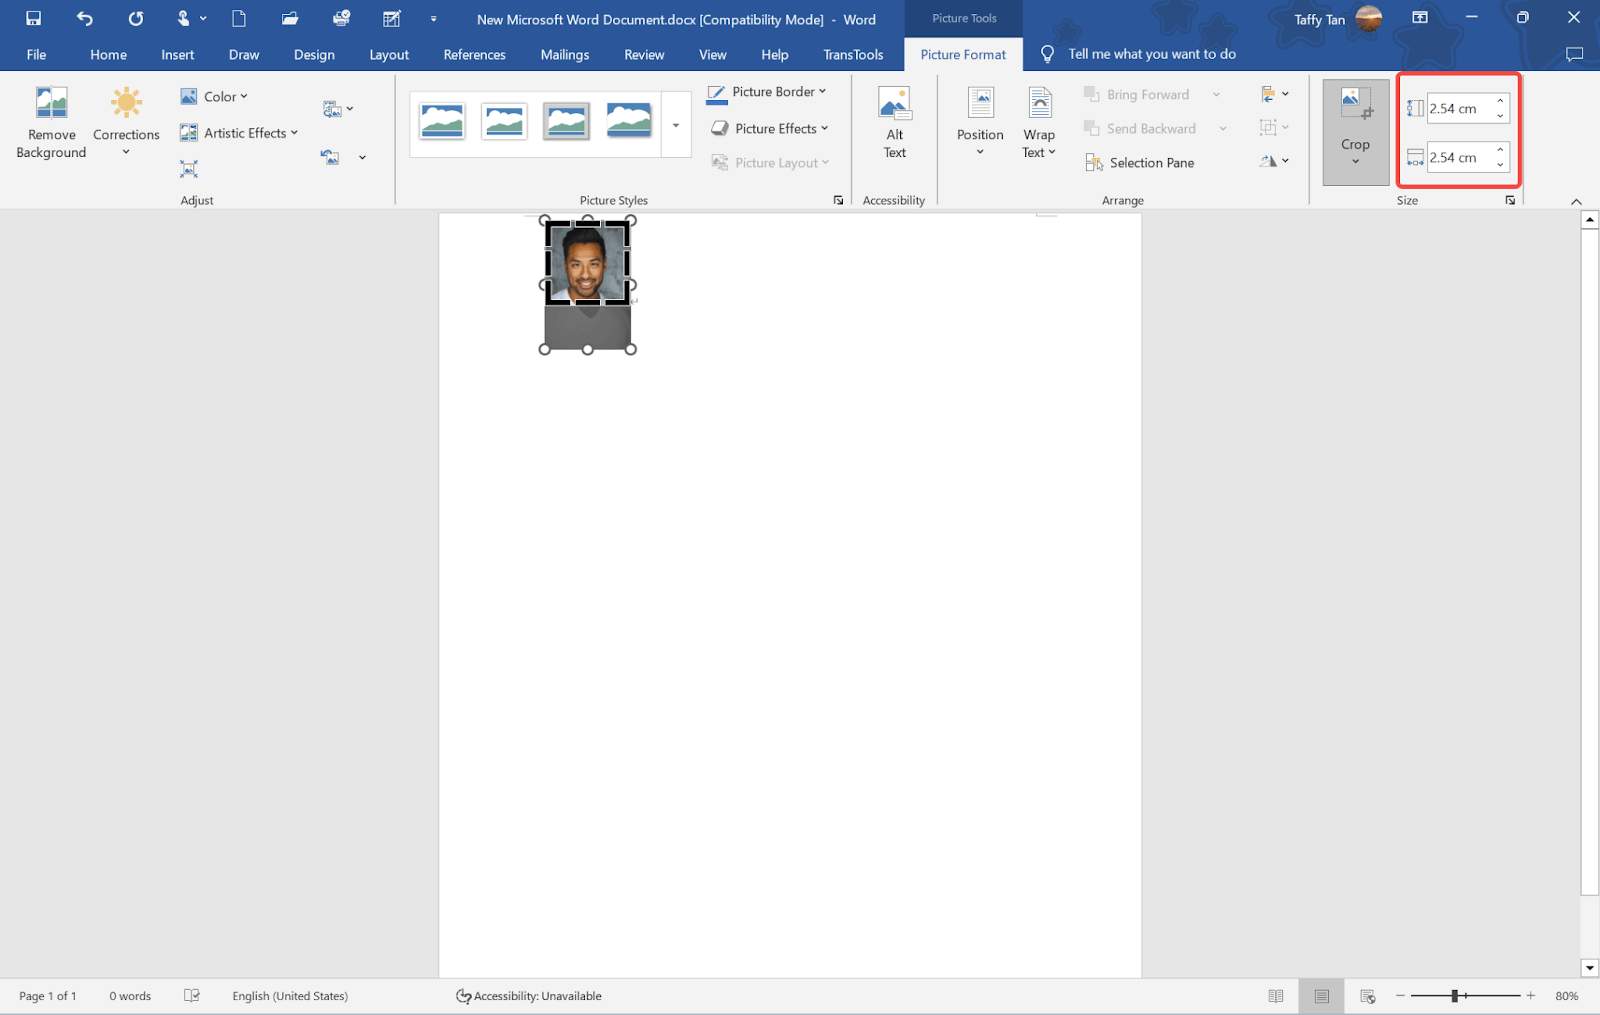
Step 5. Once you are satisfied, in the size editing section, change both sizes to 1 x 1 for inches, 2.54 x 2.54 for cm, or 25.4 x 25.4 for mm, and then press Enter. The photo will be immediately changed to a compliant 1 x 1 inch photo.
💡 Tips:
- Make sure you unlock the aspect ratio to 1:1 before you change the height and width in case the picture gets distorted.
- You need to make a high enough resolution photo in case the resolution changes and makes the photo unclear after the resizing.
How to Make 1×1 Pictures in Microsoft Paint
Alternatively, you can use Microsoft Paint to make your compliant 1×1 inch photo. Here are the steps.
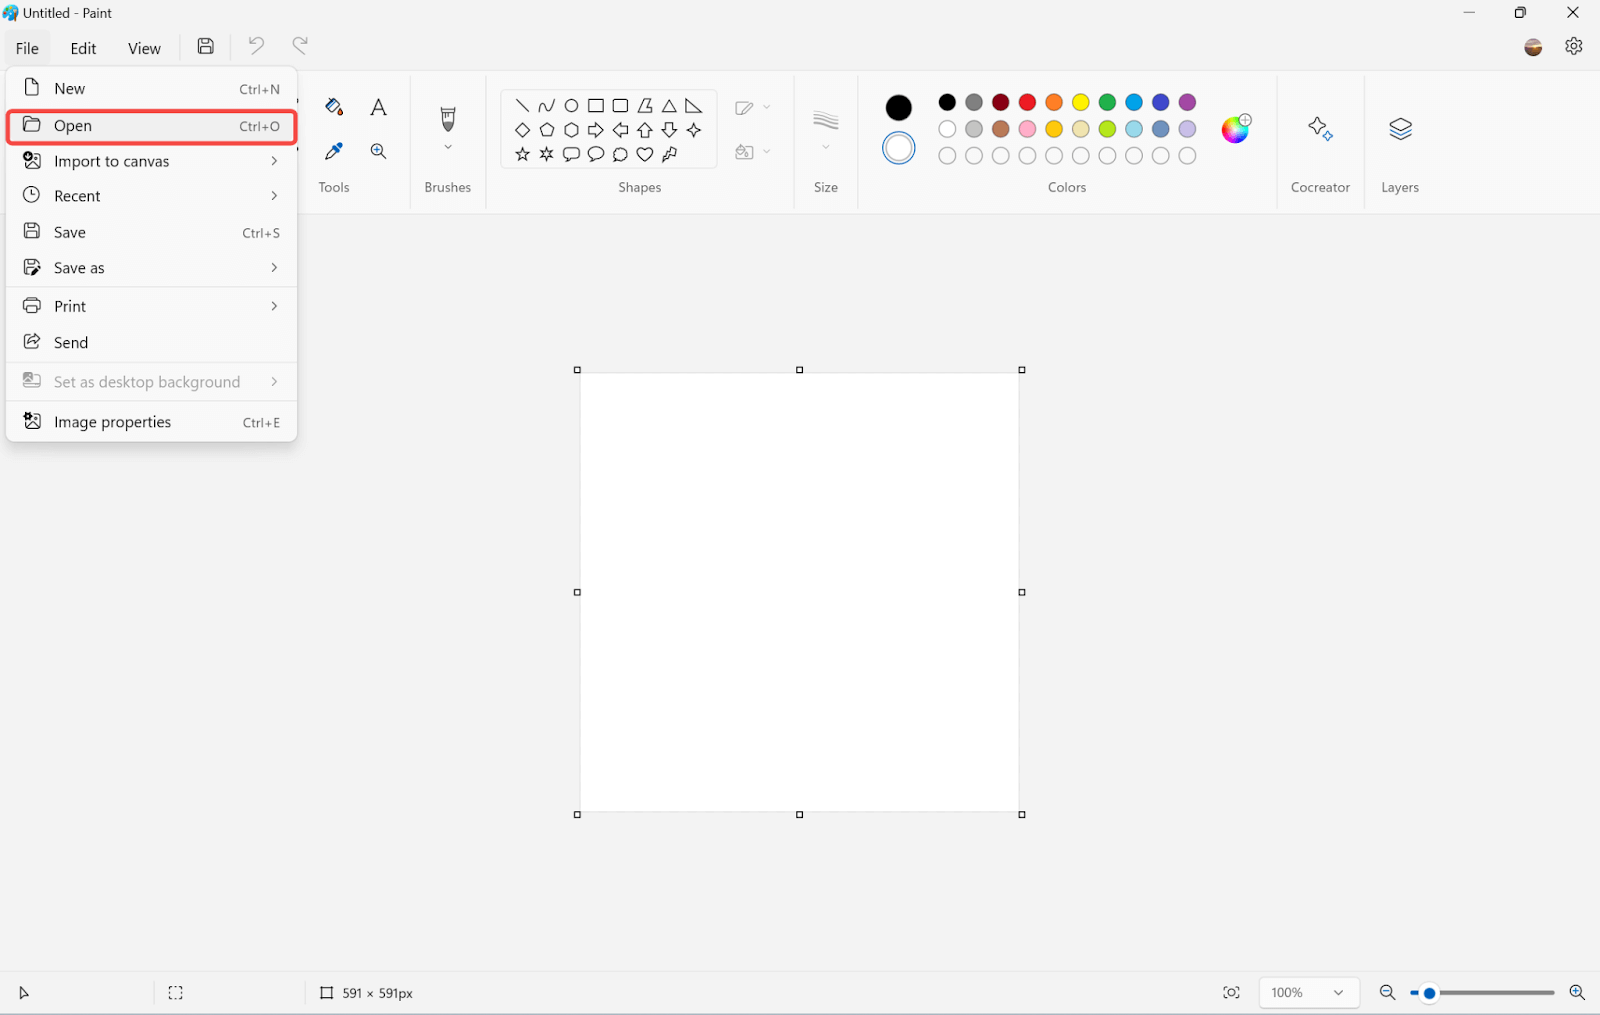
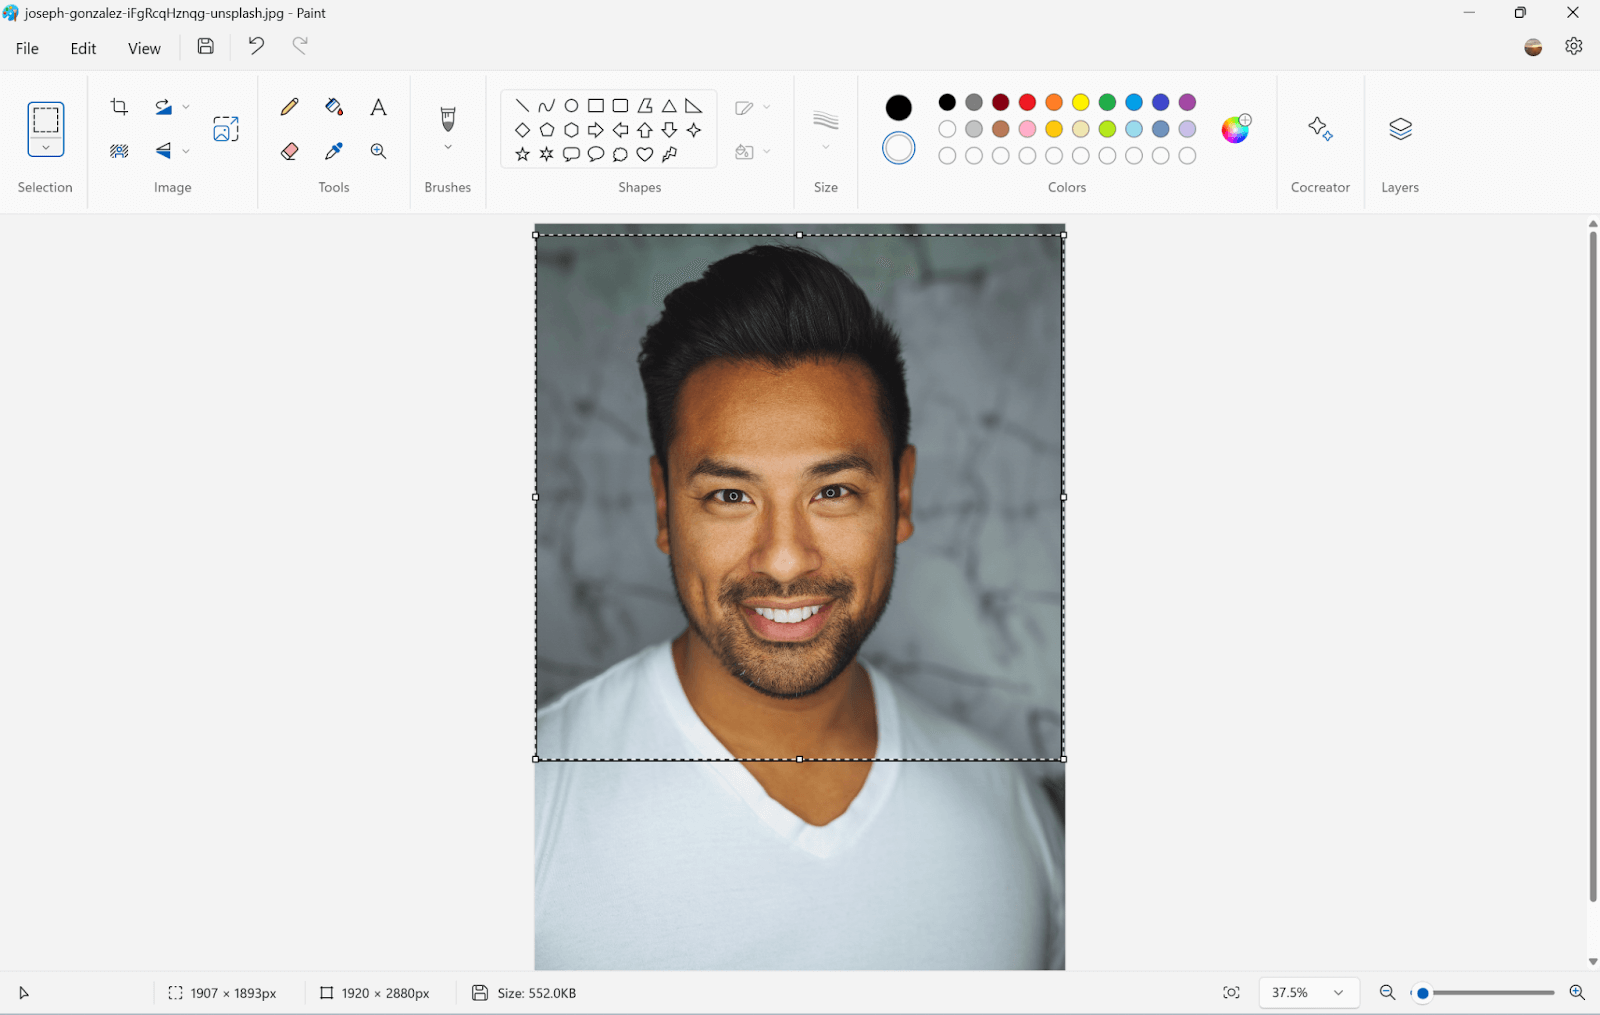
Step 1. Launch the app and click File > Open to insert your photo to edit.
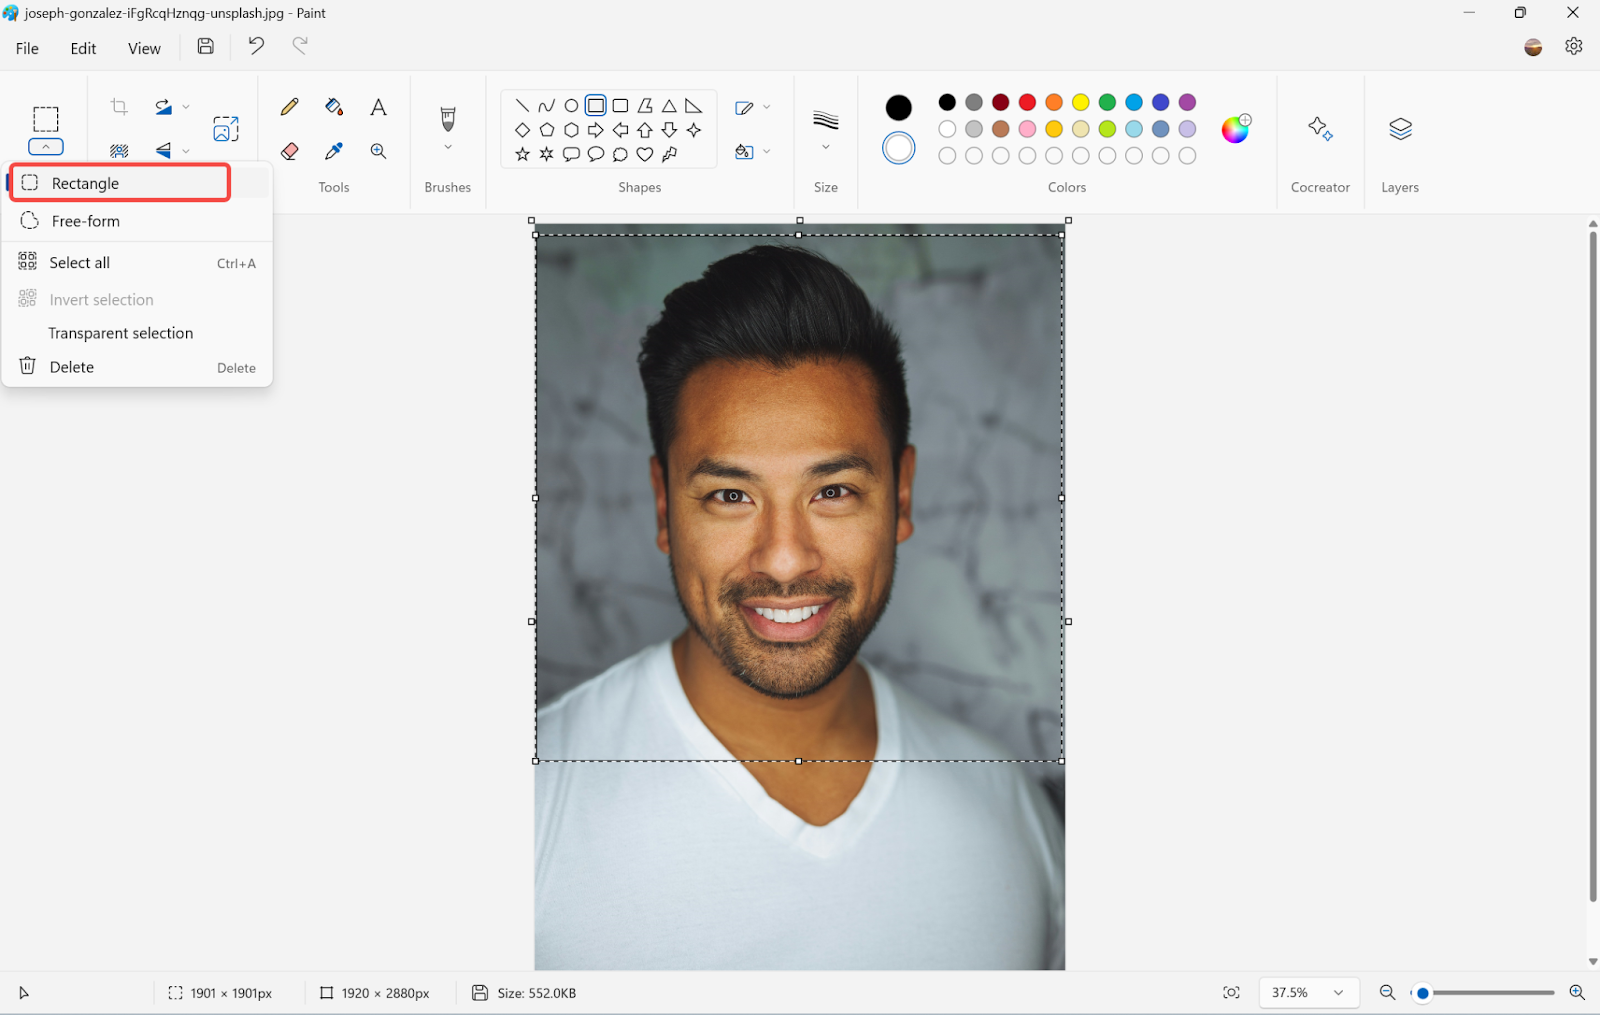
Step 2. In the shape section, choose the rectangle to draw the photo in a square shape. Hold the shift key and use the mouse to draw the square. This is to make sure you can crop the photo in a square after.

Step 3. Adjust the square to a proper place.

Step 4. In the selection group, choose the Rectangle option.
Step 5. Draw the part you want to keep and draw as the outline you have previously drawn in step 2.
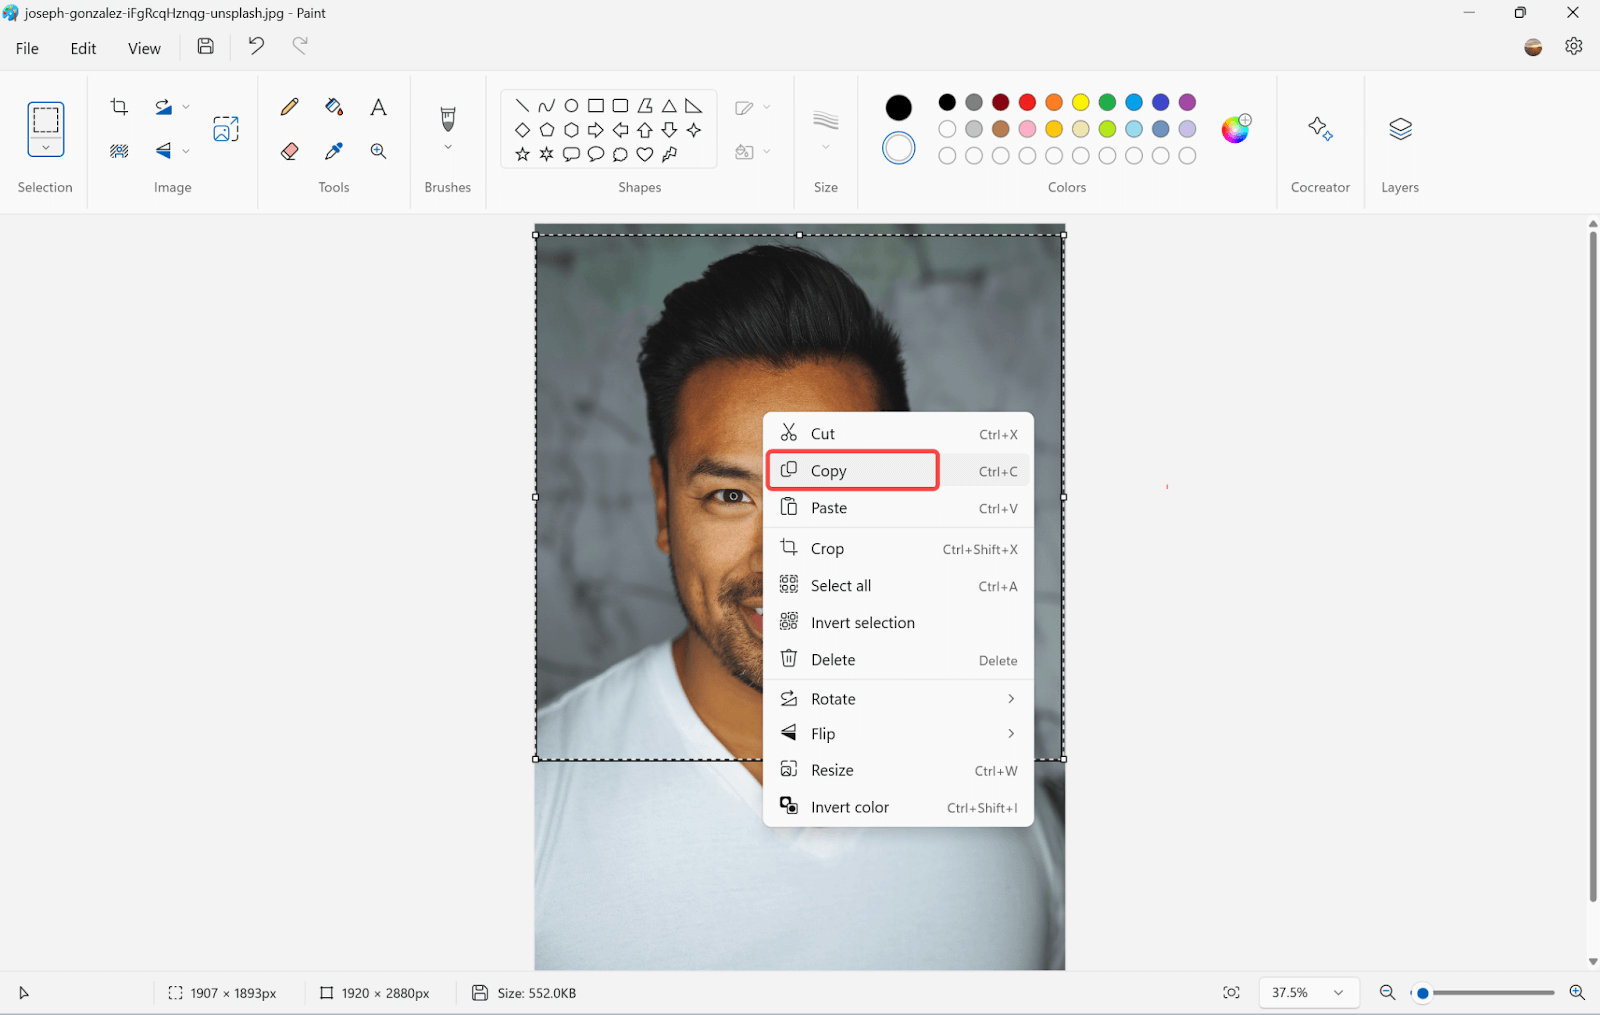
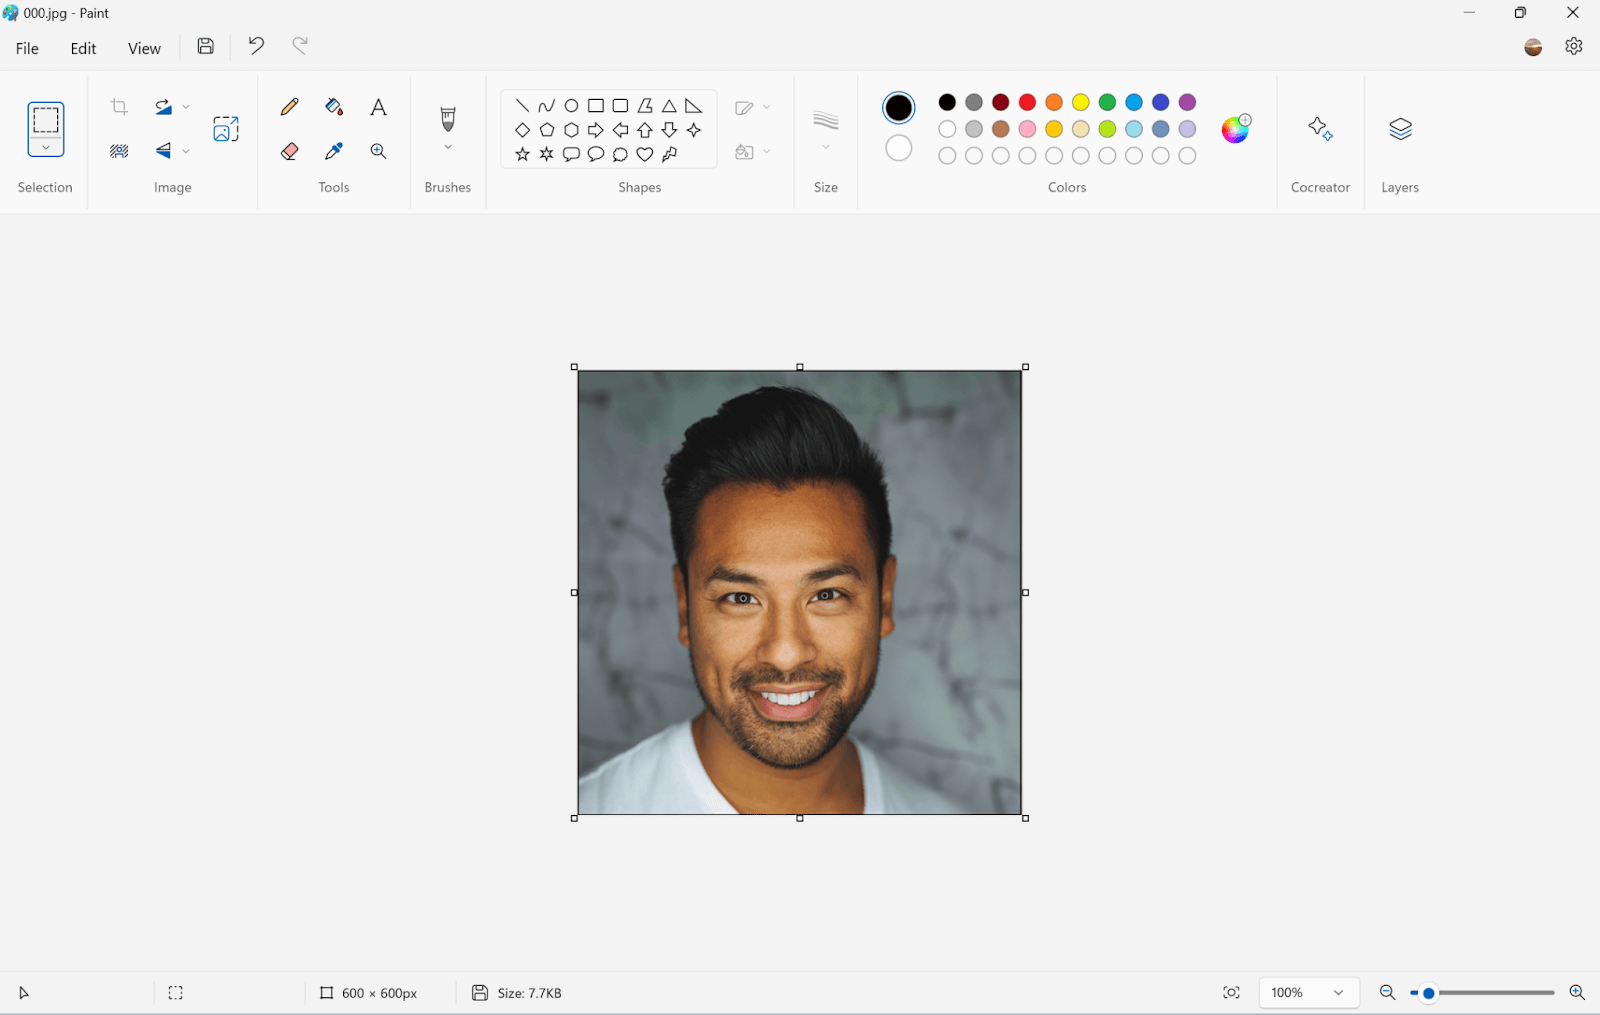
Step 6. Right-click on the photo and choose Crop. Your photo will be cropped into a square shape.
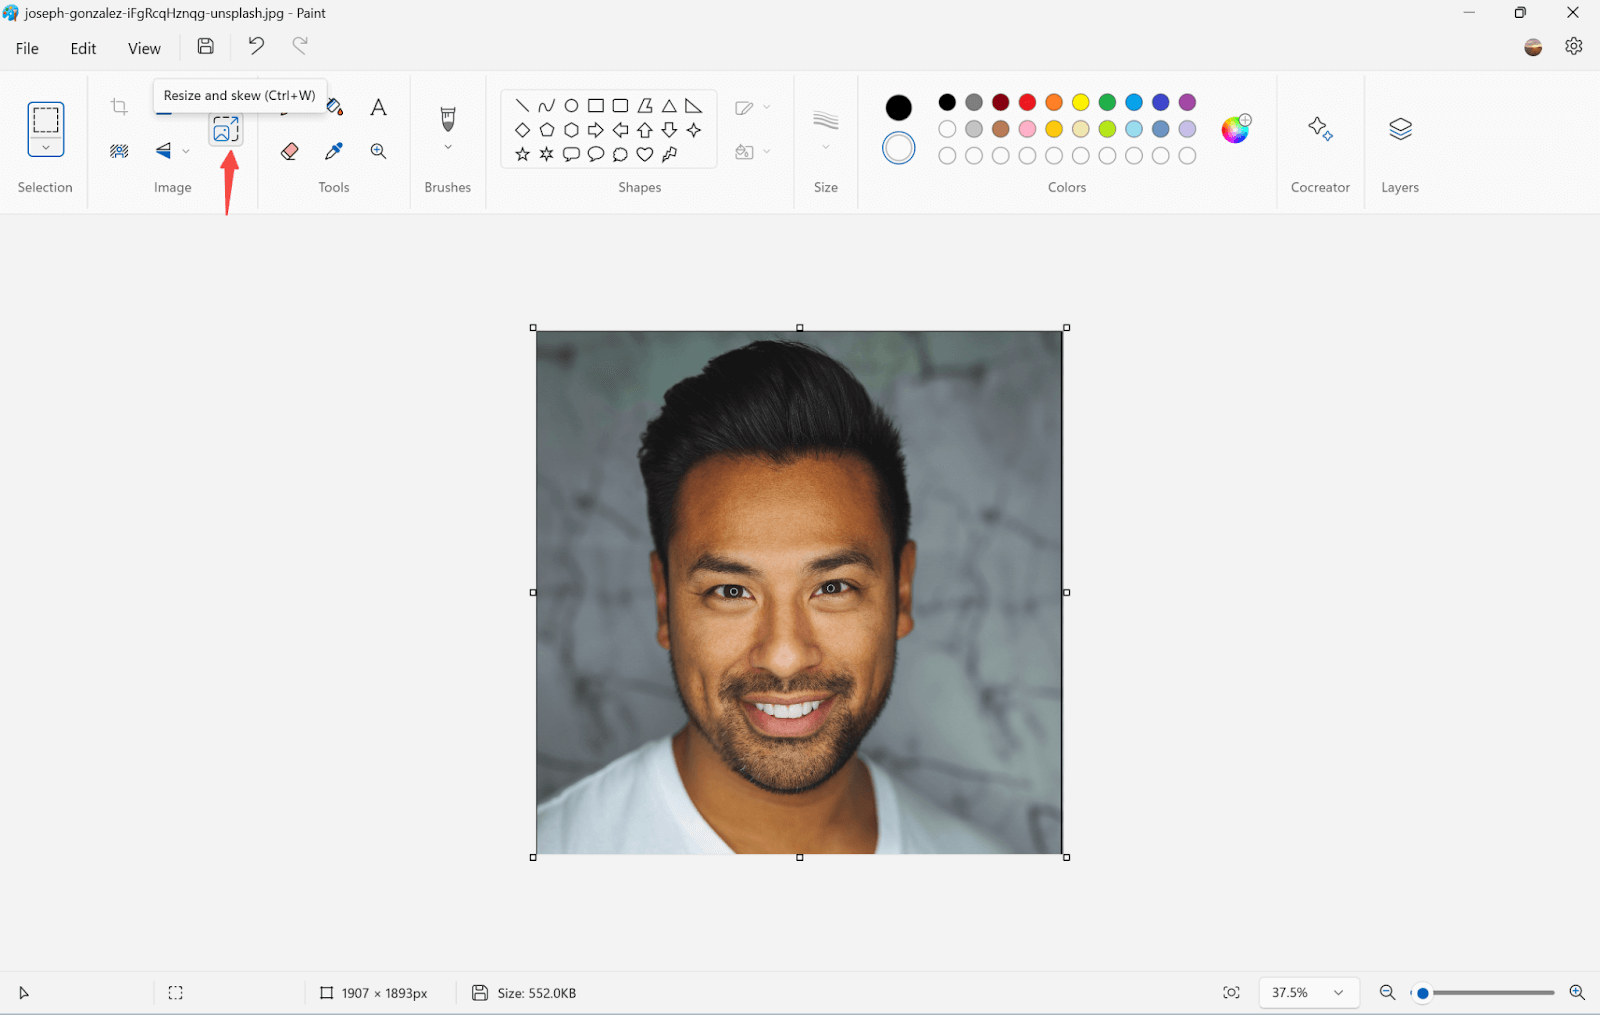
Step 7. Click on the Resize and skew button.
Step 8. Click Pixels. Enter 600 in one size. If your cropping is perfect for a square the other size will turn into 600 automatically. If you draw a square that is not formal enough, the other size will automatically be changed to another number when you enter one size.

Step 9. You need to uncheck the “maintained aspect ratio”
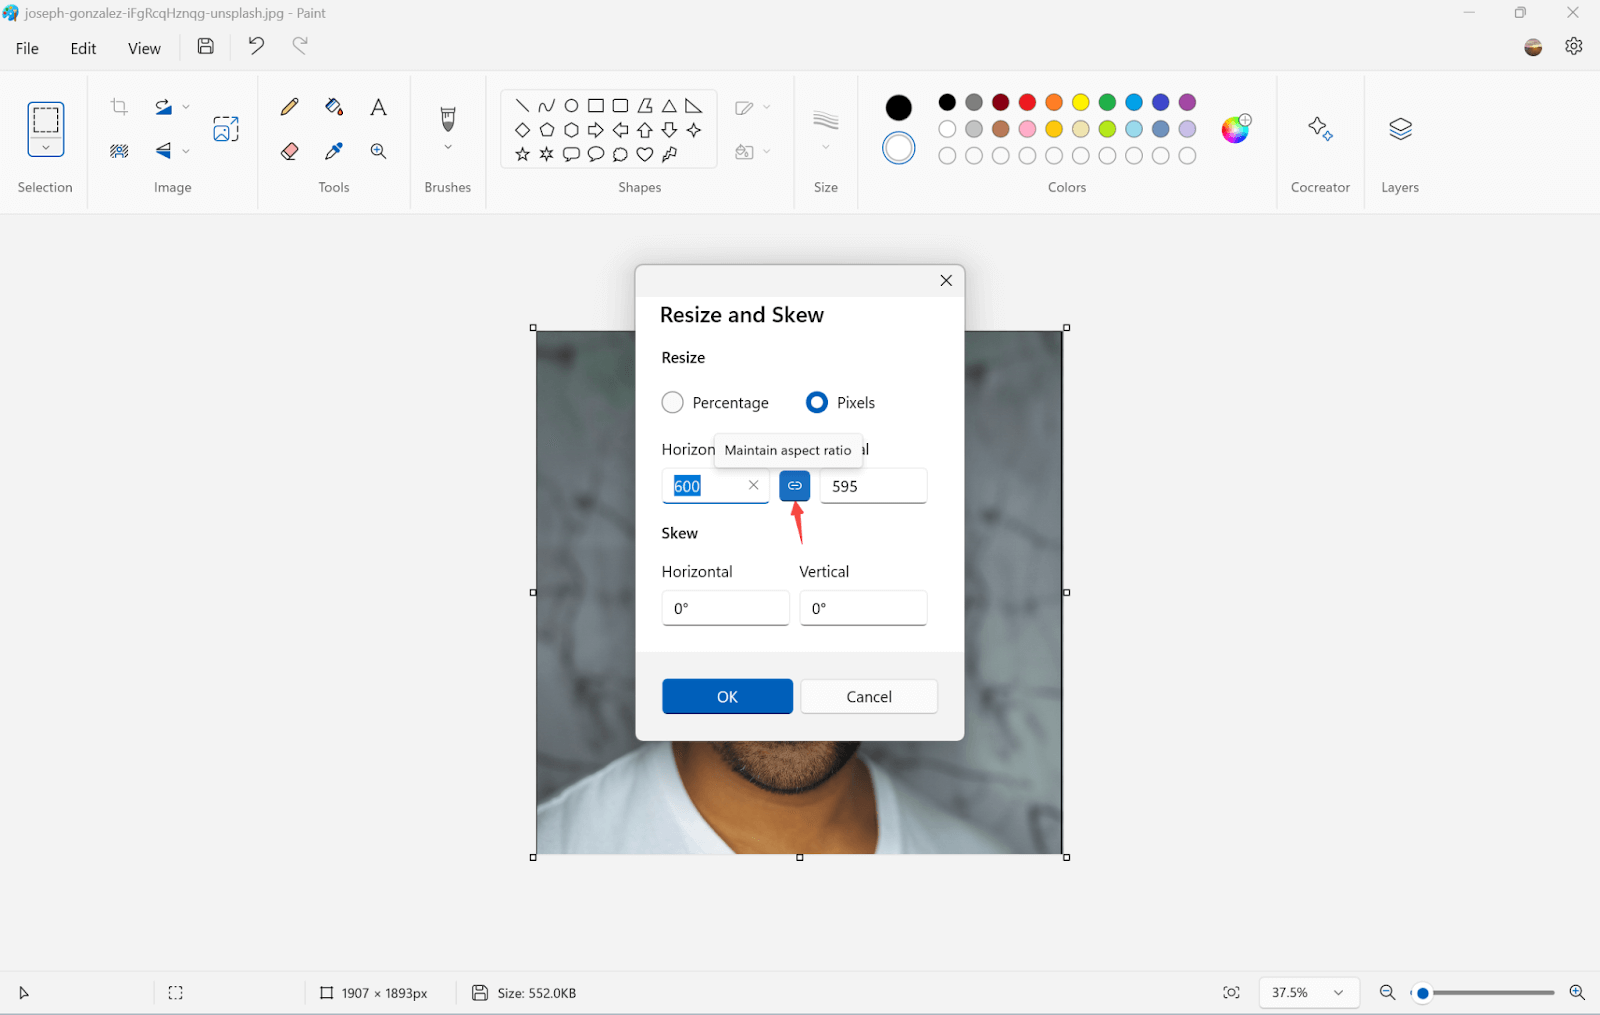
Step 10. Change the height and width to 600 x 600 pixels.
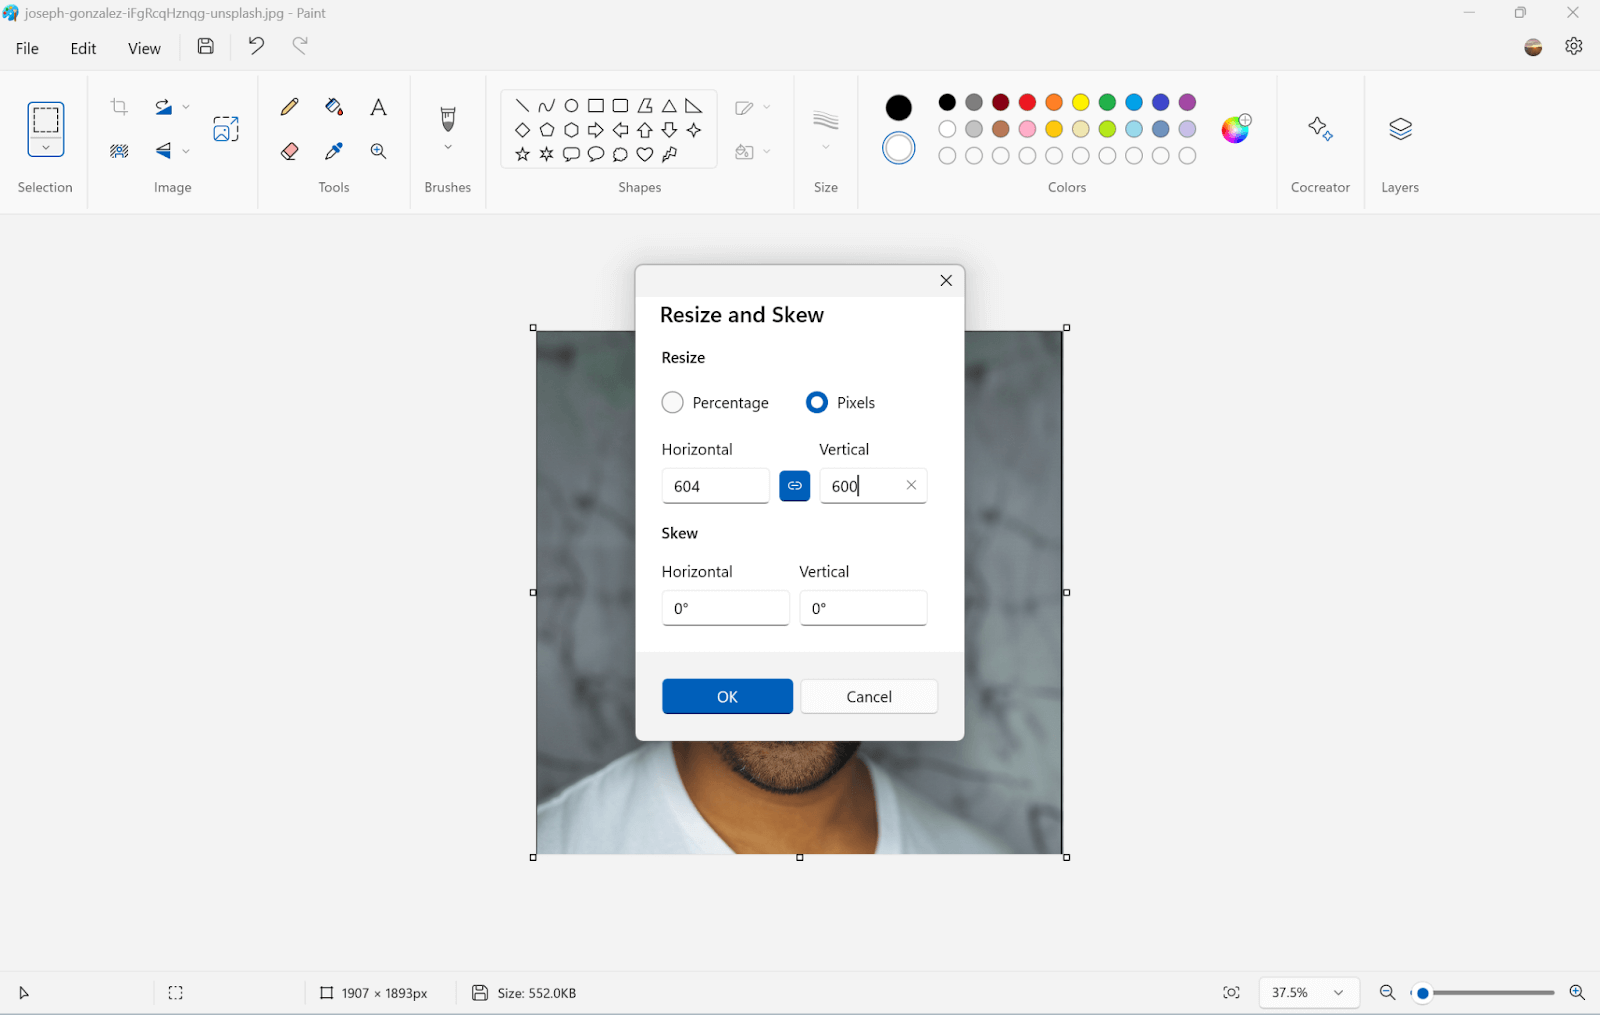
Step 10. After entering the proper pixels, press Enter or click the ok button, then you will get a 1×1-inch photo.
How to Make 1×1 Pictures Online
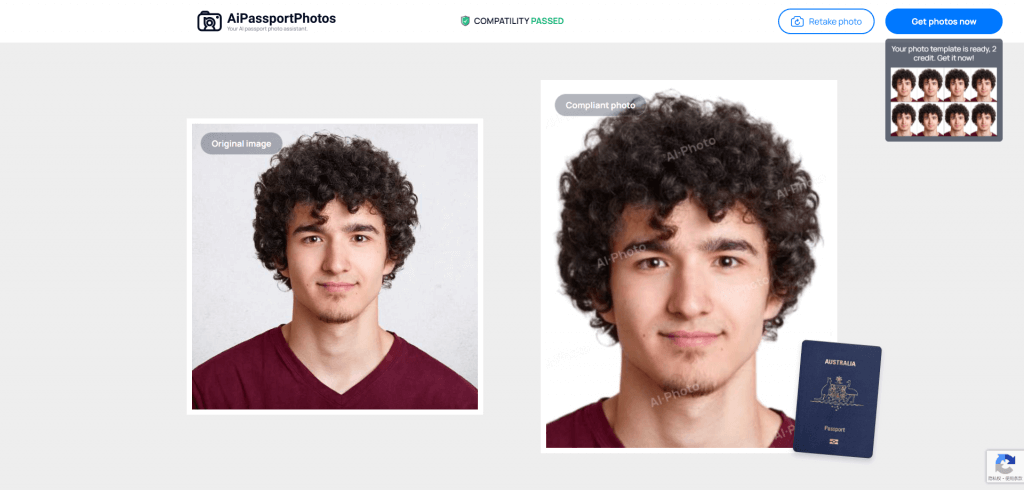
Compared to the above two methods, this is rather simple. You can utilize the online picture editor to make your photo compiled into 1×1 inch photo in just seconds. More than that, the online editor has multiple features such as remove/blur the background, restoring the photo, etc. There are a lot of online editors on the market, here we will show the steps in an example of AiPassportPhotos.
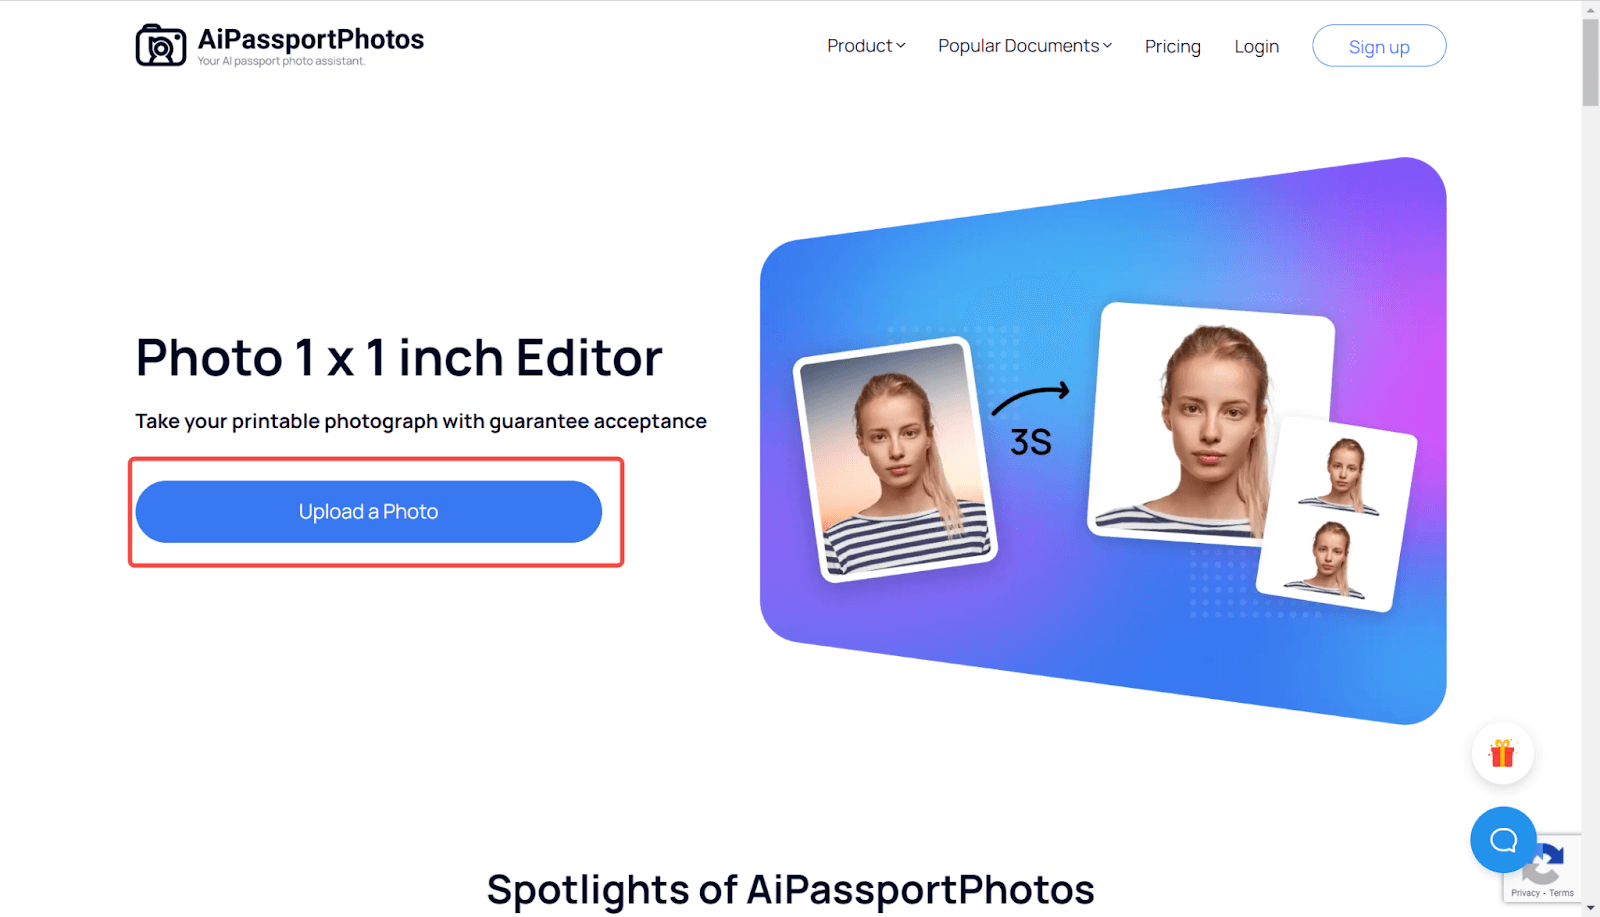
Step 1. Go to 1 x 1 inch Photo Editor by AiPassportPhotos.
Step 2. Click Upload a Photo button to upload your photo that you want to make it as 1×1 inch.
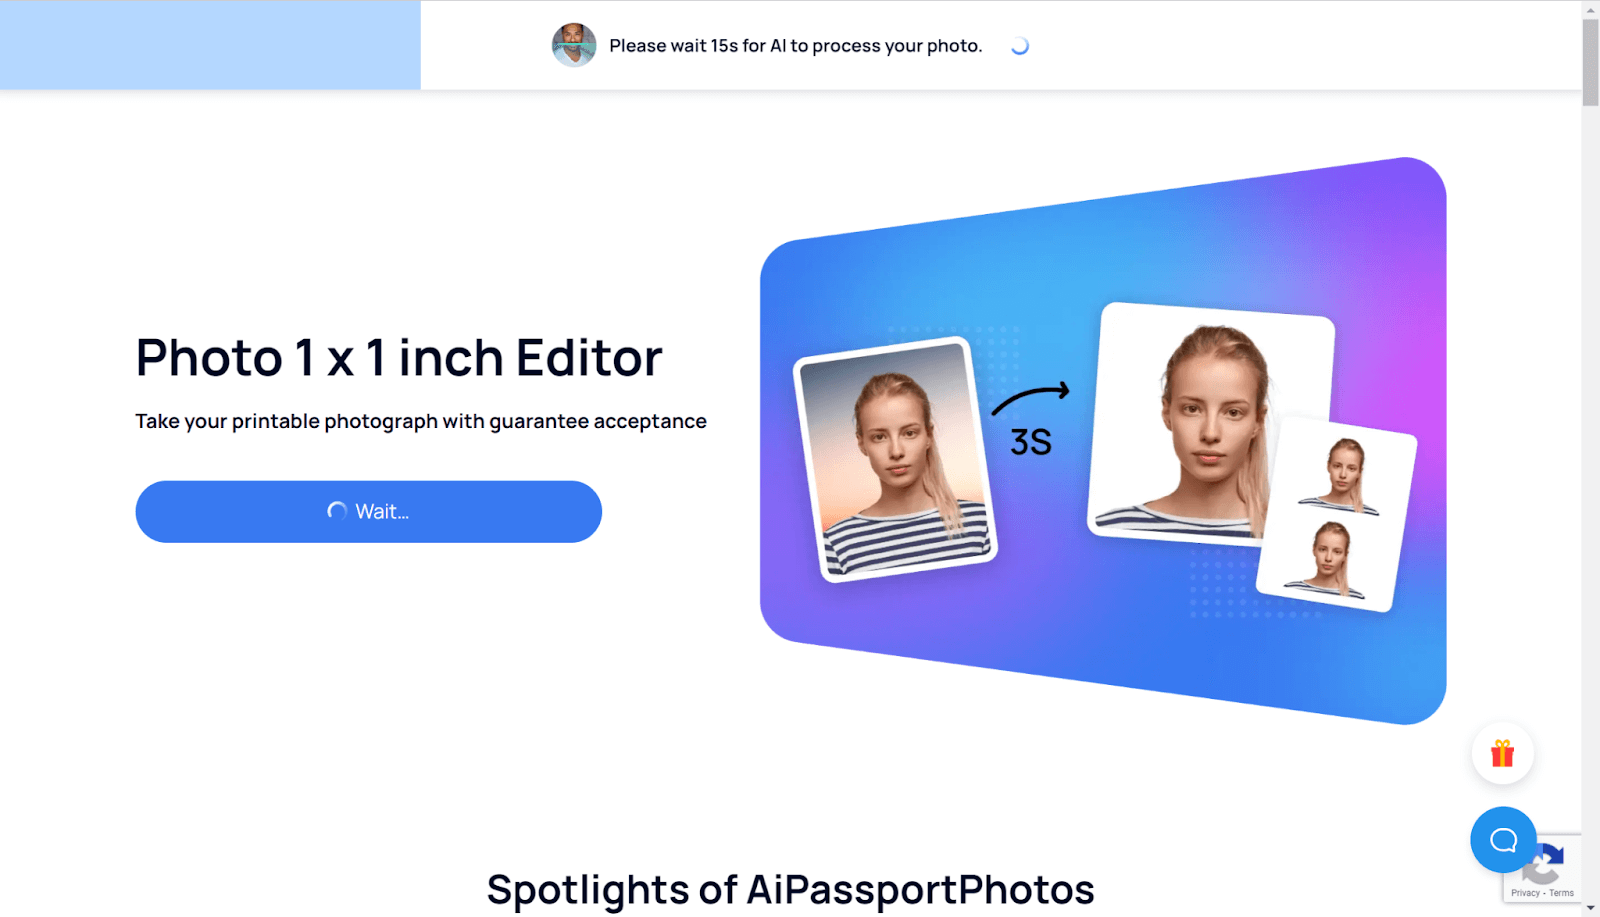
Step 3. After uploading the photo, the platform will take 15 seconds for AI to process the photo for you.
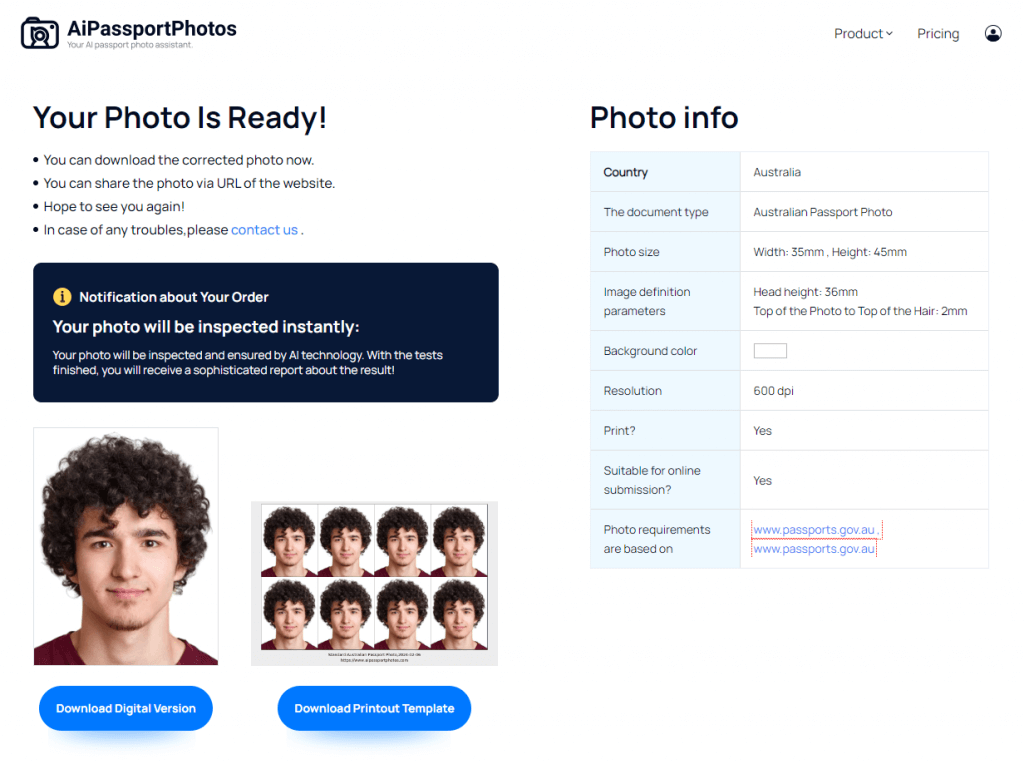
Step 4. After processing, you will be redirected to a result page that shows the compliant photo sample with a watermark.
Step 5. Click the Get Photo now to download your photo. The platform will offer you two versions of the result, a digital picture and a printable template. You may download both for various uses.
How to Make 1×1 Pictures in Photoshop
Photoshop is a professional photo editor that has powerful functions. If you are a Photoshop user and already installed it on your computer, you can use Photoshop to make your compliant 1×1 inch size photo. Follow the guide below (Photoshop 2023 as an example).
Sep 1. Launch photoshop. Press Ctrl+O to open the Open window to choose the photo you want to edit.
Step 2. On the second row of the menu bar, you can see the picture editing tools.
Step 3. Choose W x H Resolution in the drop-down menu.
Step 4. On the right side, choose px/in. And enter 600x in the two boxes.
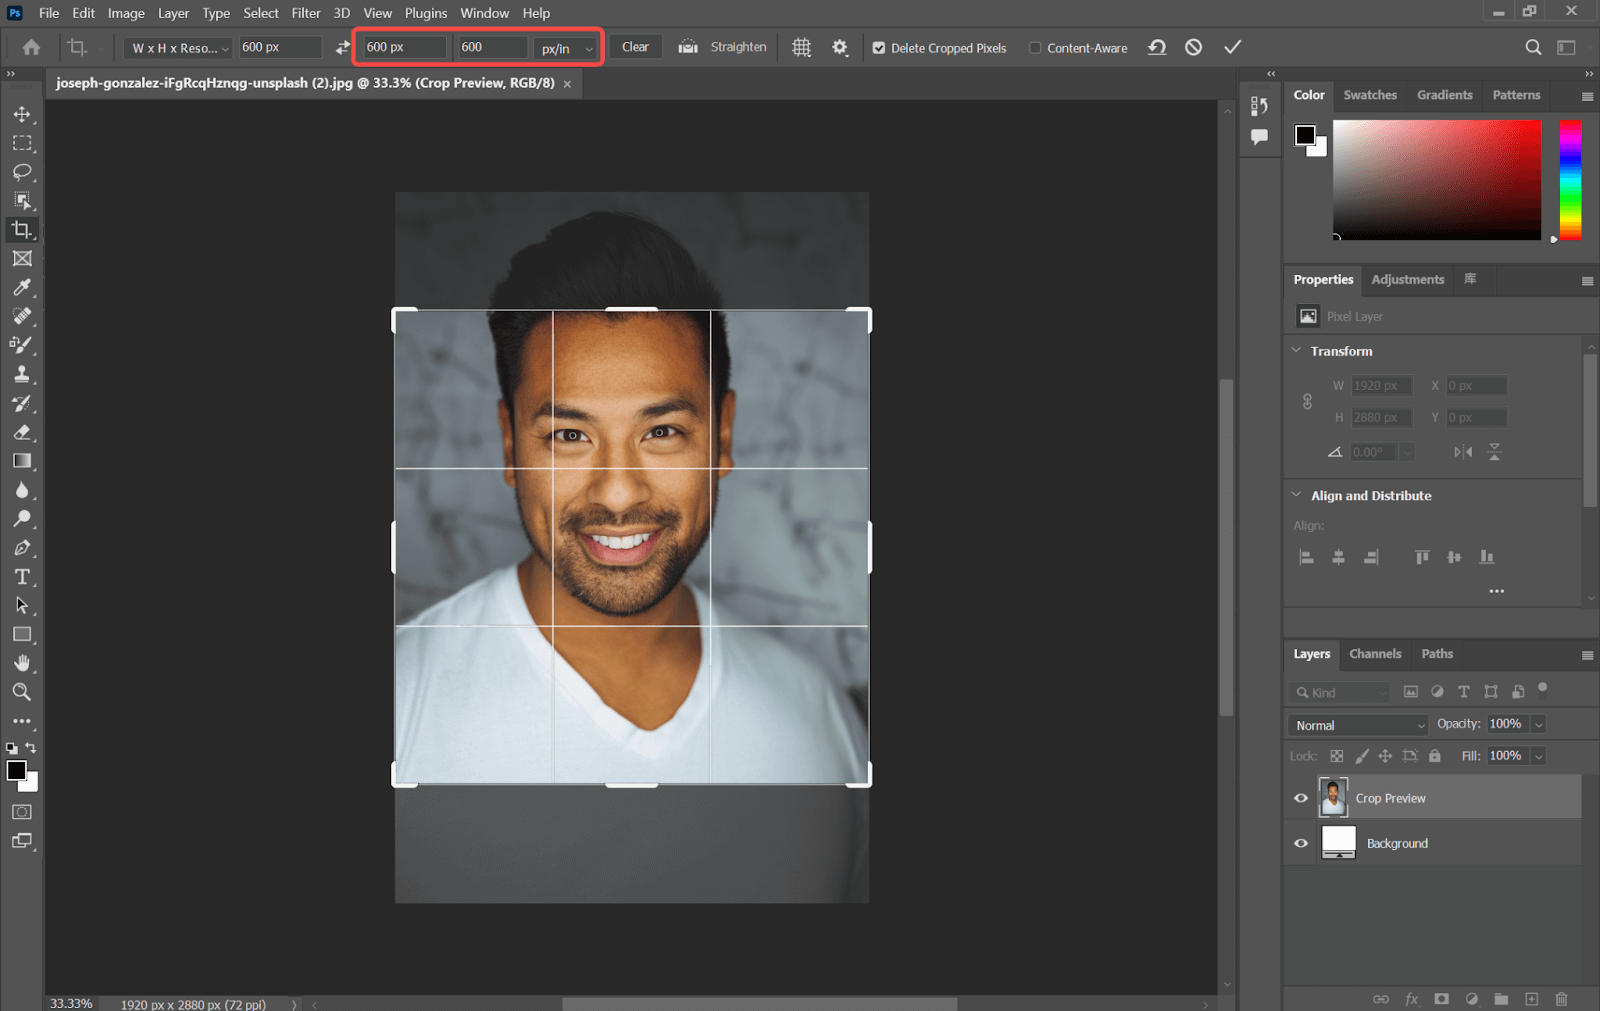
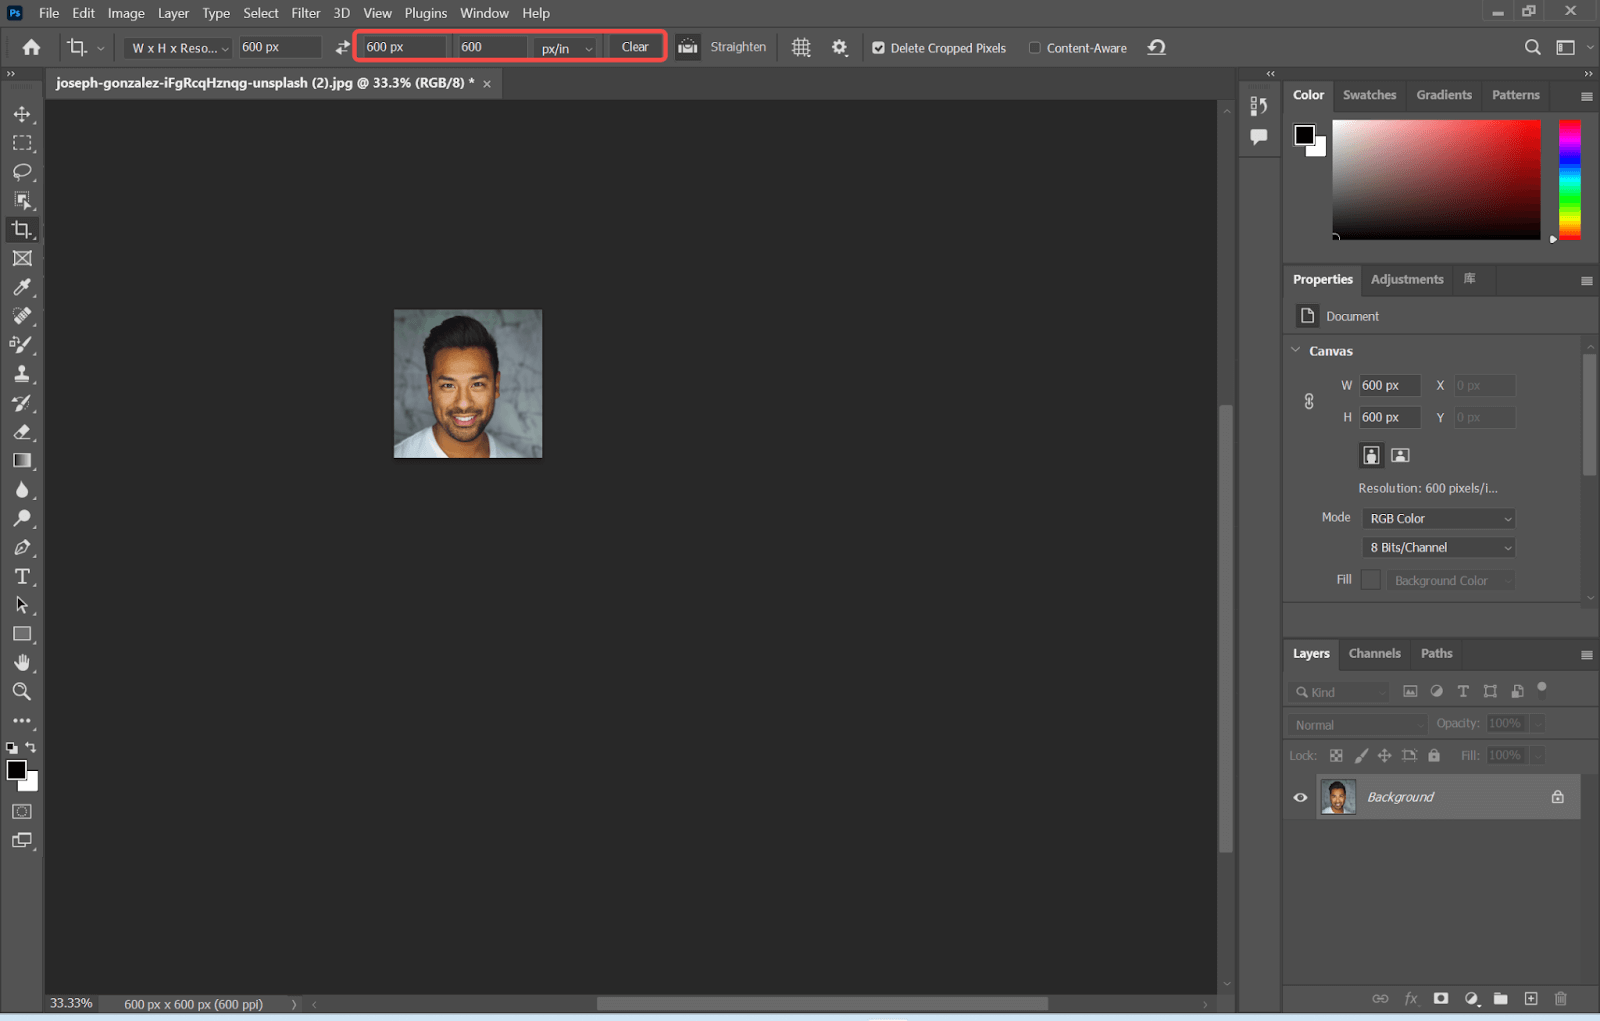
Step 5. After completing the width and height, Drag the box to make the head position more proper. Hit the Enter key. Your photo will be cropped into a 1×1 inch photo at 600 dpi.
How to Make 1×1 Pictures on iPhone
If you are an iPhone user, it is also convenient to edit the photo with your iPhone. You can use your iPhone browser to open the page for Photo 1 x 1-inch Editor by AiPassportPhotos as well and follow the same steps.
What’s more, there are many photo editing apps on the Apple app store. You can download one and use it to edit your photo into a compliant one.
How to Print 1×1 Picture in Word?
After you have edited your photo, you can print it. Here are the steps.
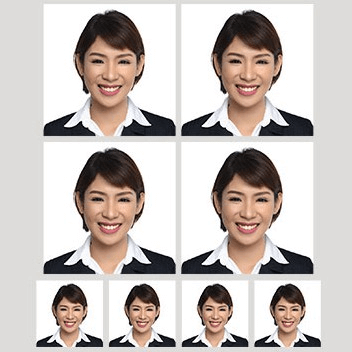
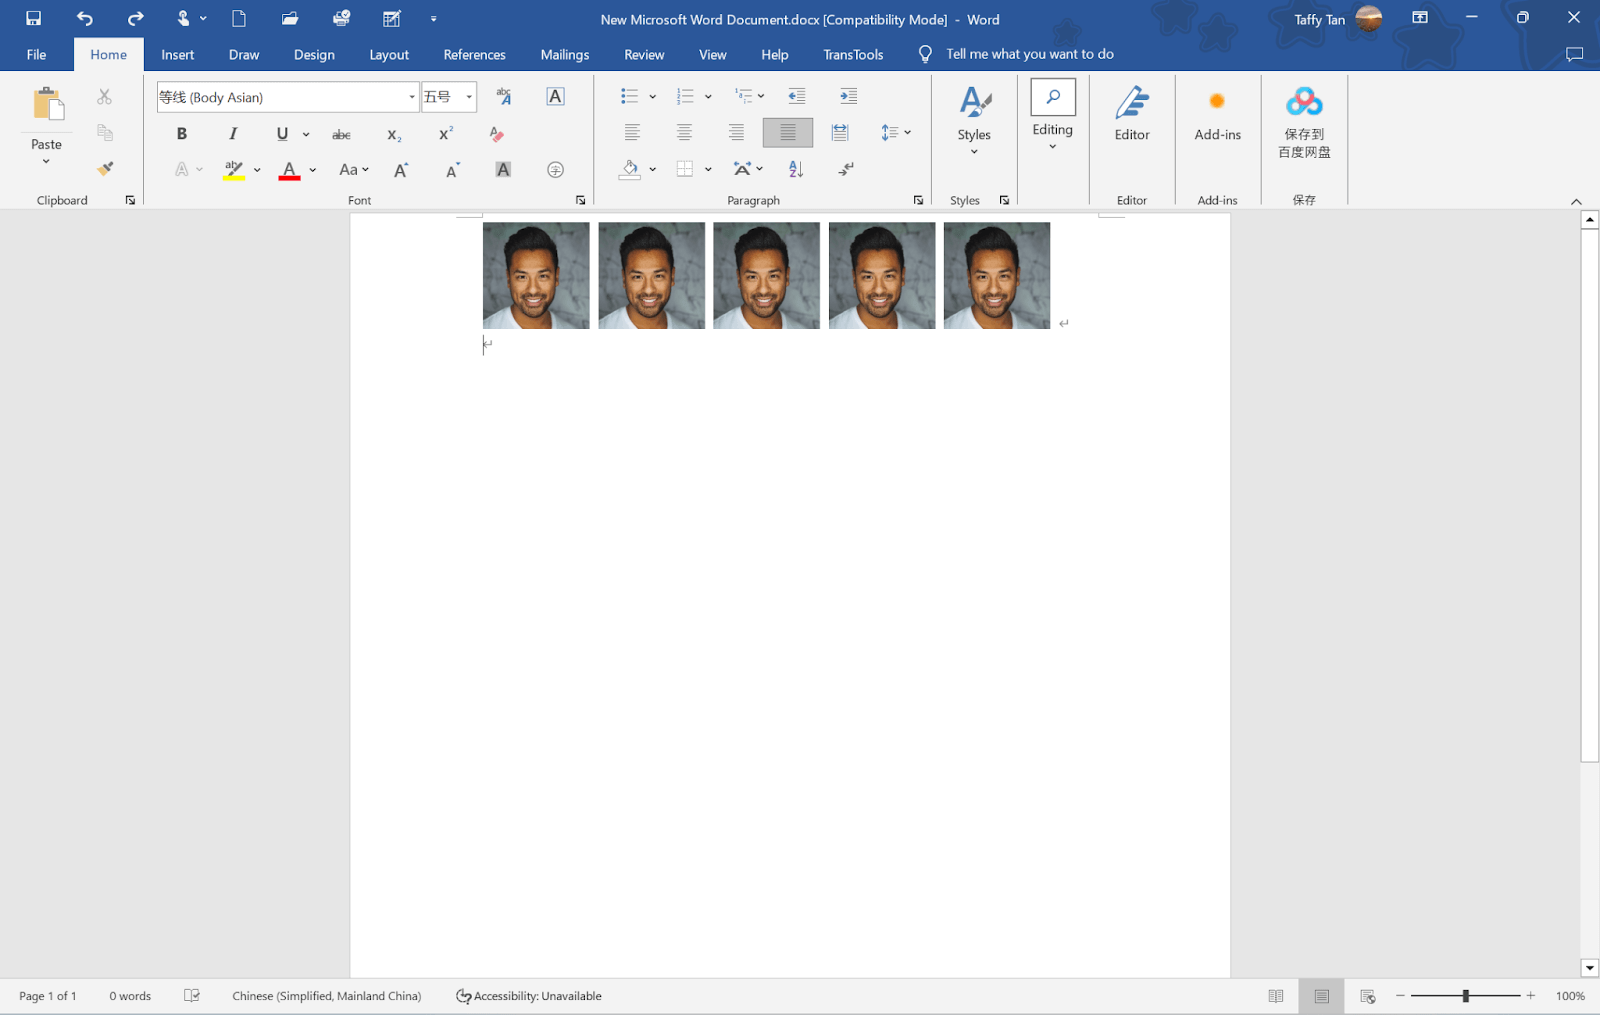
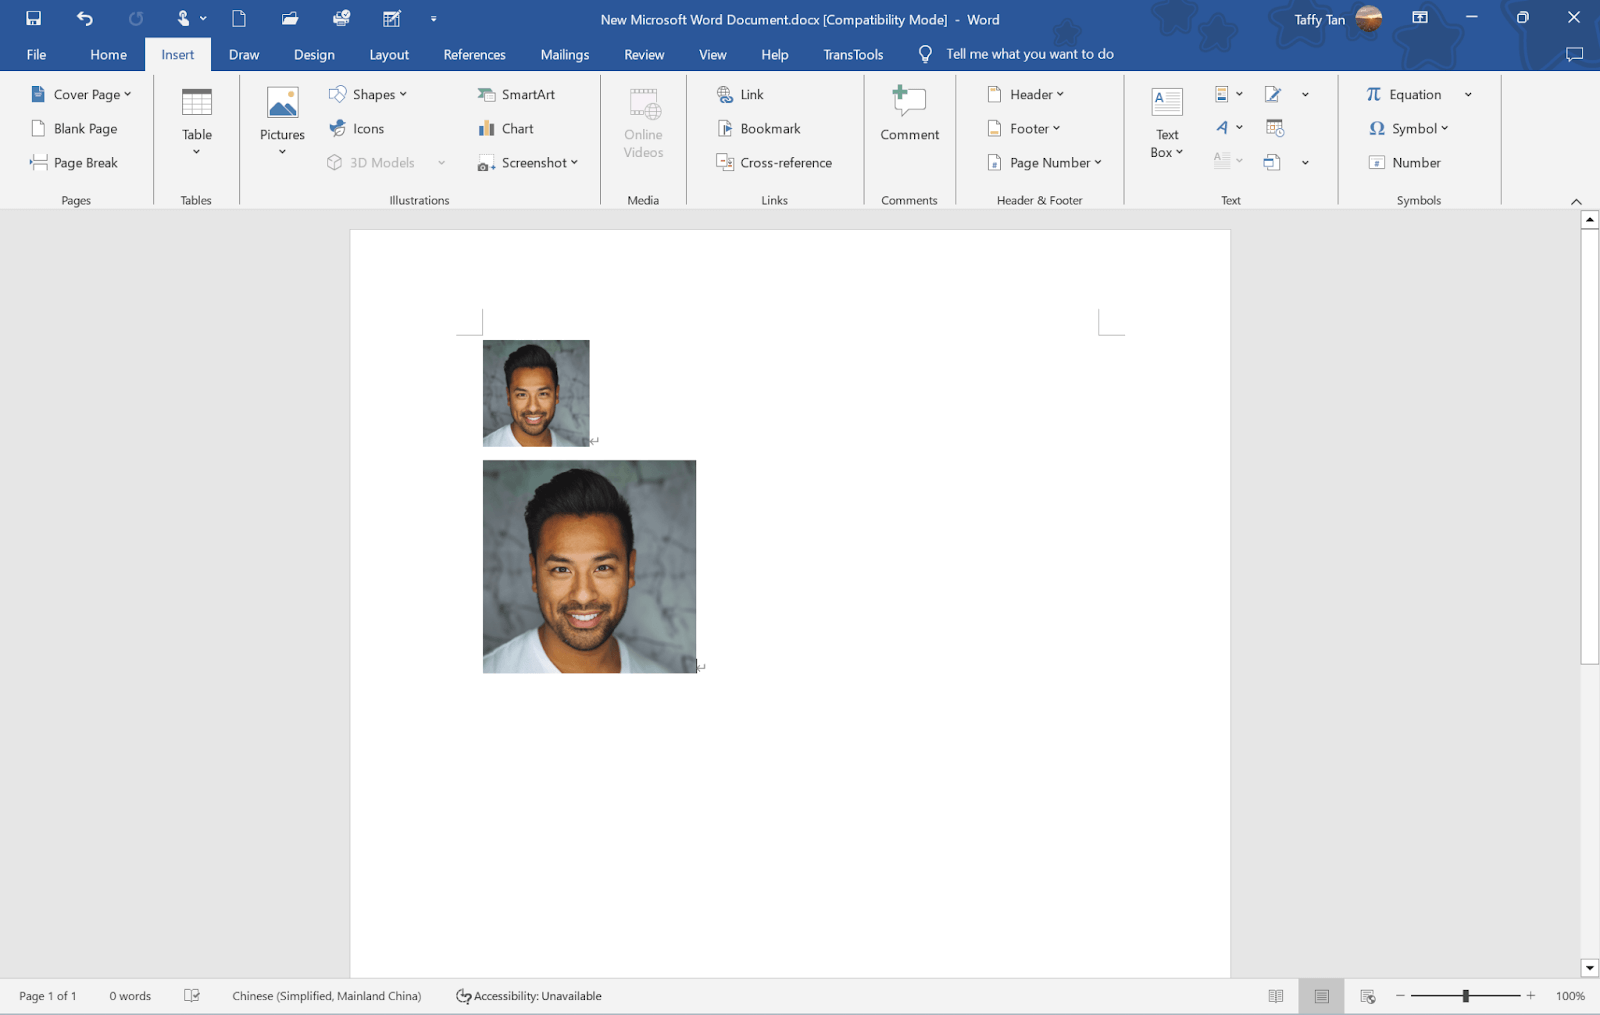
Step 1. Click the photo and press Ctrl+C, put two more spaces after the photo and Ctrl+V to paste the photos in a row.
Step 2. Select the whole row of photos and press Ctrl+C, and press Ctrl+V to paste more rows of photos.
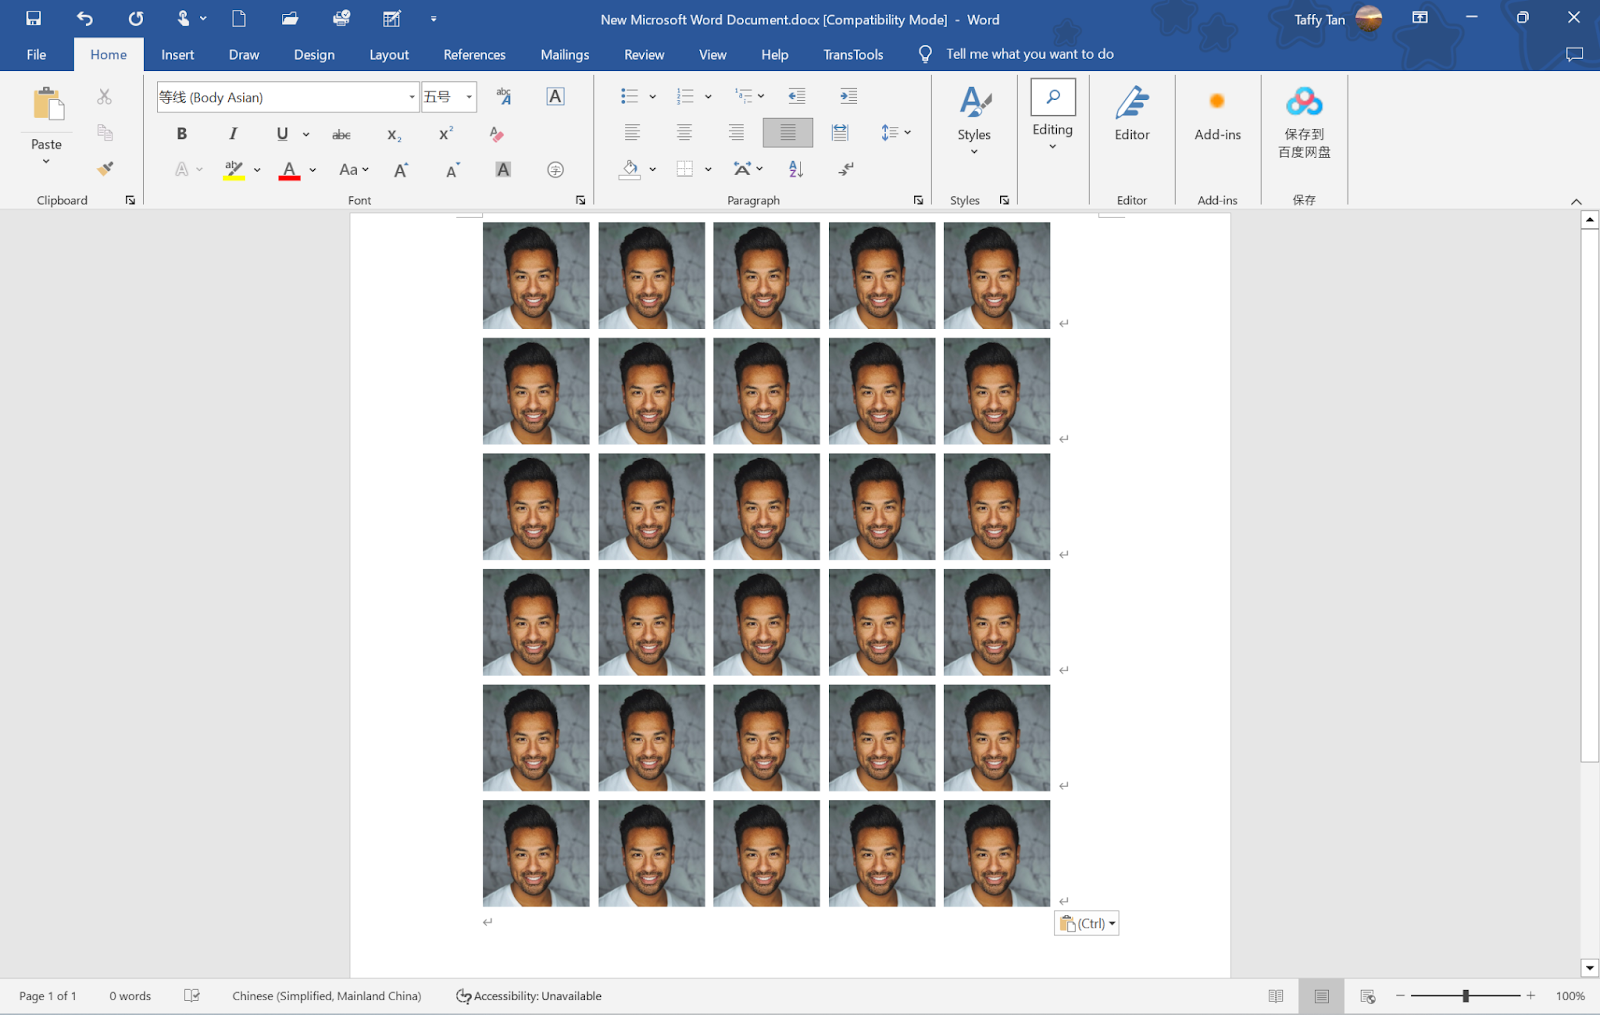
Step 3. Once you are done. You can choose a printer to print your photos.
What to Wear for 1×1 Picture
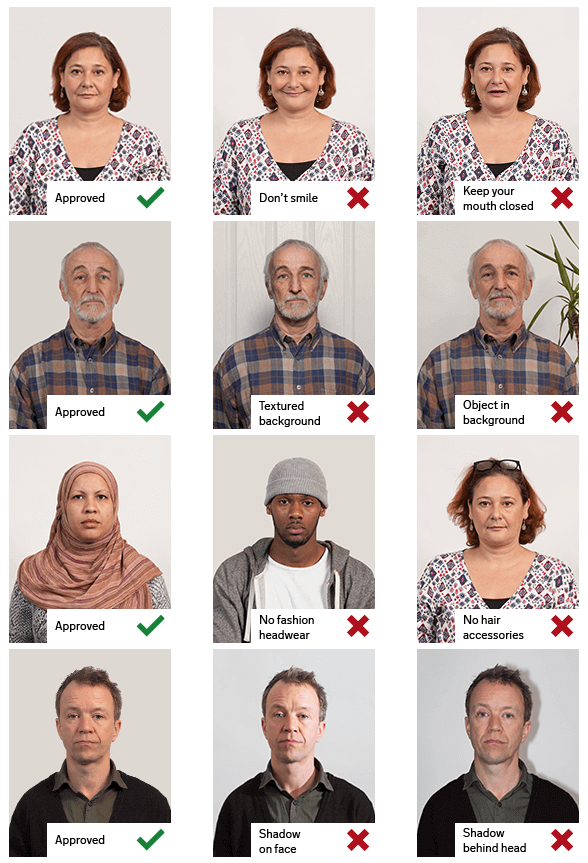
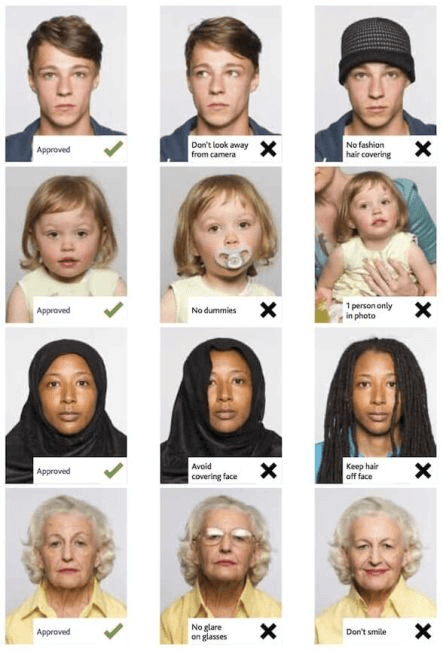
You should wear daily clothes and avoid wearing uniforms, costumes, or bizarre dresses. Due to the white background, it is suggested that you wear dark clothes to form a sharp distinction between your face and the background. The eyes should be visibly seen in the photo, and sunglasses and glasses with tinted lenses are not allowed in any circumstances. If you wear optical glasses, make sure there is no reflection and ensure your eyes are not covered; otherwise, it is suggested that you do not wear them.
1) Male
If you are a soldier, military suits are not allowed, and no face covering with any accessories.
2) Female
Religious headwear is acceptable, but the face cannot be covered.
3) Infants
Only one face in the photo. The adult can hold the baby but cannot show the face and hand in the photo. And the baby cannot hold any toys in the hands. Infants are not required to look at the camera directly but with their eyes open.
How to Take 1×1 Picture Using a Cellphone?
Before you take the photo, you better know the 1×1 inch photo-making tips. Make sure you get the following suggestions:
- Ensure the background is white. If you cannot get a white background it is ok. AiPassportPhotos platform provides a background-changing function.
- Make sure your cell phone has a high resolution.
- Make sure there is sufficient lighting around and keep your hand still to make sure your face is clear in case the face can not be recognized.
- Look directly at the camera and relax.
- Don’t smile, frown, or squint. Keep your face a neutral facial expression.
- For better quality, you can use a tripod, setting in about 1-2 meters, or ask friends to help you and adjust the distance in need.
👉 Sample:
Applications for Philippine 1×1 inch Pictures
1×1 inch can be used in many licenses in the Philippines, such as:
- Philippine driver’s license
- Registered electrical engineer
- Professional electrical engineer
- Registered master electrician
- Professional regulation commission
- Real estate practitioners
- Massage therapy license
- Philippine RUSH ID
- Philippines Certificate of Identity and Registration (CIR card)
📚 Read Also:
How to Get an LTO Student Permit Fast
How to Renew a Philippine Driver’s License
The Ultimate Guide to Postal ID 2024
1×1 inch vs 2×2 inch picture comparison
Apart from the 1×1 inch photo, there is a format of 2×2 inch picture size in 51×51 mm or 5.1 x 5.1 cm that is used for a US visa or the Certificate of Legal Capacity to Contract Marriage (CLCCM) Photo for the Philippines. Compared to 1×1, it has a much larger size and smaller resolution.
| Document Type | Size | Resolution | Used for |
| 1×1 inch | 2.5 x 2.5 cm or 25 x 25 mm | 600 dpi | Most of the license |
| 2×2 inch | 5.1 x 5.1 cm or 51 x 51 mm | 300 dpi | US visa photo/Philippines CLCCM photo |
Here is an intuitive size comparison in pictures visually. The 1×1 inch photo is a quarter of the 2×2 inch photo.
How to convert a 1×1 picture to 2×2?
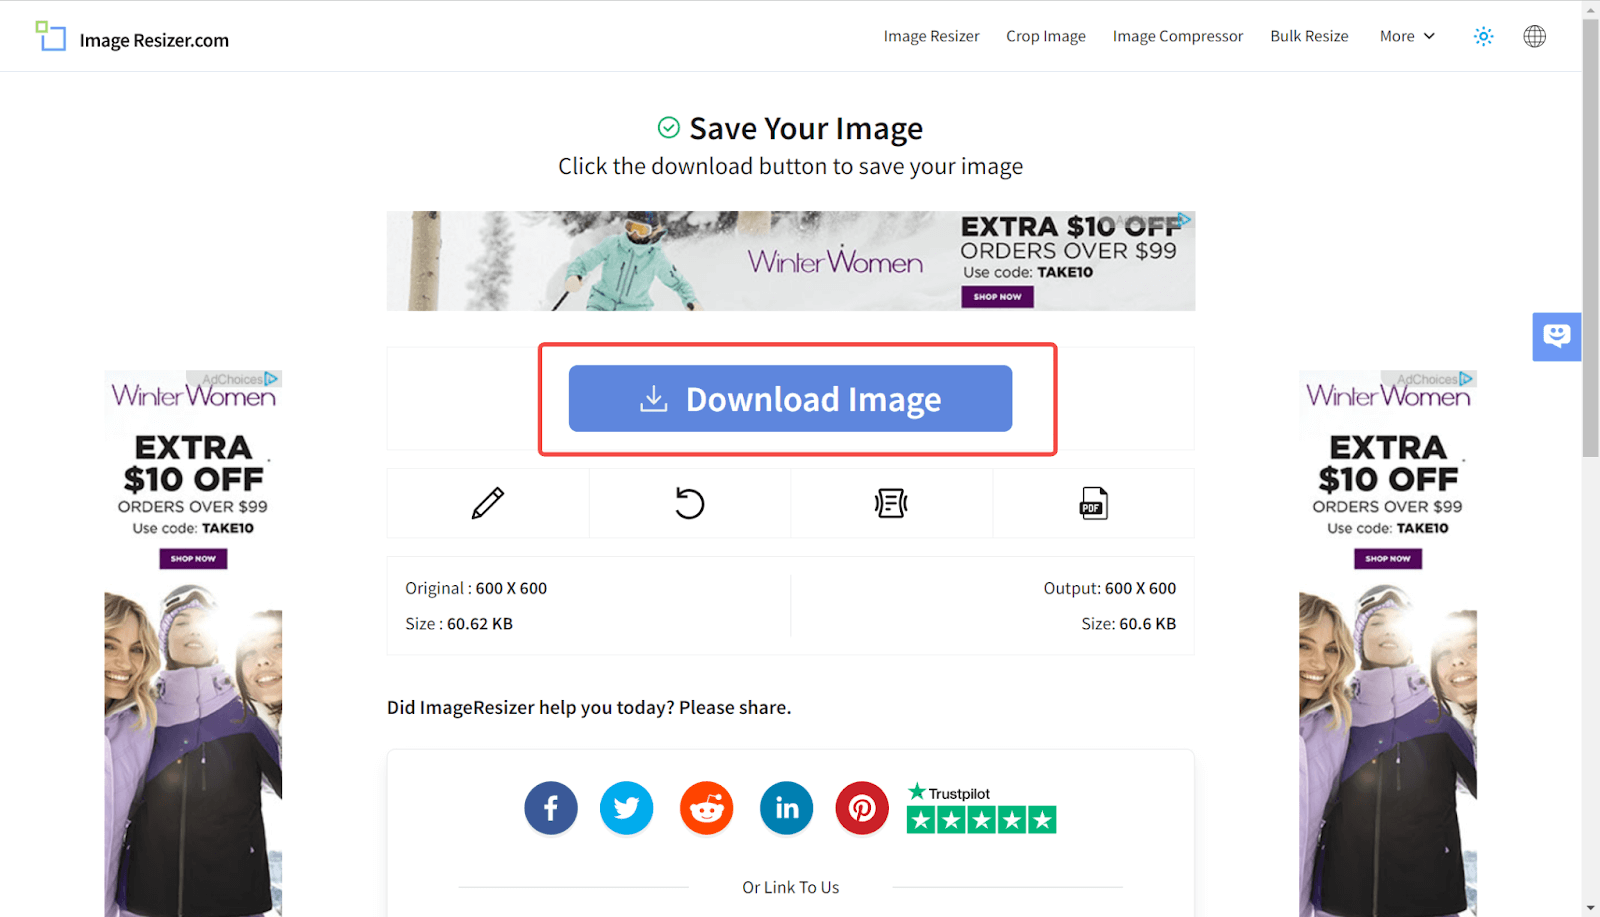
If you want to convert a 1×1 inch picture to 2×2, you can use imageresizer.com.
Step 1. Go to the page.
Step 2. Upload the 1×1 picture you want to convert to 2×2. The DPI of 1×1 should be higher than 2×2 otherwise the picture converted will be less clear.
Step 3. Choose the width and height in inch as both 2 and then select the DPI as 300.
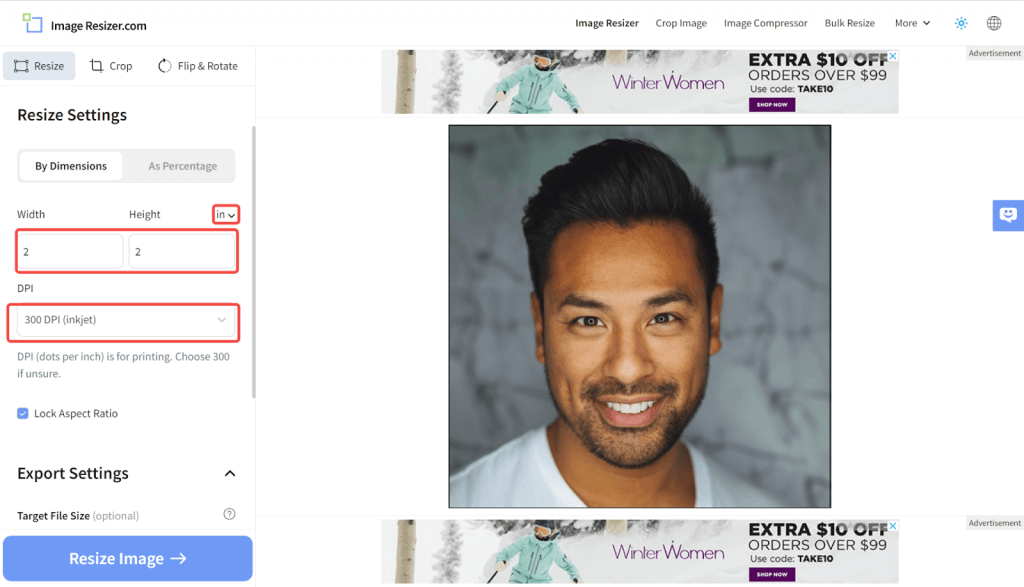
Step 4. Click the resize image button and click to download the photo after processing.
📚 Read Also:
How to Make a 2×2 Picture in Word
Closing Thoughts
Still having headaches with photos for your license application? With this article, we’ve covered five ways to edit your 1×1 photos, and I’m sure you will now learn how to use these tools. With that said, it is suggested that you avoid taking a selfie. It is better not to have a textured background, but it is ok if you cannot meet the requirement. AiPassportPhotos can be helpful in any case.