
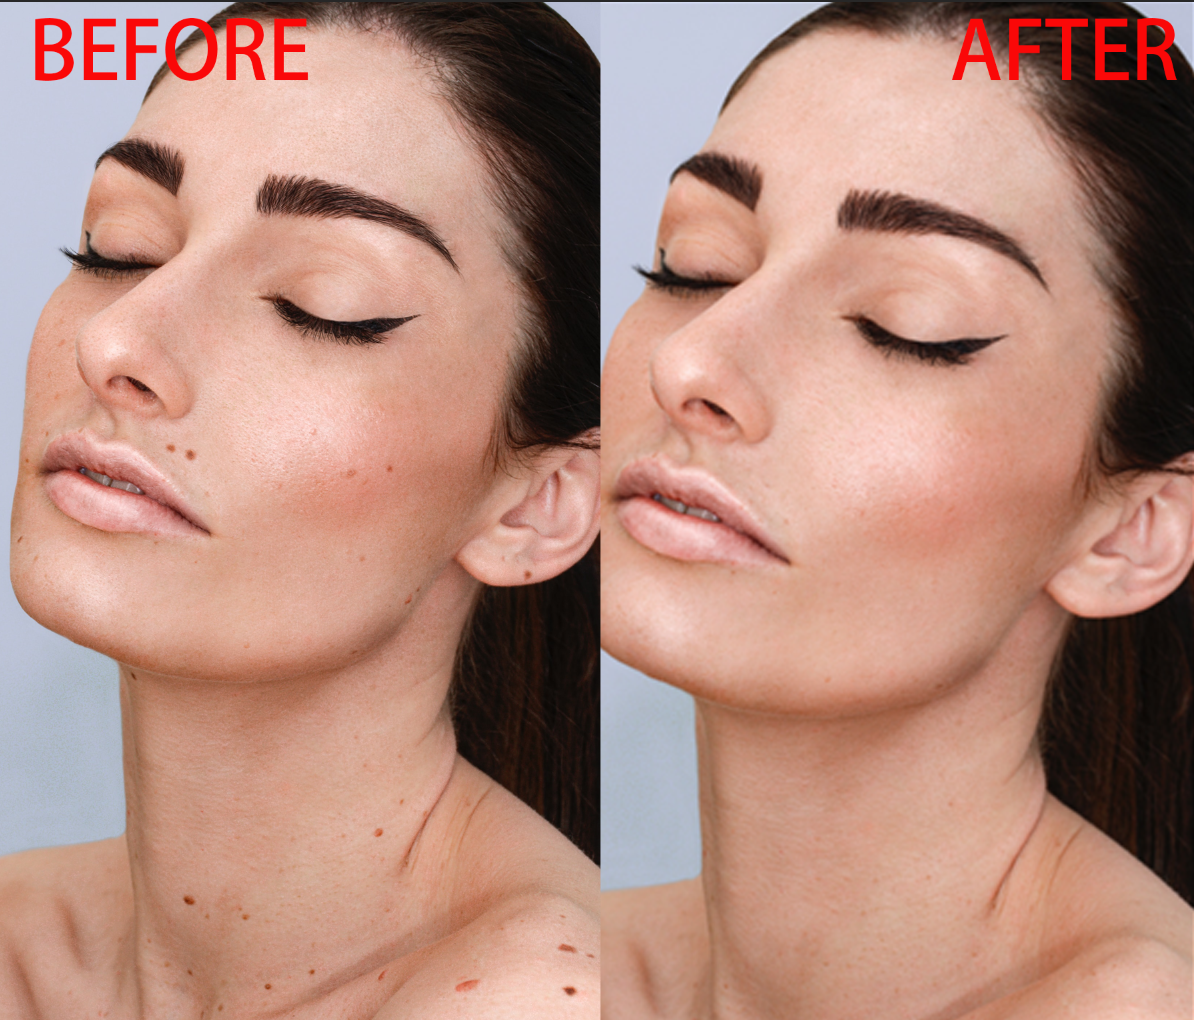
Photography plays an important role in daily life, business promotion, fashion, art exhibitions and so forth. We are used to capturing a snap whenever we see something special or interesting and share it on social media while professional photographers spare no effort to make perfect shots for commercial content. No matter for what purposes, photo quality is of great importance. However, even the best photographer and the best equipment can’t guarantee their works are 100% perfect. Sometimes they have to spend a lot of time dealing with defects such as blemishes, wrinkles, color imbalances, etc. Photo retouching used to be a unique skill for professionals. However, as technology develops, there are more options for even novices. In this passage, we are going to talk about how to remove blemish from photos with some effective techniques and tools.
Quickest & Easiest Blemish Remover: AI Photo Retouching
AI photo retoucher, supported by artificial intelligence techonology, can automatically detect imperfections and remove blemishes. As all operations are run by AI, it is quite user-friendly for those without photo editing basics. Moreover, it usually takes only a few seconds or minutes to process one picture, which is quite efficient for bulky workloads. There are multiple applications available on the market, and we will introduce some popular ones in this section.
AiPassportPhotos
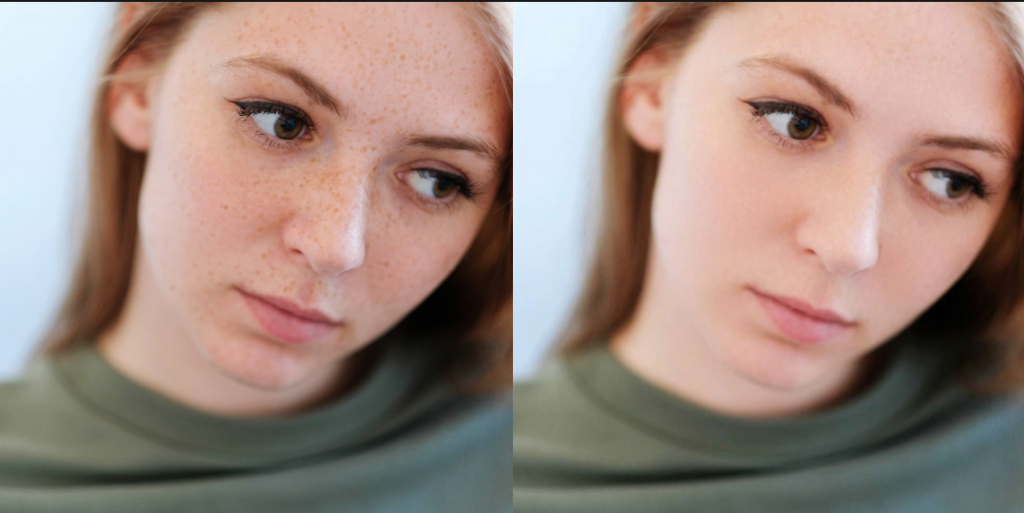
It is an online program compatible with any operating system and device that can be networked. It can not only remove blemishes from photos but also adjust color and enhance exposure. Over-retouching is a common mistake for manual operations, making the photo look unnatural. However, this tool retains the natural beauty and texture while removing acne, wrinkles, or age spots from photos. More importantly, you just need to click the Upload button and it will do the rest for you. Here is how it works.
- Visit AiPassportPhotos Online Retouching. Register on it or log in.
- Click on the “Upload an Image” button and choose a picture from your album or take a shot.
- Wait for a few seconds and then preview the final results.
- Click on the “Get the Photo” and save the post-edited picture.
Fotor
It is also a web-based AI blemish remover that combines manual and automatic retouching. It provides not only basic editing features like cropping, resizing, compressing and cutting out subjects but also advanced functions like enhancing photos, adding filters and special effects. Here are steps to remove blemish.
- Go to the Fotor Editor.
- Insert a photo by clicking on the “Edit” button.
- Choose the “Blemish Fix” tool from the “Beauty” section on the top menu. Put the cursor over the blemish and left-click on it. Fotor will automatically replace the defects with a similar color of the surrounding pixels automatically, thus removing blemishes.
- Repeat the process above untill all blemishes disappear. If you are not satisfied with the results, you can use the “Edit” feature to manually recover it.
- Click on the “Save” button on the top to export the picture.
Professional Manual Blemish Remover
Supposing that you have basic photo editing knowledge or your photo are severely defective, you might need combinations of a variety of tools to repair it. Manual restoration hence would be more recommended.
Adobe Photoshop
Photoshop is favored by photographers, designers, and architects. As a powerful and full-featured graphic design and photo editing tool, it provides a variety of tools to retouch photos. With advanced features like layers, masks, blending, etc., it supports more complex operations. However, you have to manually retouch the photos in Photoshop, you have to be more patient and careful in order to bring out better effects. After installing the desktop application, please follow the steps below to remove blemishes.
- Import a picture by following “File>Open” at the top left corner.
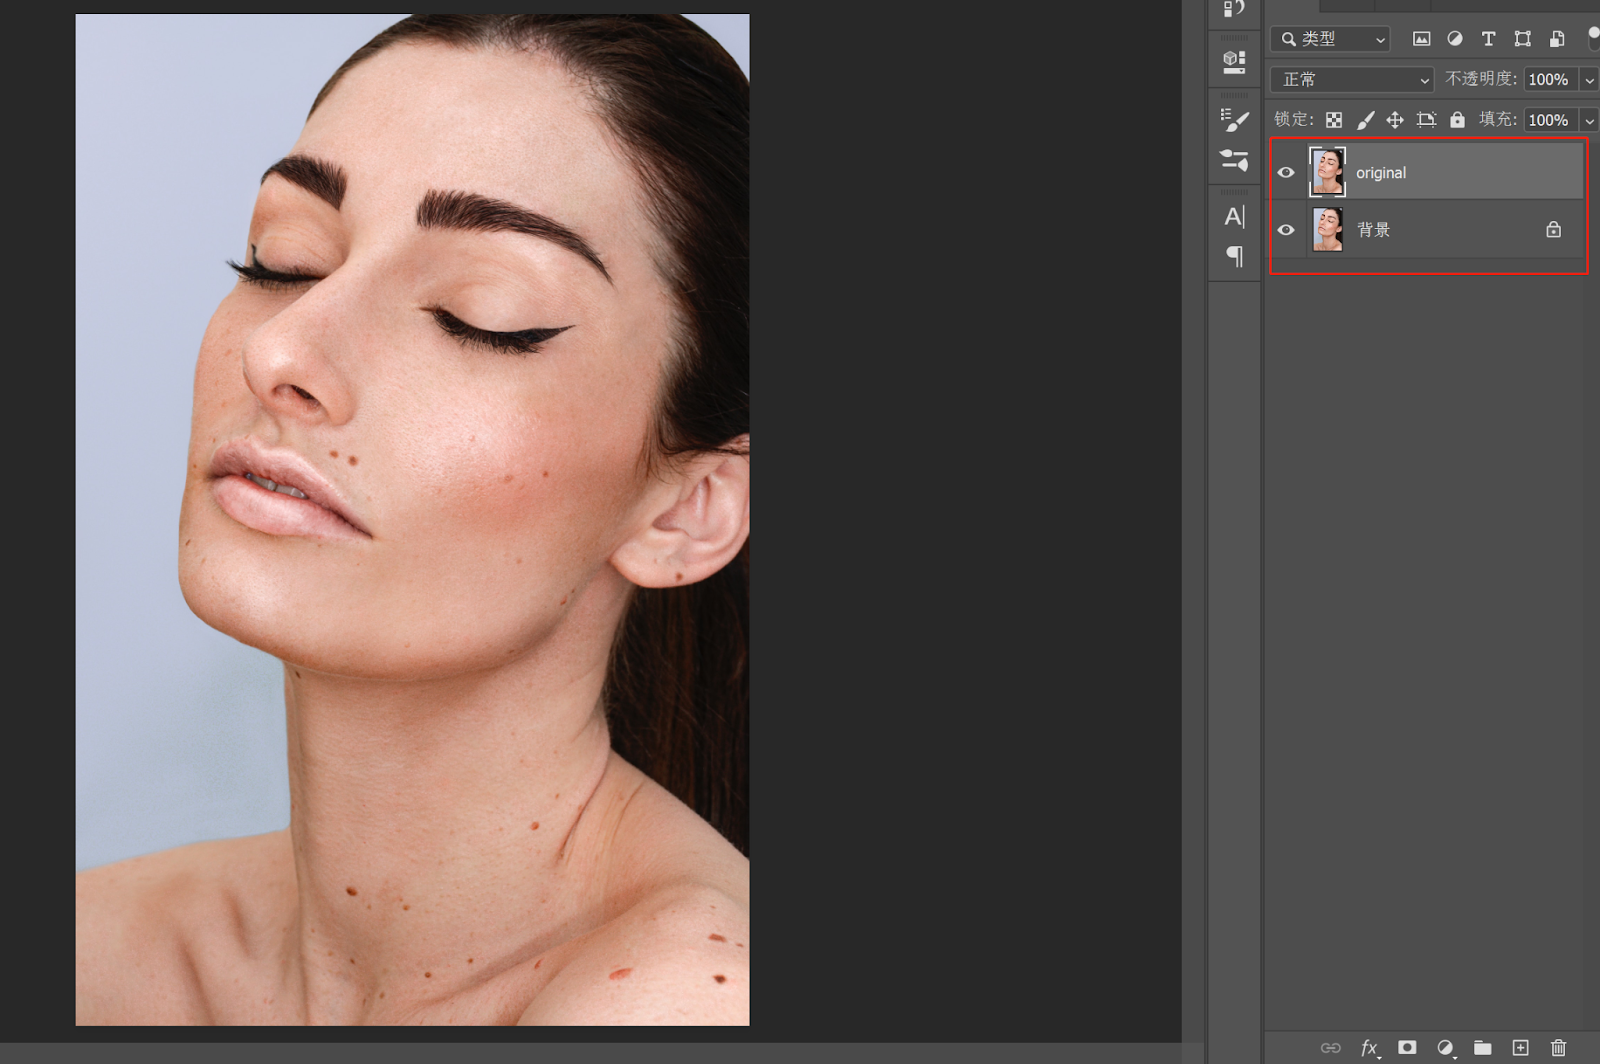
- Duplicate the layer by pressing Ctrl+J on the keyboard and name it “Original”, which is used to separate the following operations from the background layer. In this way, every step you do will overlay without damaging the original image. You will see two layers on the right “Layer” panel.
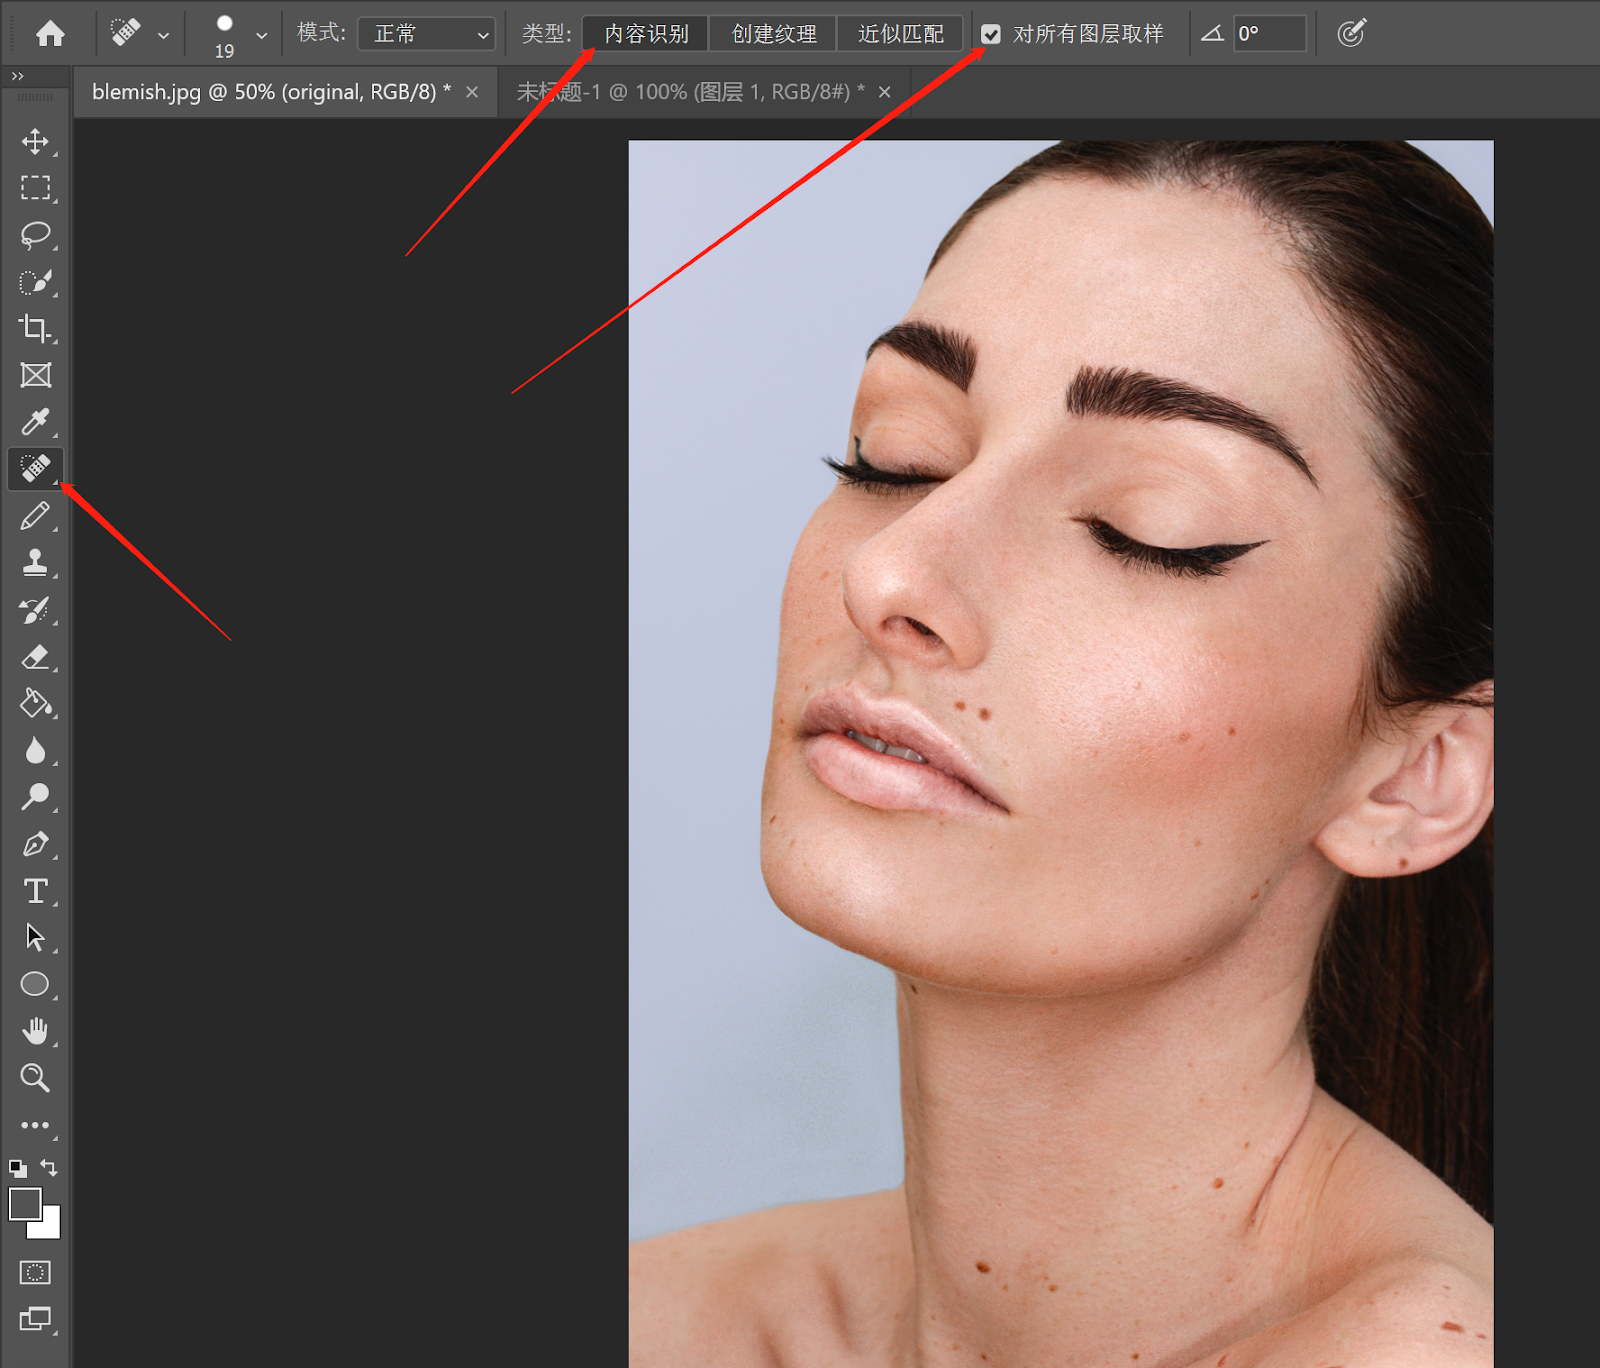
- Choose “Spot Healing Brush” on the left-side toolbar. Then go to the top menu. Check the box in front of “Sample All Layers” and select “Content-Aware”, so Photoshop can intelligently choose a replacement texture for recovering.
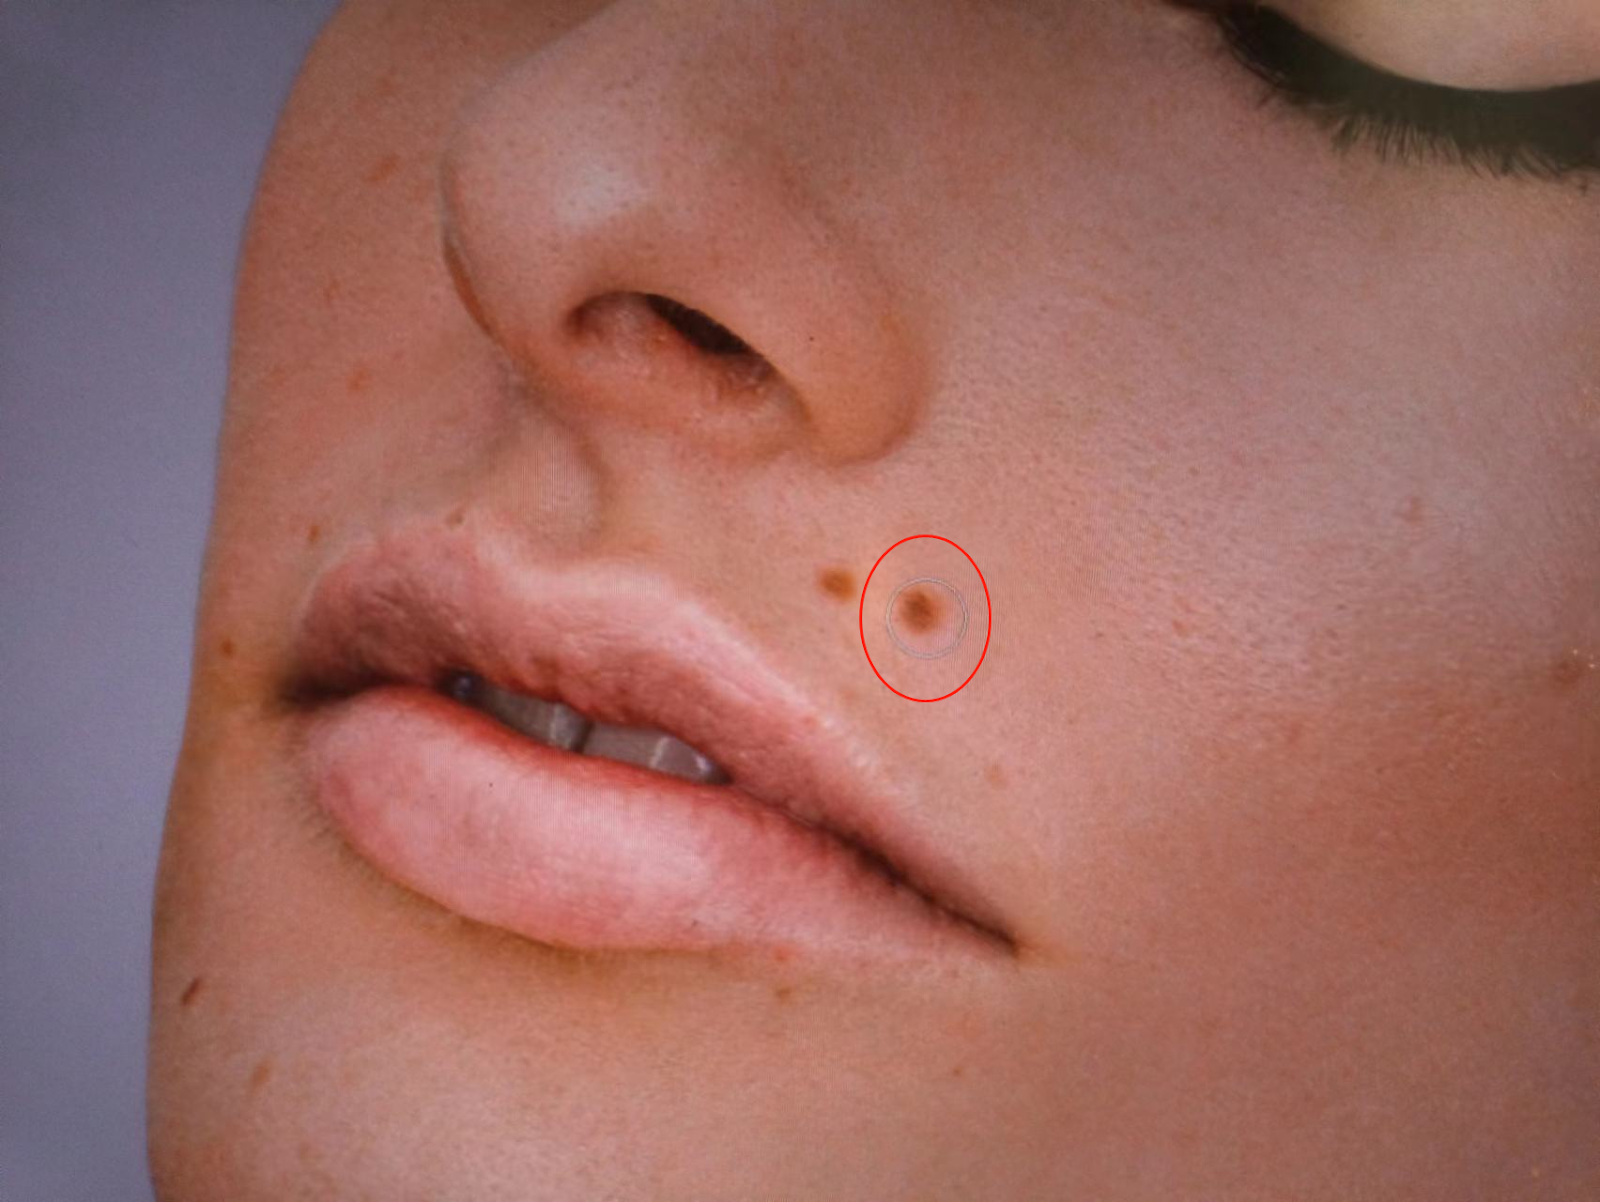
- Locate the blemish and you will see a circle around it. Click on it and the brush will heal it. You can adjust the size of brush tips on the top menu according to the areas that you want to recover. Make the circle a little bigger than the pimples.
Single pimples or small areas of skin problems are easy to resolve. However, for a large area, it is recommended to click and drag the Spot Healing Brush in short strokes to cover until the imperfections disappear gradually. Don’t use extra large brush size in case of mistakenly select non-defective areas. Never expect a single click can solve all problems. Sometimes you need to repeat this step several times to get the best result.
- After removing all blemishes, click the “File>Save as” to save the post-edited picture.
Free Blemish Remover: GMIP
GIMP, short for GNU Image Manipulation Program, is an open-source photo editing tool. It is compatible with Mac, PC, and Linux, and remains updating. If you find it too expensive to subscribe to Photoshop, this would be a preferable alternative.
To remove blemishes, please do as follows:
- Upload a picture by following “File>Open” at the top left corner.
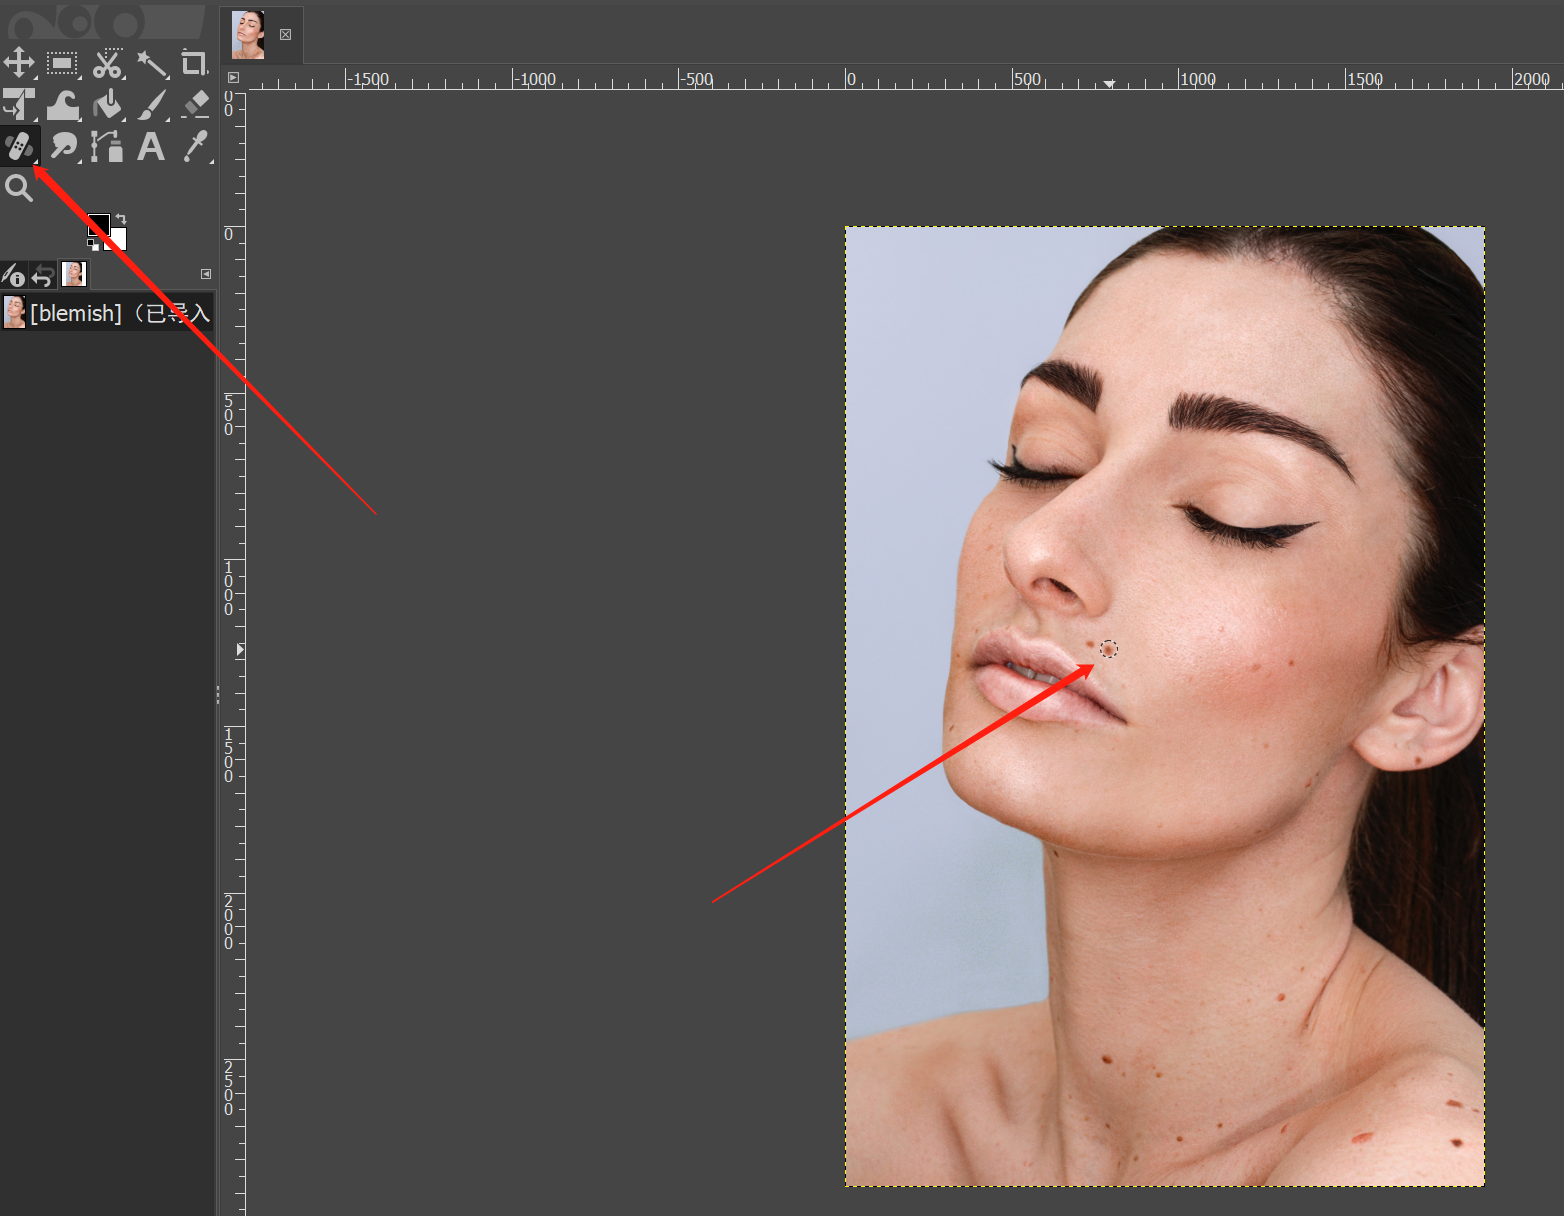
- Select the “Healing Tool” on the left-side toolbar.
- Put the cursor over the blemish and click, just as what you do in Photoshop.
- Repeat the same operations until you get a satisfactory picture.
- Click on “File>Save as” export the photo.
AI Blemish Remover VS Blemish Removers
These are different types of blemish removing tools. An AI blemish remover usually run automatically, which saves more time and energy. The auto-features make Through self-learning ability and preset algorithms, can analyze the picture, locate imperfections, and remove or conceal them. Some combine multiple functions in one tool. For example, AiPassportPhotos is an integration for photo retouching, photo enhancing, repairing, color correction, etc.
Traditional tools require manual operation. The good news is that you have precise control over the repairing effects. It is up to you to decide what to remove and remain, which tools to choose and how to adjust settings. Most of them can do more than remove blemishes, which is quite helpful in commercial and complicated fields.
Summary
After reading this passage, you will find it simple to remove blemishes and retouch photos whether as a professional photographer or a fan of photography. We can say that AI blemish remover is more convenient while manual ones are more professional. Which one you choose depends on your real needs, basic knowledge and workload. You can also combine both of them. Use AI tool to fast process flawed photos first, and then use Photoshop or GMIP to further improve if it remains to be perfected.